


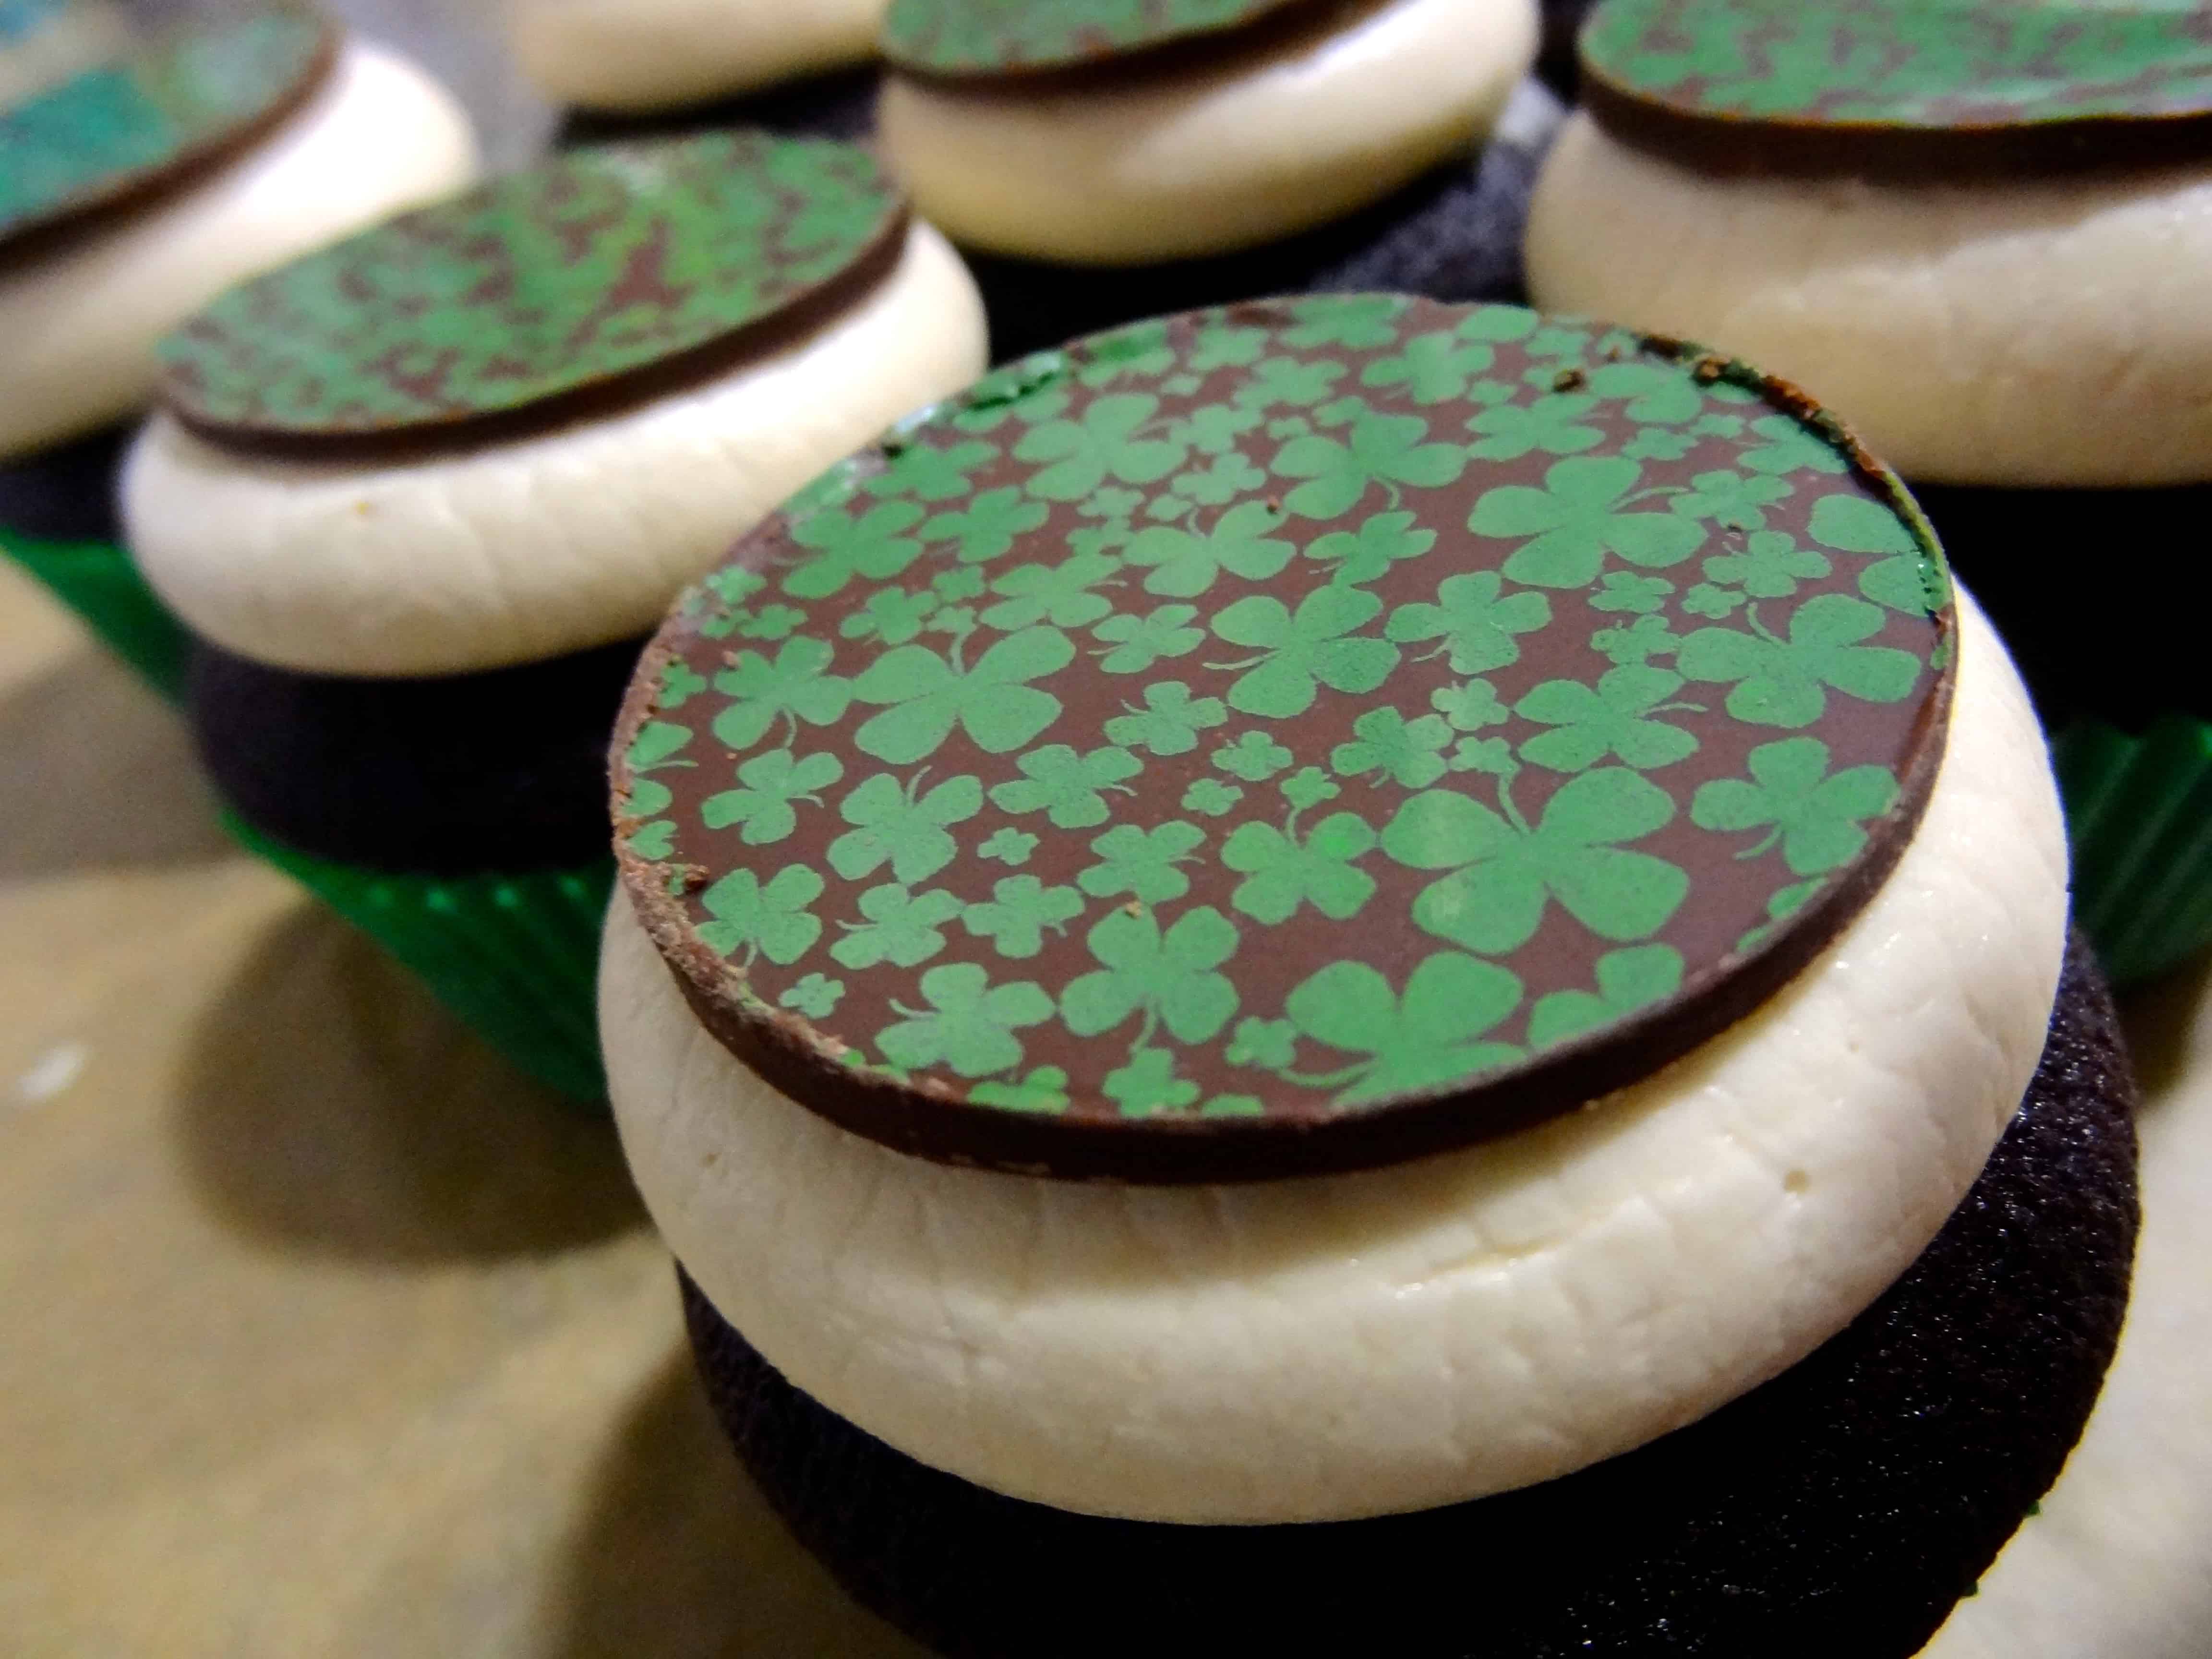
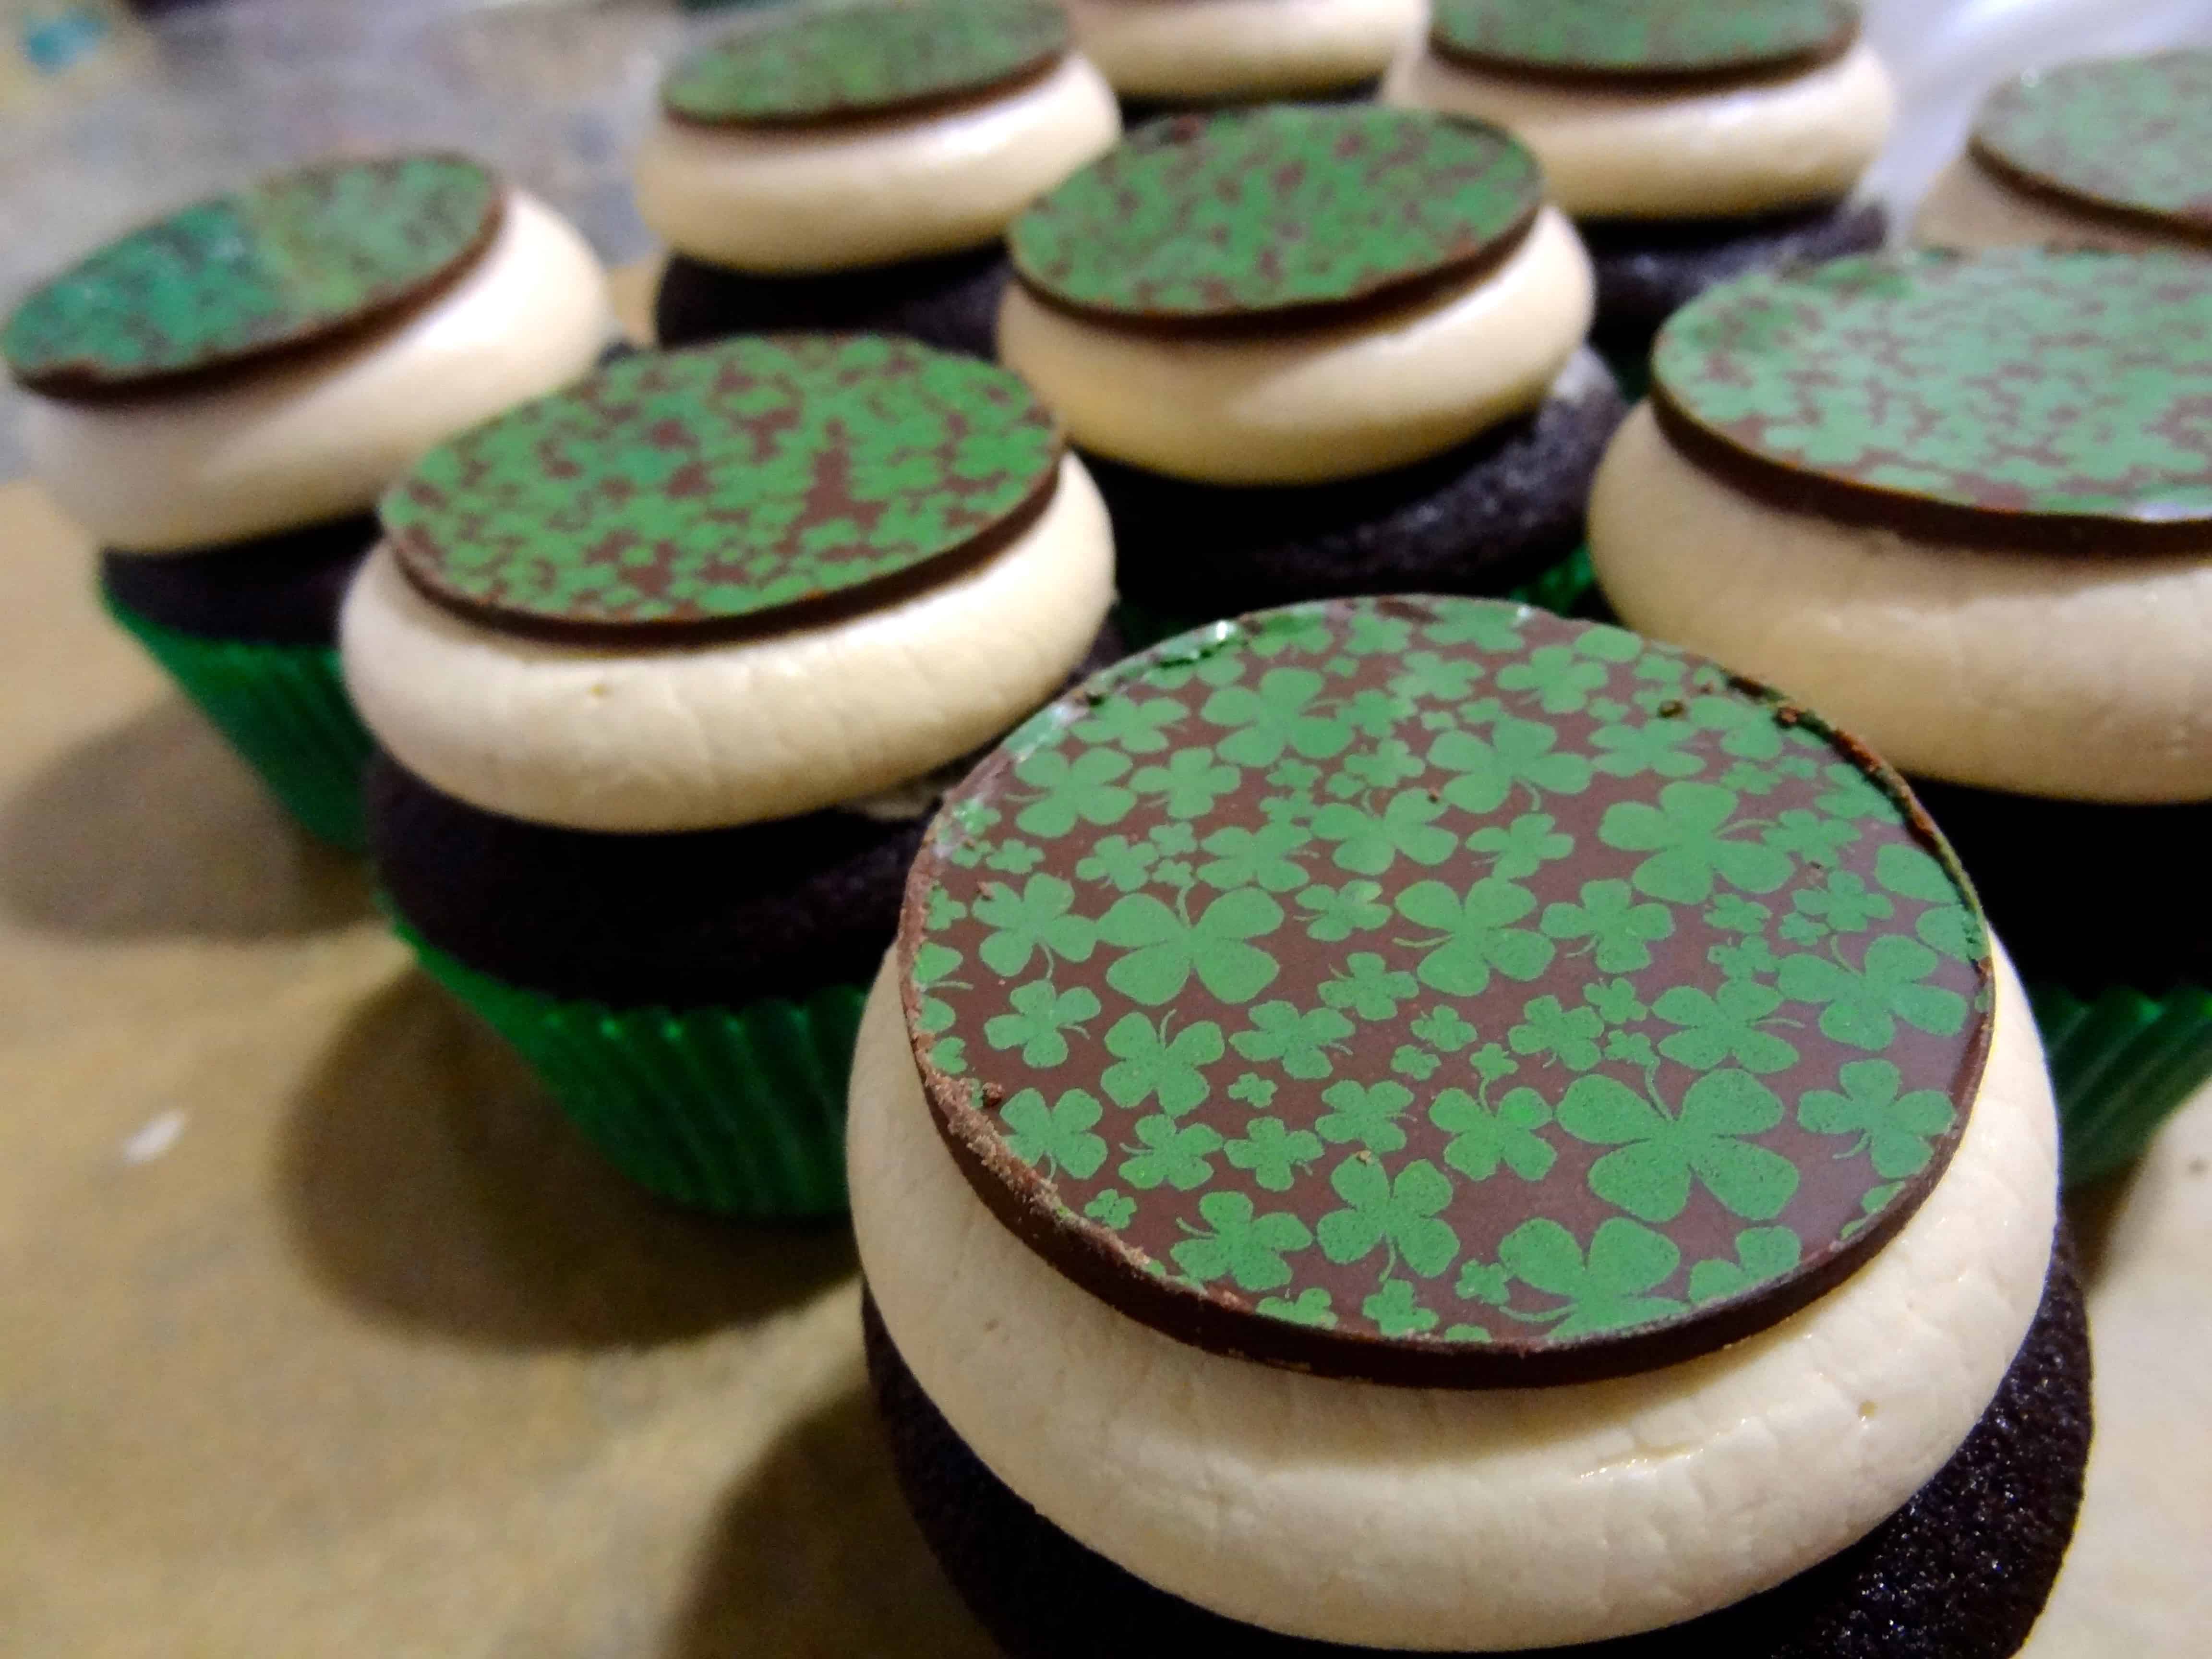
I am forever searching for new ideas to decorate cupcakes. Some may say, a little obsessively. (Don’t judge.) I saw this idea in the Butch Bakery cookbook, which is *highly* underrated, by the way– every recipe I’ve made from that book has been awesome. This is a New York City delivery-based bakery that makes “cupcakes for dudes”; in other words, no pink frosting swirls or frilly decorations to be found here! Most of their flavors incorporate some kind of booze or bacon (or booze and bacon), and most of them are topped with printed chocolate disks like these. I thought this was a fabulous and unique way to top a cupcake, and I’ve been meaning to try them forever. Then, when searching for some cool St. Patrick’s Day decorating ideas on my favorite baking supply websites, I came upon a *shamrock* chocolate transfer sheet, and the design came together in my head immediately– it was time to try my hand at making Irish-themed chocolate disks, which would be perfect on top of my Chocolate Irish Cream Cupcakes!
Now, the book gives instructions for how to make plain chocolate disks, but they claim that getting the design onto the chocolate is pretty complicated and difficult, and there are no instructions; perhaps they assume their audience wouldn’t be willing to take on a slightly advanced baking challenge. As soon as I saw them, I guessed that their cool decorations were achieved using chocolate transfer sheets, which seem a bit intimidating, but they are actually very easy to use.
Ever seen those gorgeous artisan chocolates with colorful, intricate designs that practically look painted on? Yup, those designs are often created using chocolate transfer sheets. I first learned about them in a chocolate tempering/truffle-making class at Baking Arts in San Francisco a few years back. The technique was so cool that I immediately ordered myself a half-dozen transfer sheets… and they’ve been waiting patiently to be used ever since! I never ended up making homemade truffles, but I’ve been itching to use the transfer sheets (they apparently keep indefinitely), and this project was the impetus that I needed.
Chocolate transfer sheets can be ordered from various online baking supply vendors. I ordered mine from Fancy Flours, which has a nice variety of designs, colors, and themes. You can use a “background” of dark or white chocolate, or colored candy coating (such as Wilton Candy Melts, readily available at craft stores), and some designs will show up better than others, depending on the darkness of the background. The graphics are made of cocoa butter and powdered food coloring, which are embossed onto a large rectangular sheet of clear acetate. The design is transferred onto the surface of your chocolate as follows:
- Lay the sheet onto warm, melted chocolate spread on a baking sheet
- Wait for the chocolate to cool and firm up
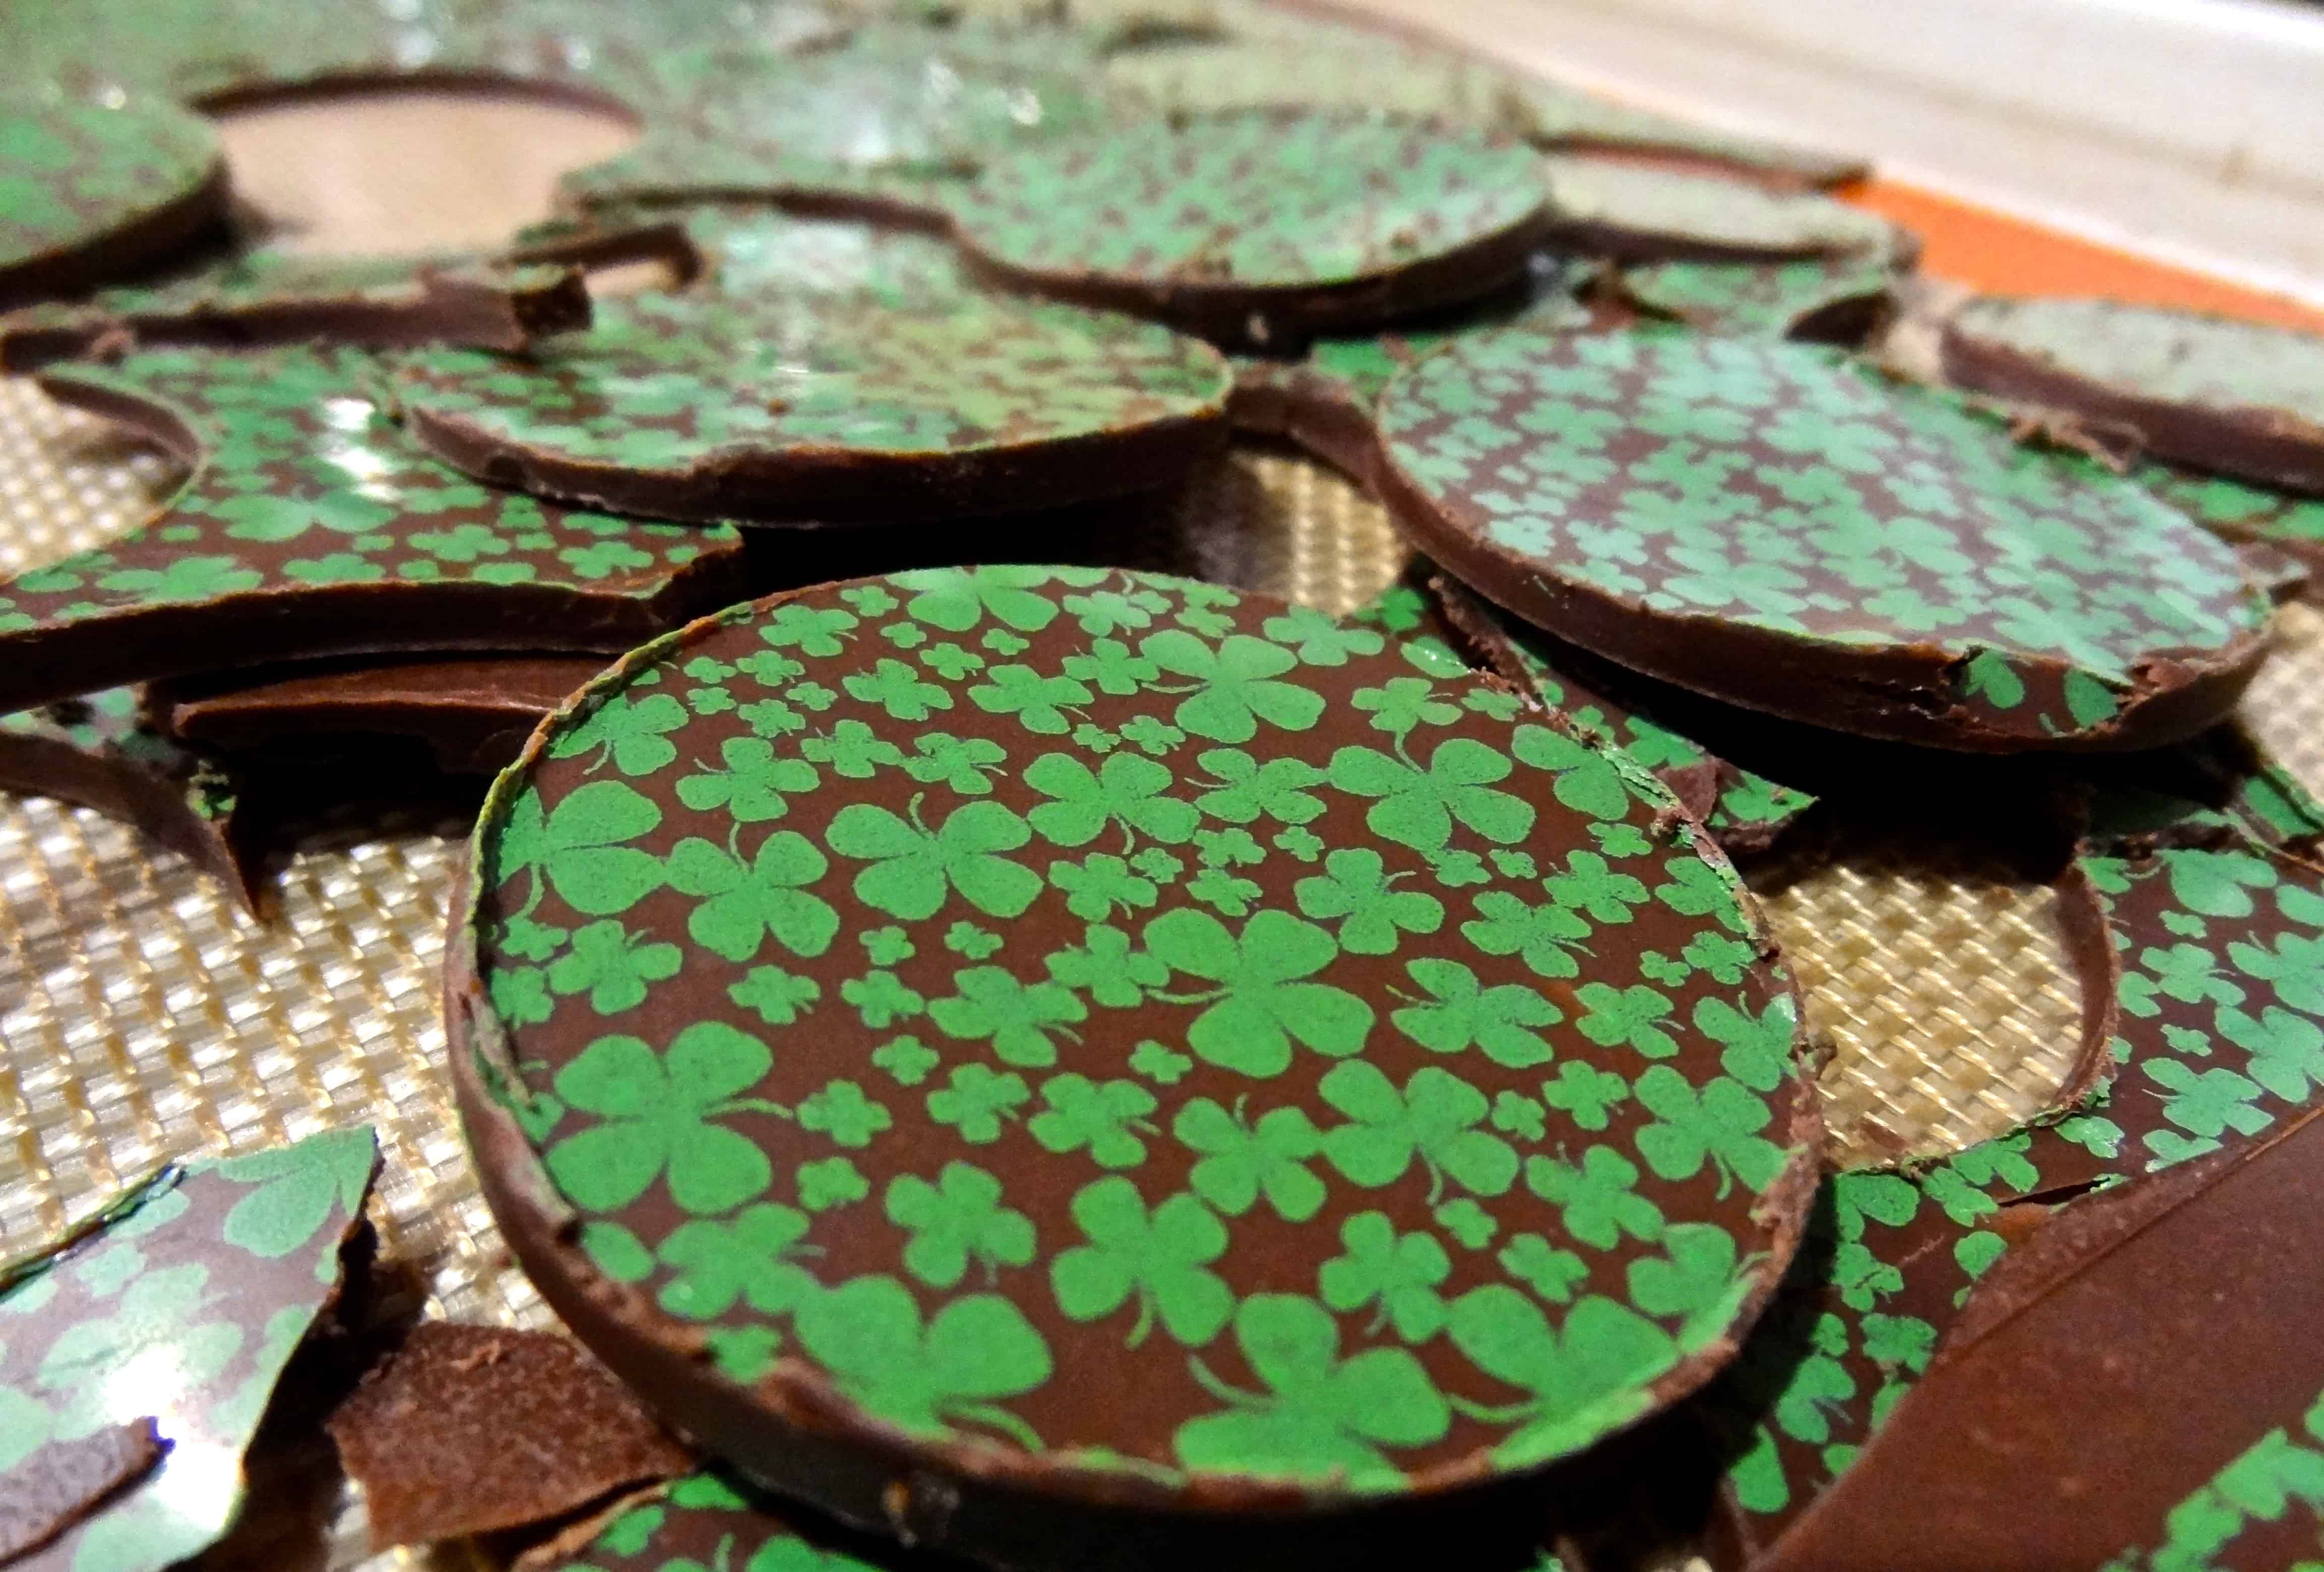
- Pull away the acetate sheet, leaving behind the design
And you’re done– it really is that easy. It takes a bit of practice to know exactly when the sheet is ready to be removed and when the chocolate is ready to be cut into decorative shapes, so I would recommend practicing with inexpensive candy coating before using ¾ pound of expensive chocolate on mistakes! The possibilities are endless with these– you can not only choose from tons of printed transfer designs, but also consider using cutters of different shapes and sizes to create all sorts of awesome custom cupcake toppers. 🙂
Chocolate Disks
Inspired by Butch Bakery
Makes approximately 20-50 disks (depending on size of cutter)
You can use either real chocolate or chocolate candy coating to make these decorative disks. Using real chocolate will naturally yield better-tasting disks, though candy coating will achieve the same visual results. You can use any chocolate transfer sheets that you wish, making this a very versatile way to decorate cupcakes for any occasion.
- 12 ounces good-quality tempered chocolate (dark, milk, or white), chopped, or candy coating disks (chocolate, white, or color)
- 1 chocolate transfer sheet
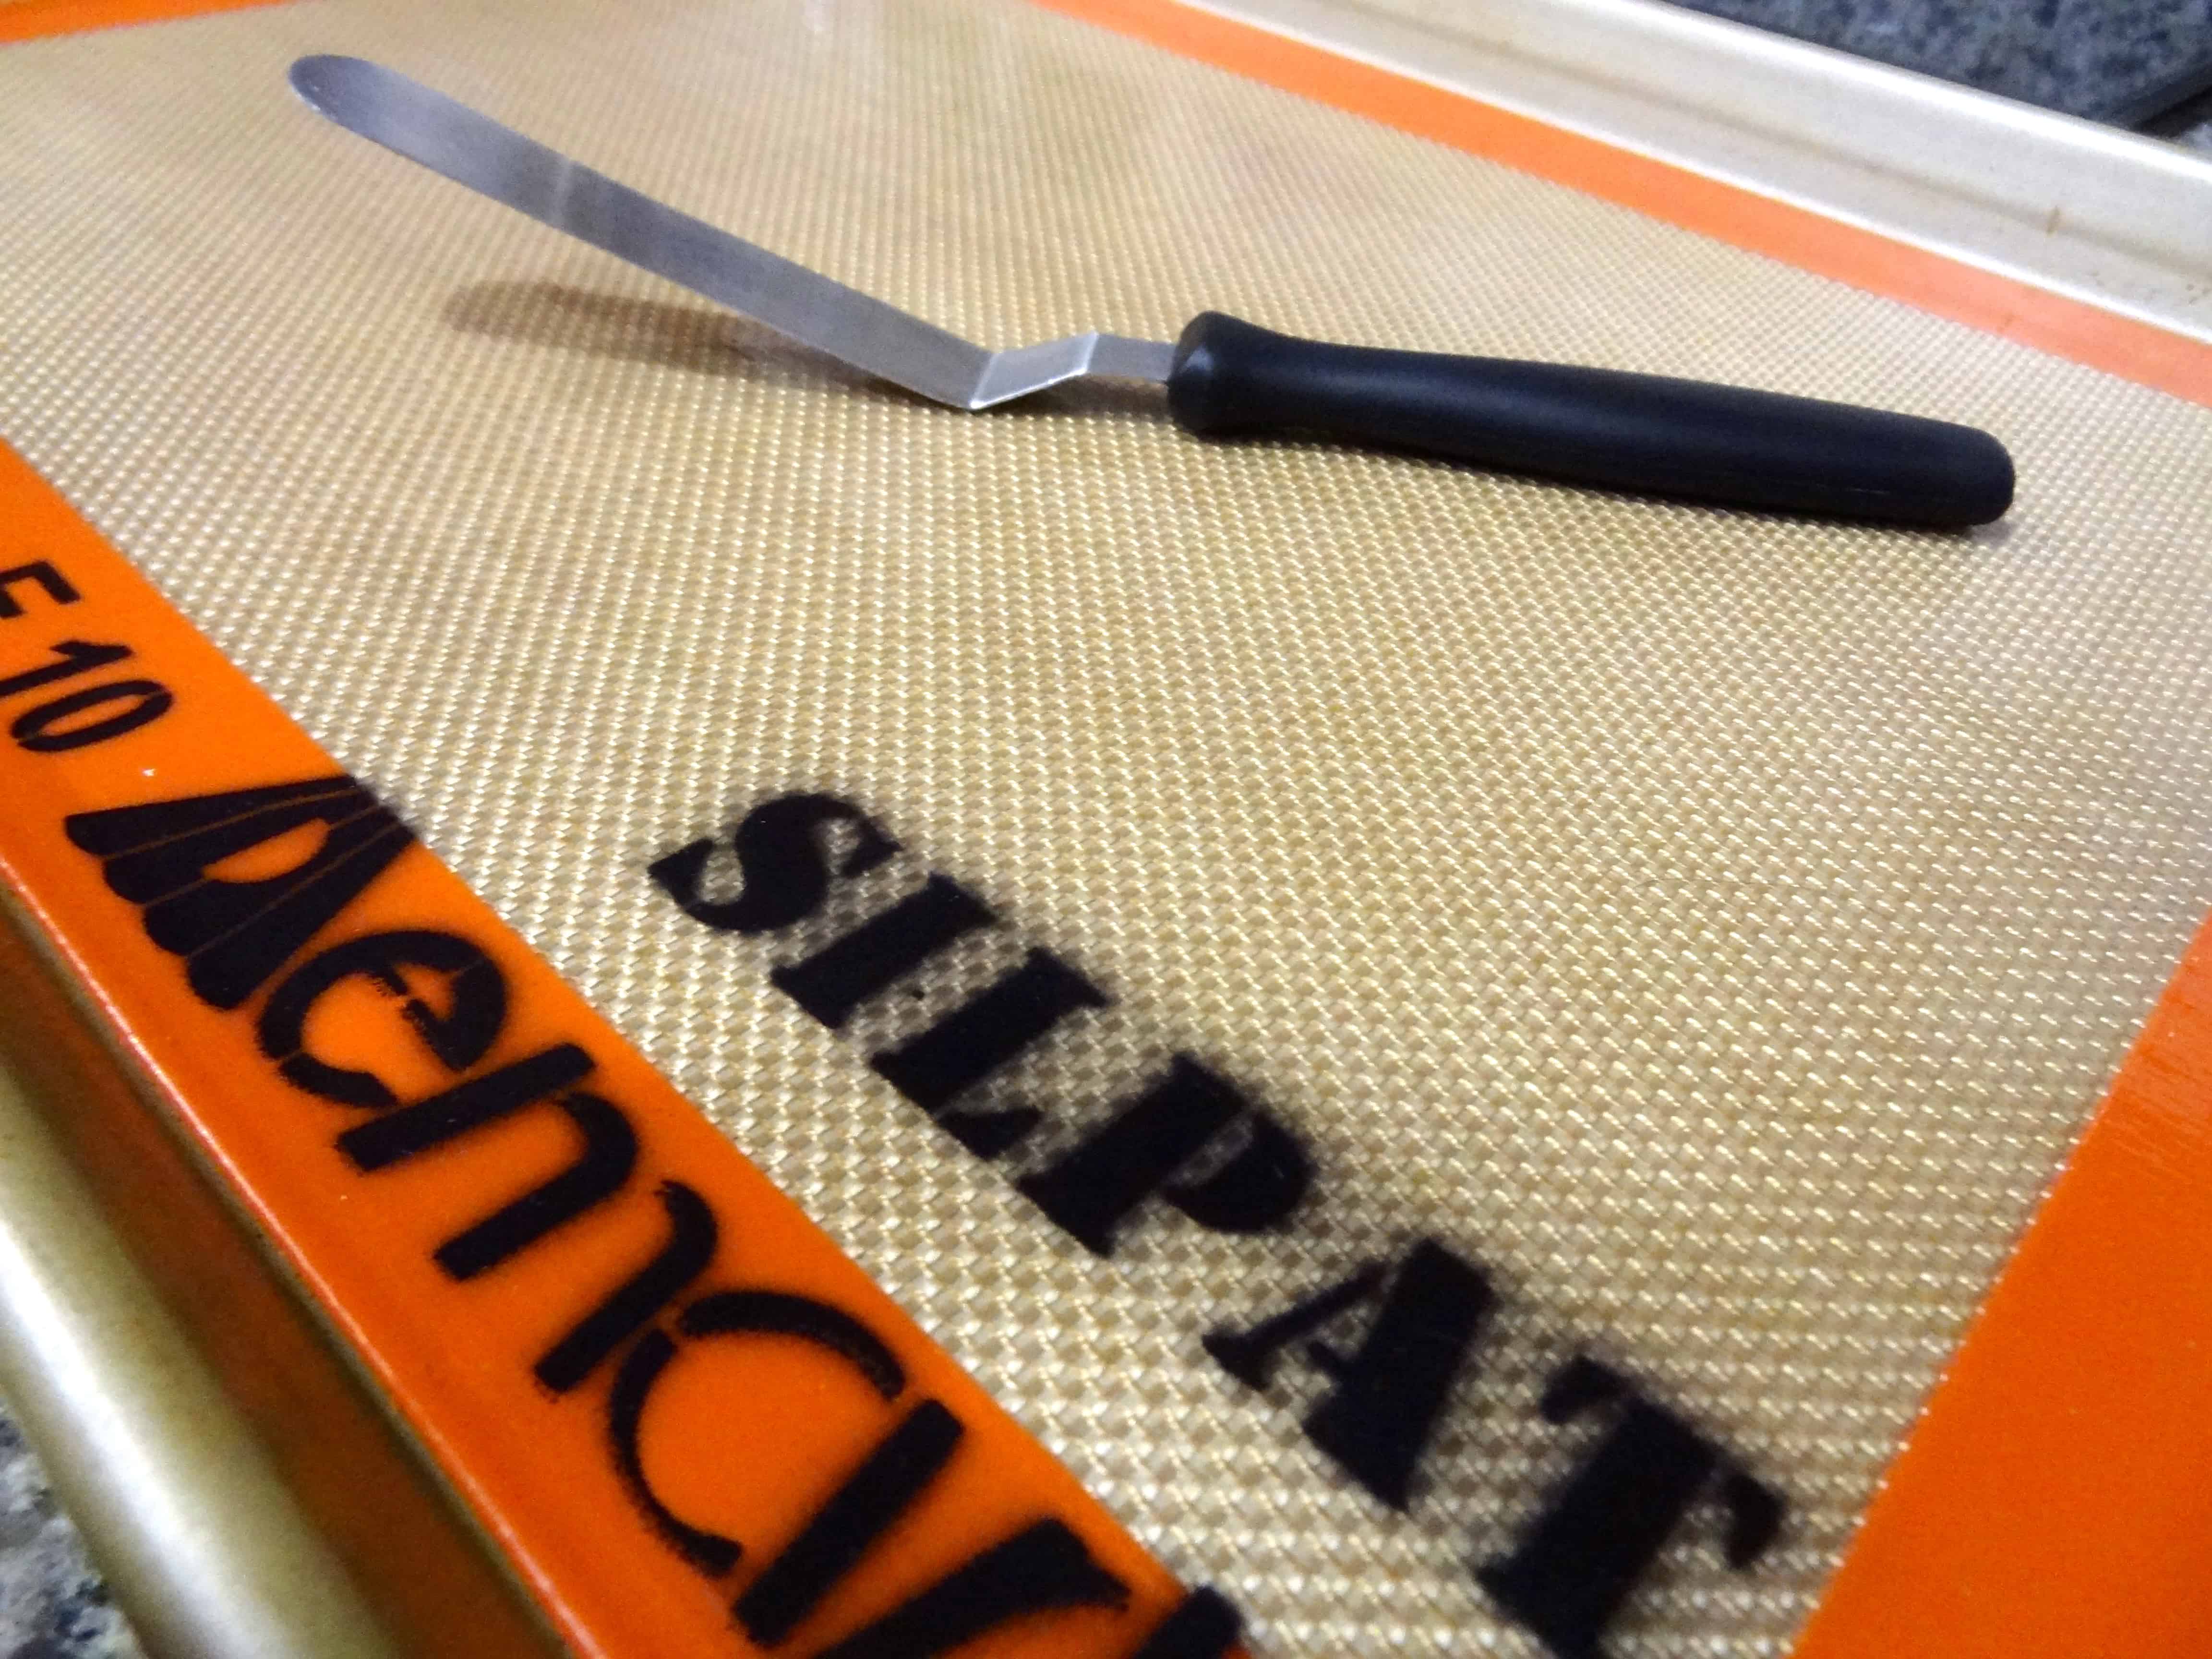
Prepare a rimmed baking sheet with a nonstick baking mat (such as Silpat) or parchment paper and set aside. If using parchment, I recommend taping it down, so it won’t slide around when you spread the chocolate. Prepare a second flat surface (another sheet pan or a spot on your countertop) with parchment paper.
Place your chocolate in a heatproof bowl over a pot of simmering water. Melt the chocolate until smooth, stirring occasionally. Make sure the bottom of the bowl does not touch the hot water, and take care not to get any steam or water drops in your bowl, as this can cause the chocolate to seize up and be ruined.
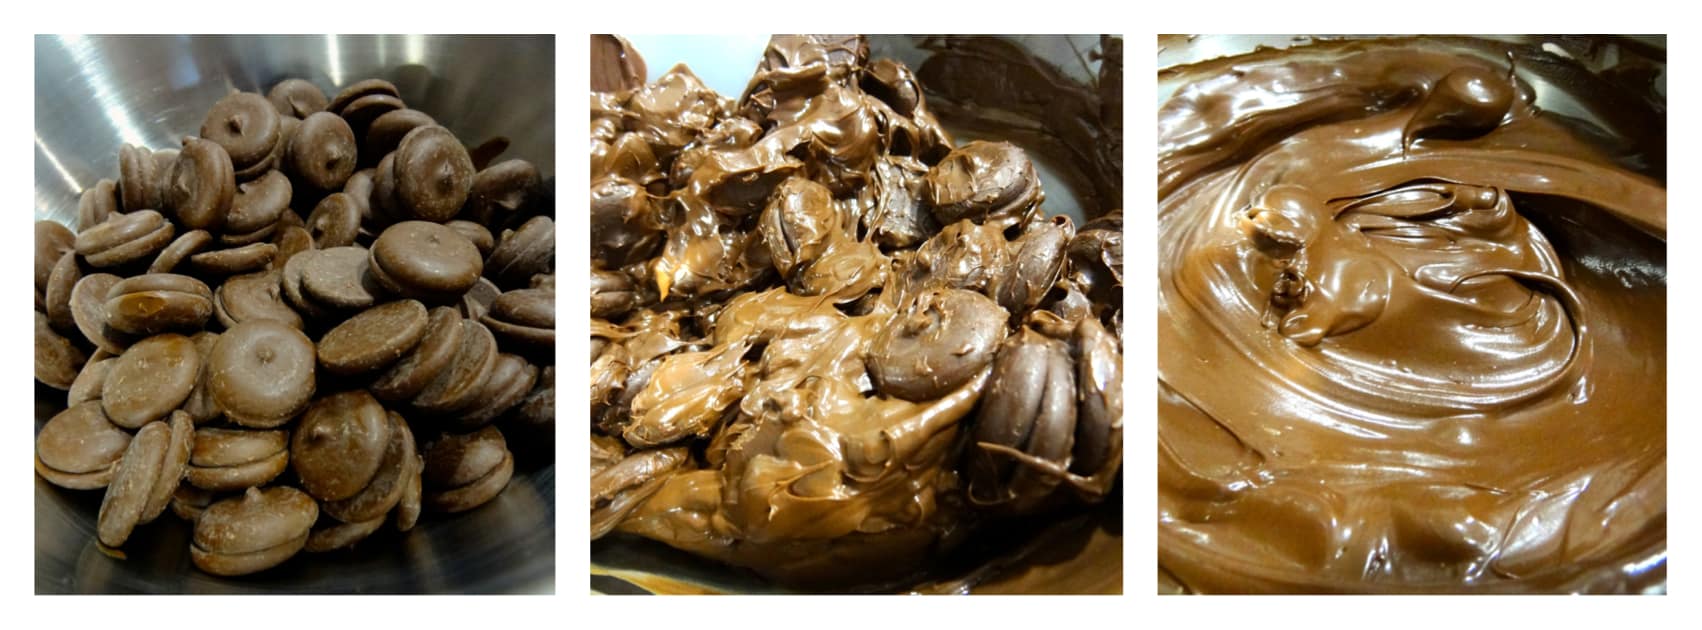
If using real chocolate, it’s best to temper it to minimize the chance of chocolate “bloom” (whitish markings forming on the surface of the cooled chocolate when the chocolate crystals are not properly stabilized).
Working quickly, pour the melted chocolate onto your prepared baking sheet. Spread it in a thin, even layer to the edges of the pan using an offset spatula.
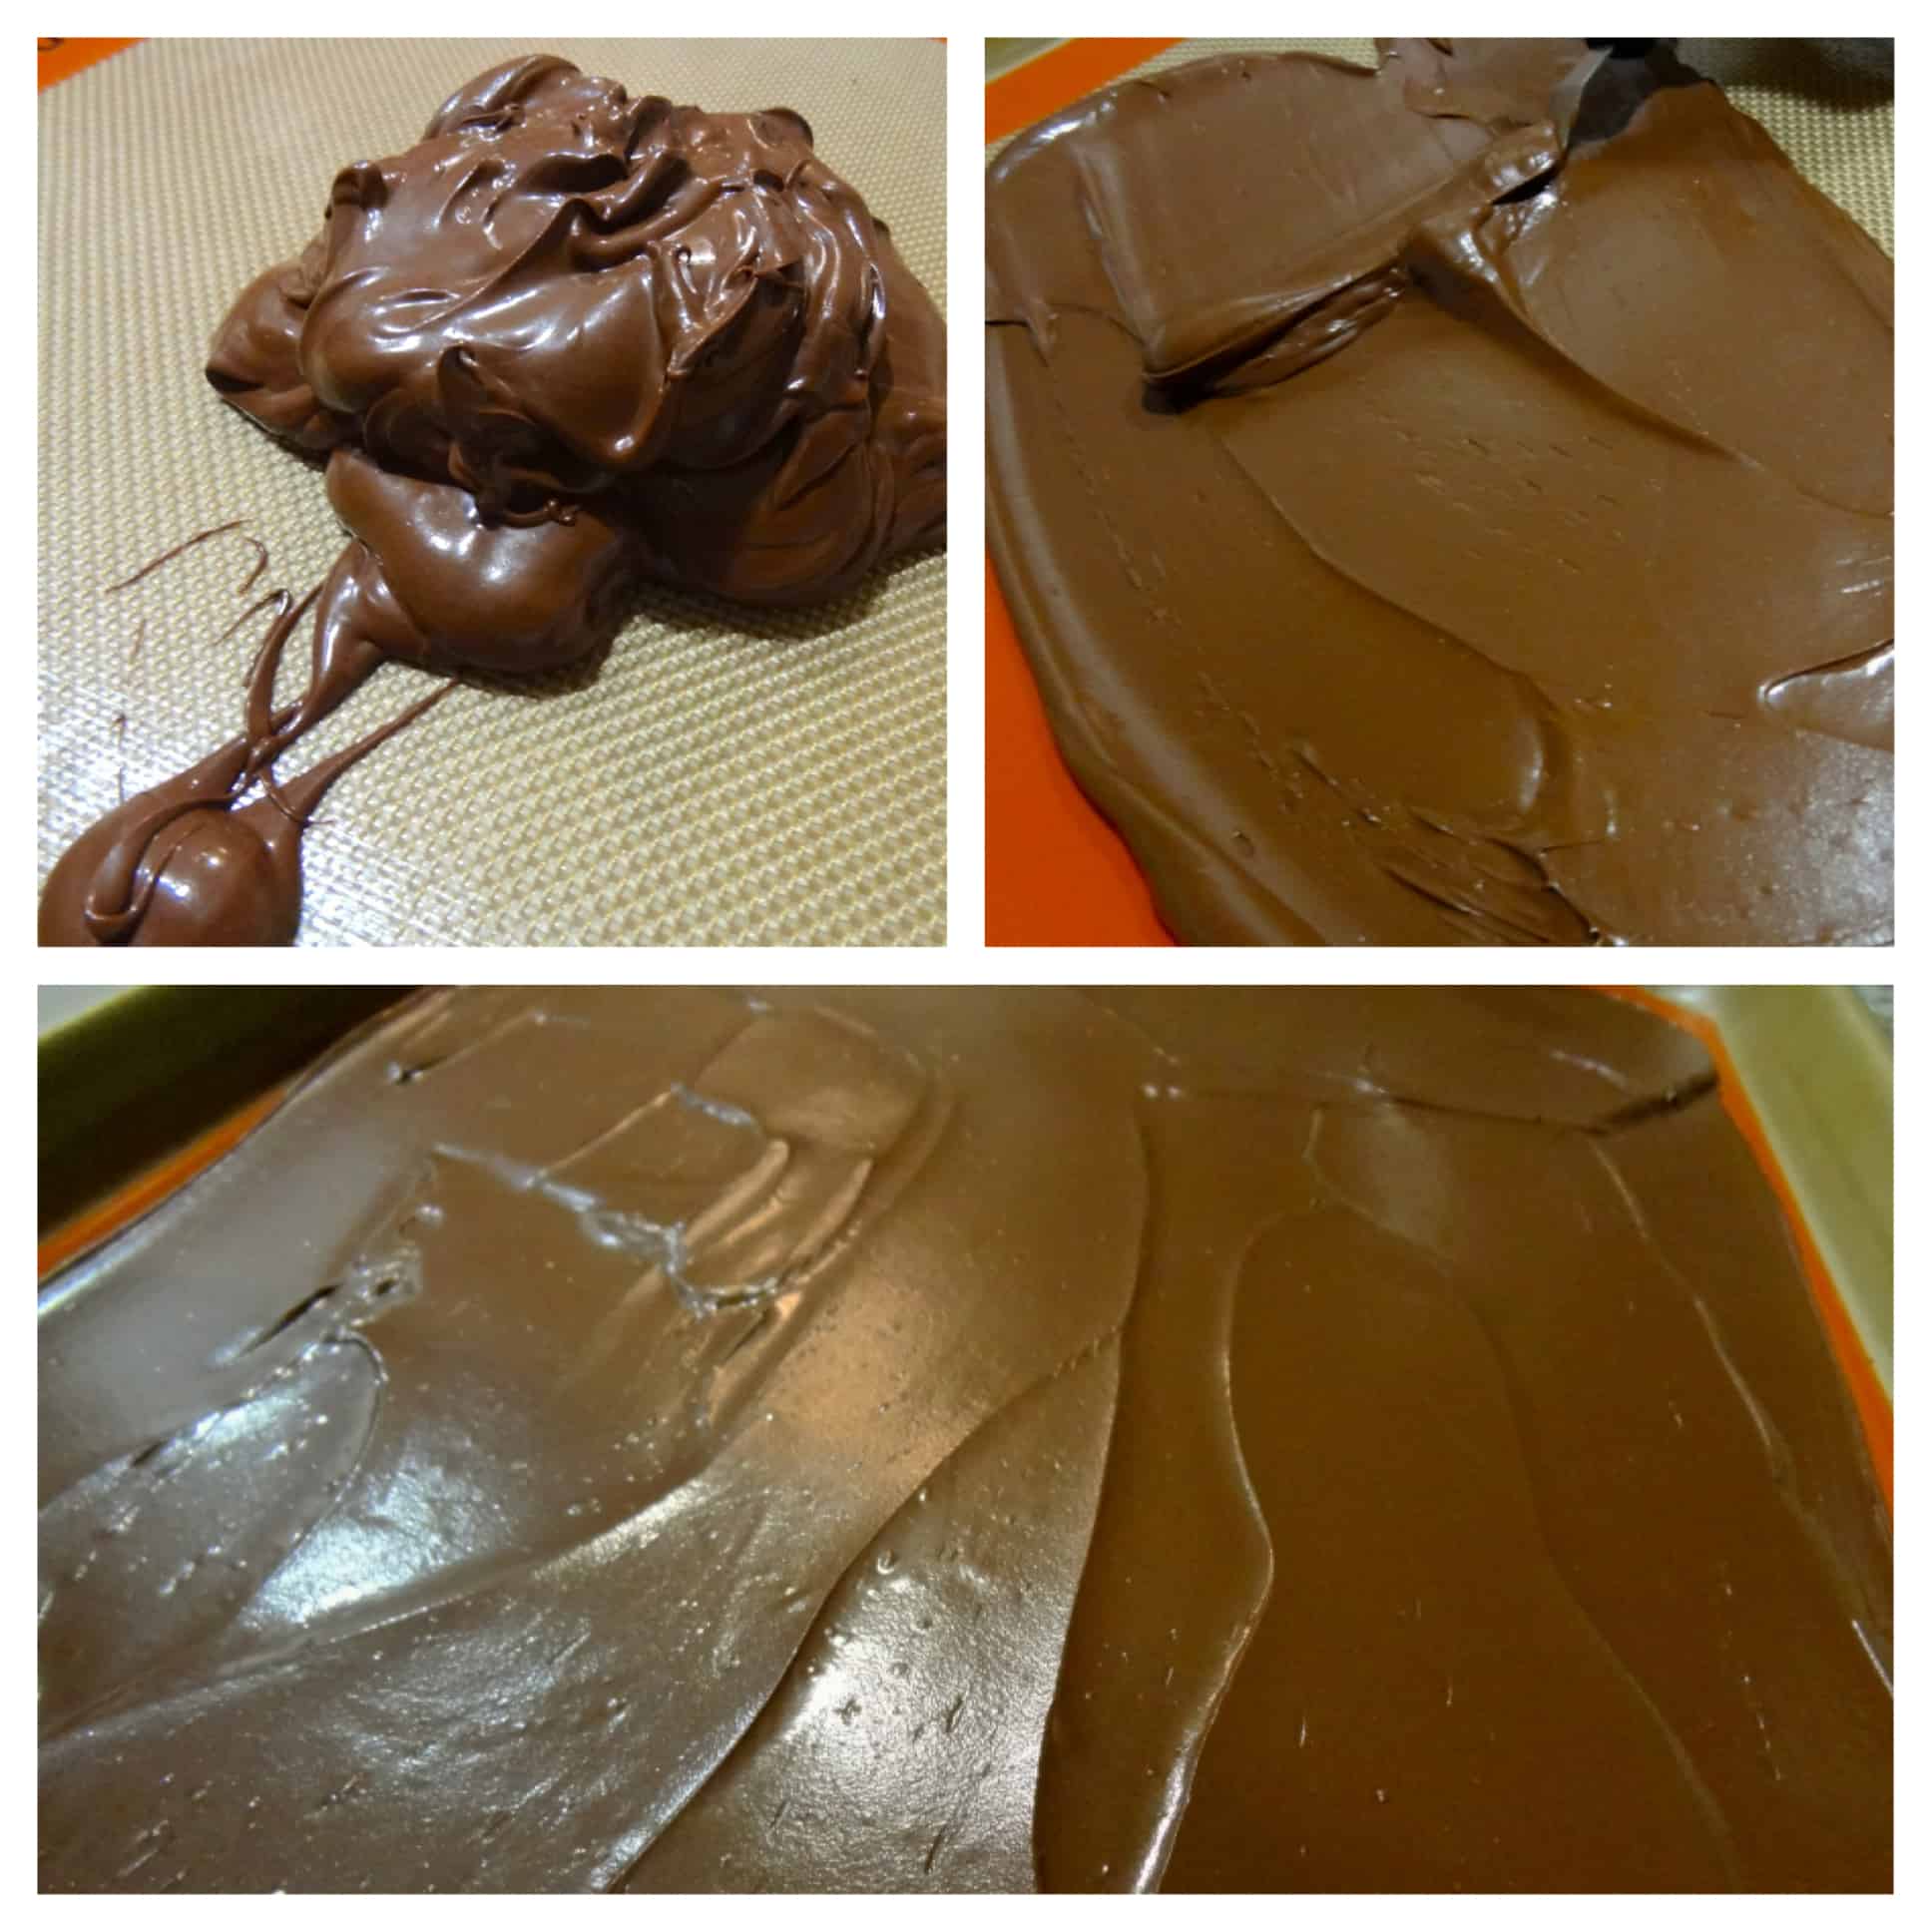
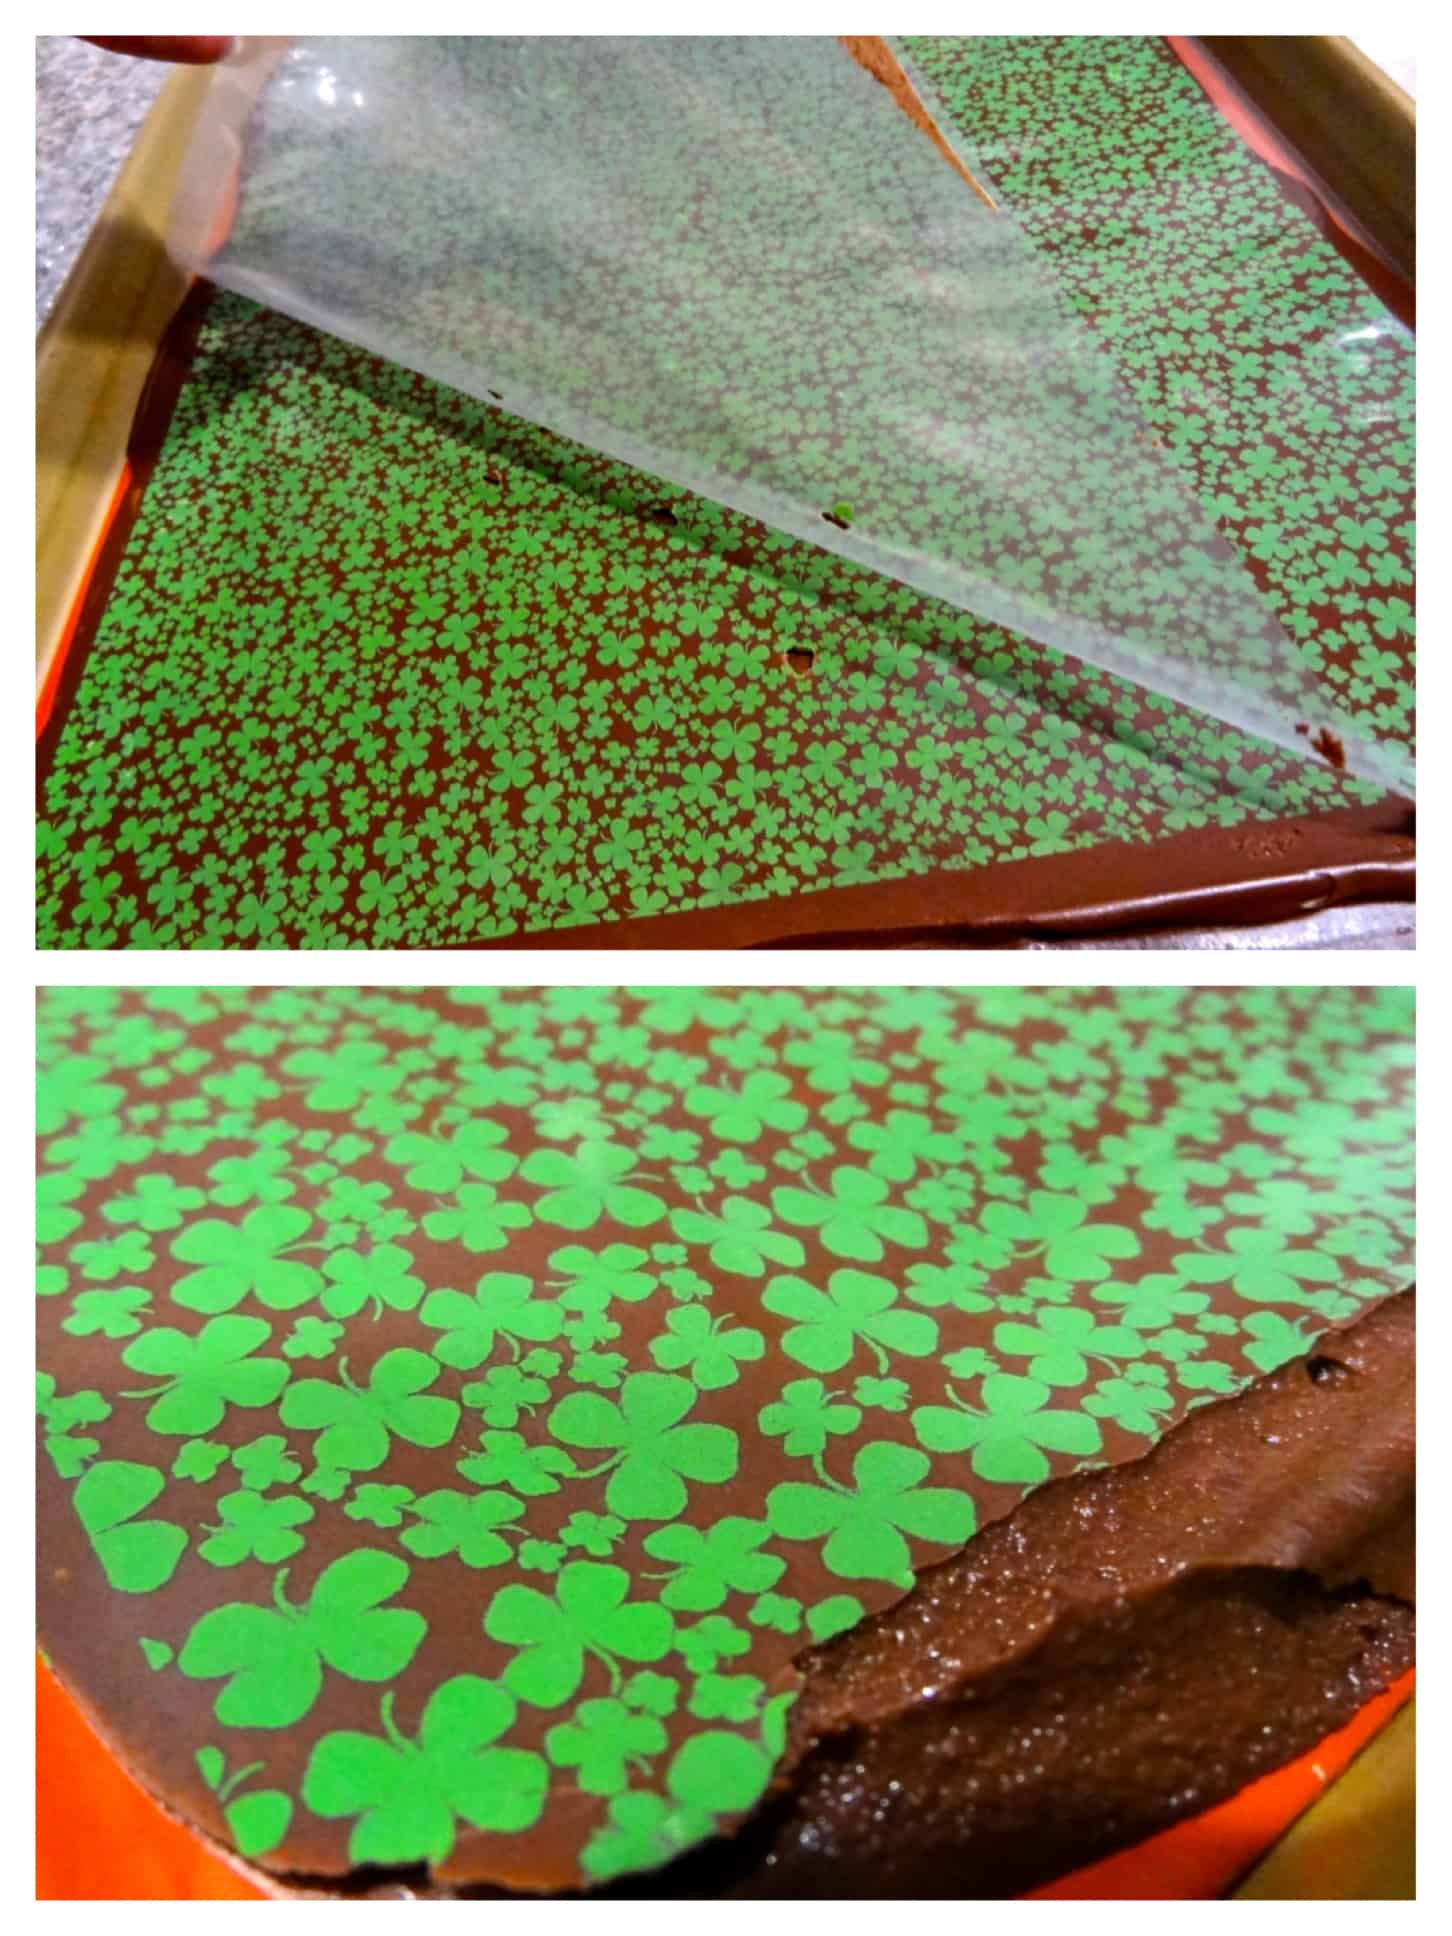
Carefully place the chocolate transfer sheet, textured side down, onto the wet chocolate. Press very gently to adhere the transfer design to the chocolate. You can use a bench scraper to even out the surface and remove air bubbles.

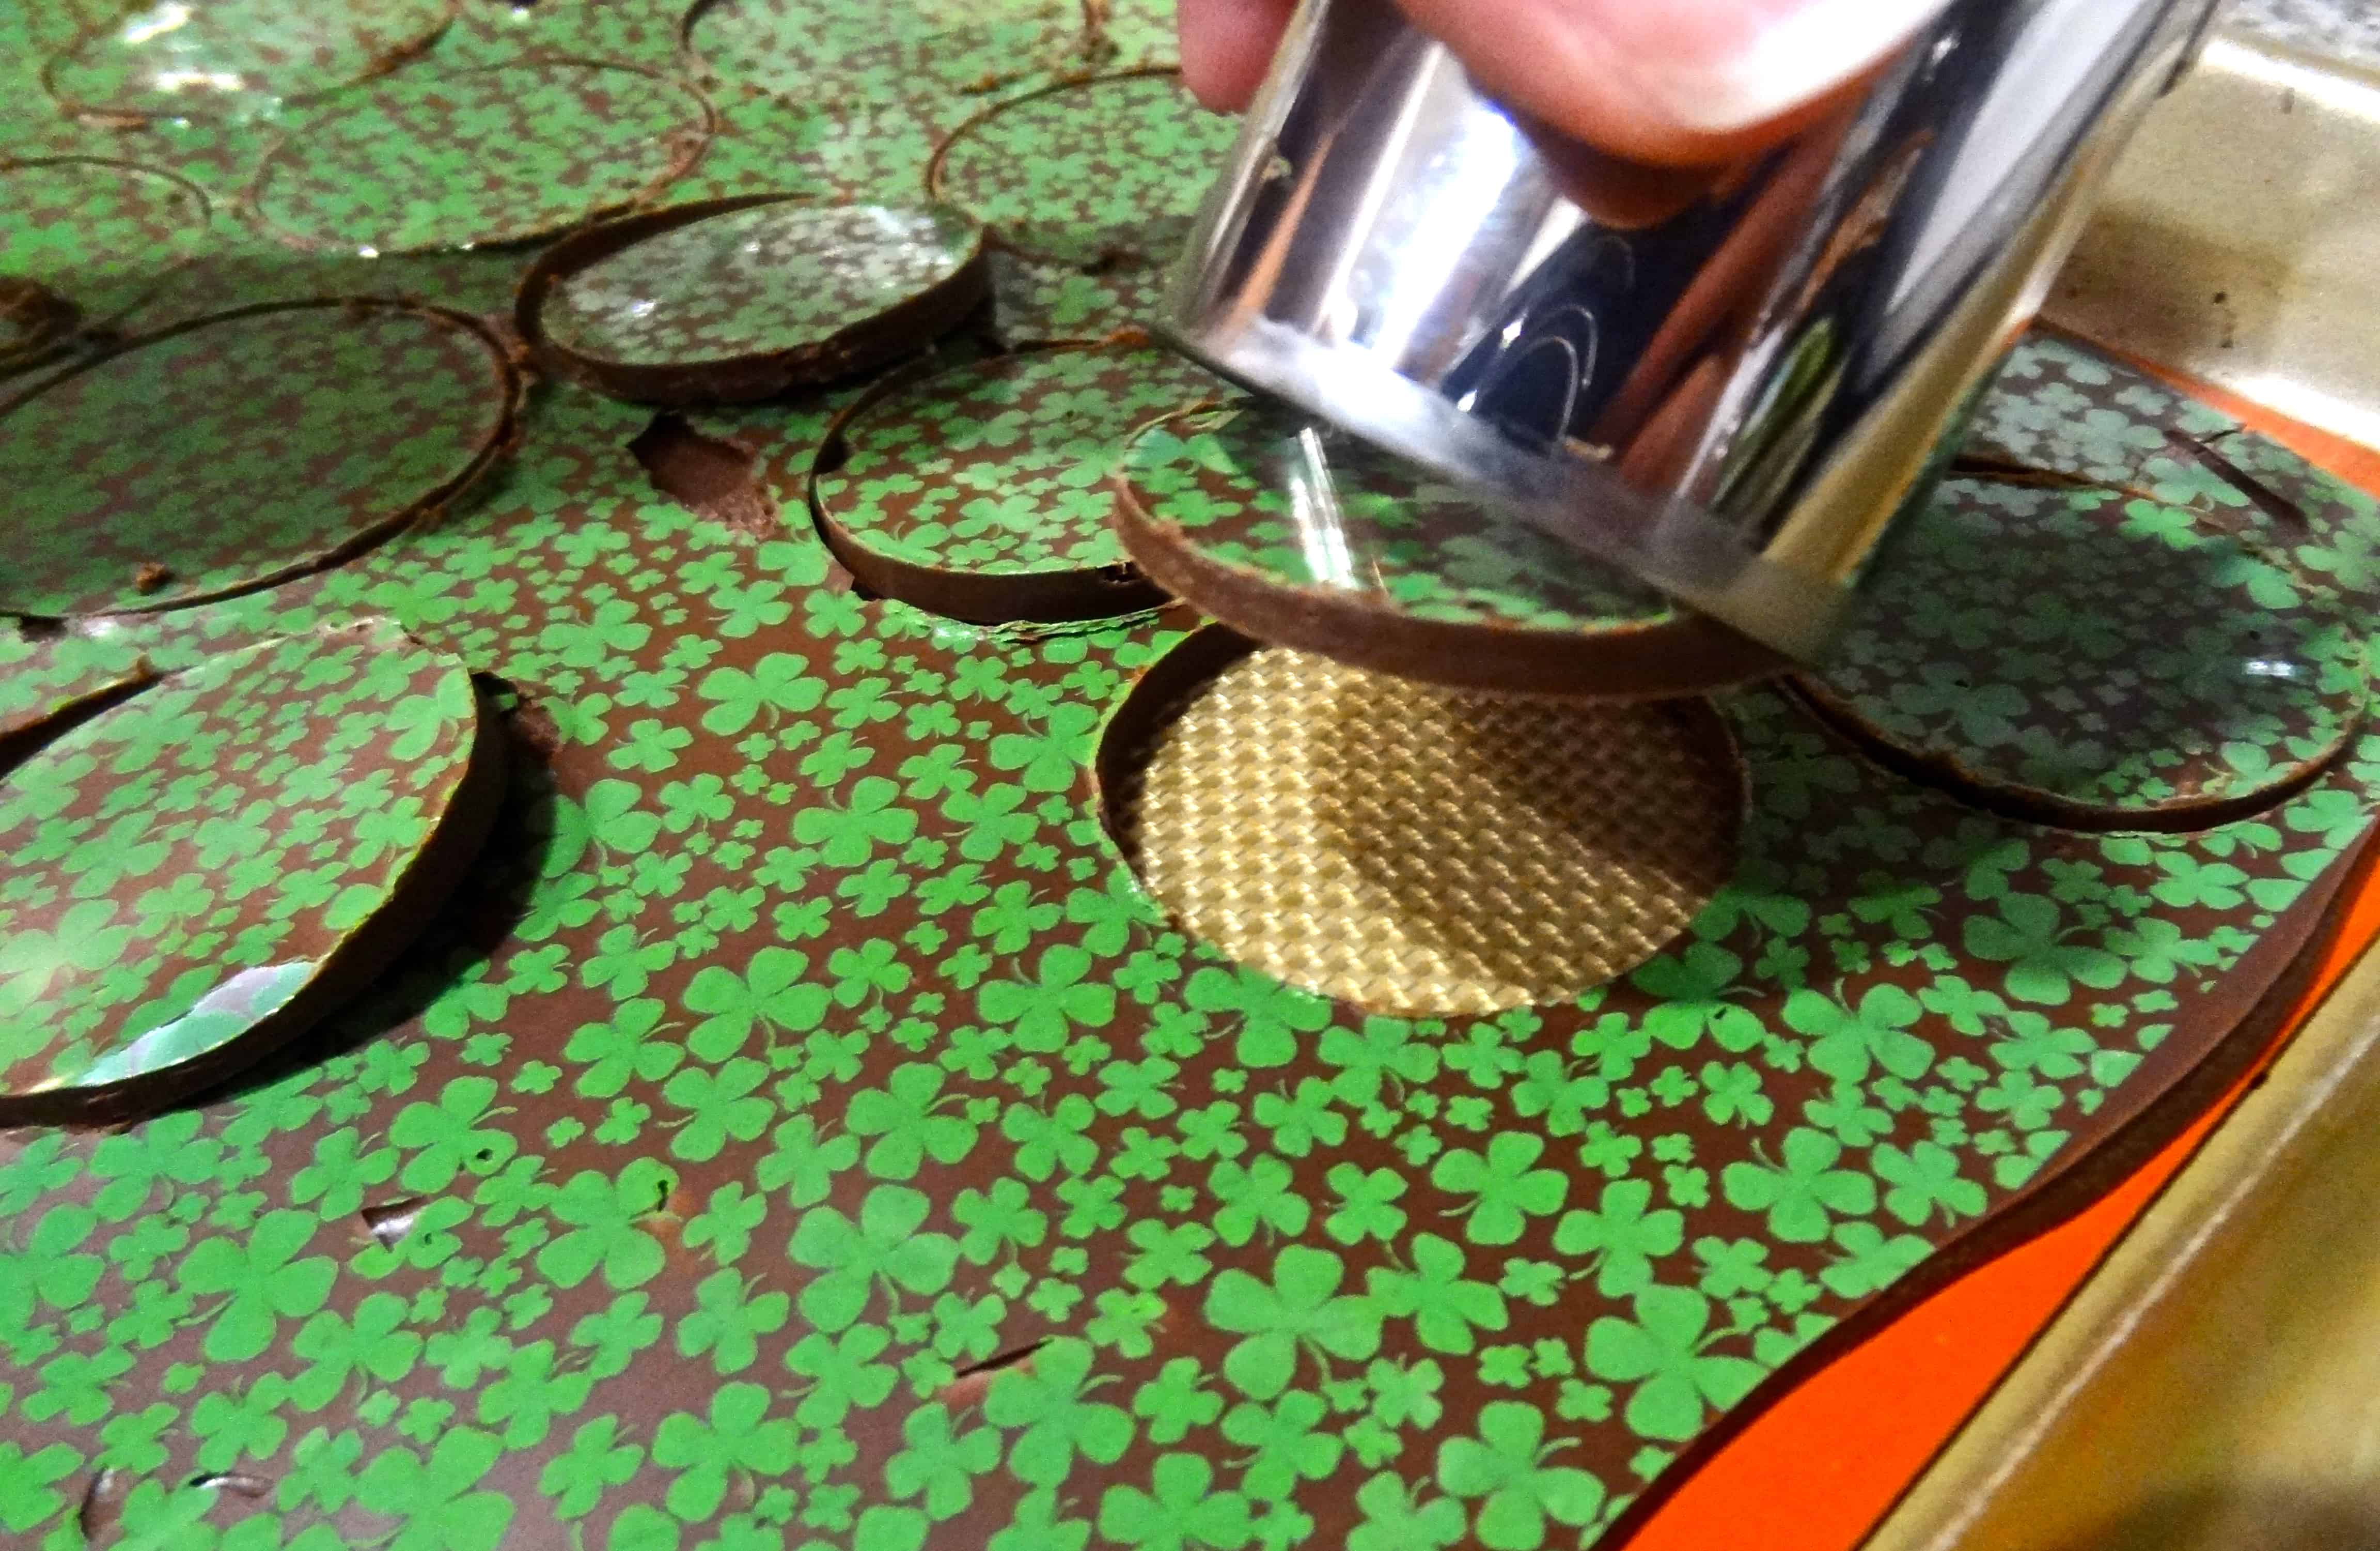
Let the chocolate cool for about 8-10 minutes, or place the sheet pan in the refrigerator for about 3-5 minutes, until the chocolate is semi-set. It should be set enough to cut into with a cookie cutter, but not completely solid. (If it’s too solid, it will crack when you attempt to cut it.) Check to see if it’s ready by carefully lifting the corner of your transfer sheet; if the acetate sheet lifts away, leaving the transfer design on the chocolate surface, you are ready to proceed. If the design has not adhered to the chocolate, it is still too soft and needs more time to firm up. Once the chocolate is set, slowly pull away the entire acetate sheet. Your chocolate should be completely covered with the transfer design. You may have a few small patches of chocolate that did not take the transfer due to air bubbles, and you can simply work around them.
Again working quickly, use round cutters to cut circles out of the chocolate. I used 2-inch round cutters for these particular cupcakes, but you can use any size, or any shape for that matter– there are endless decorating possibilities!
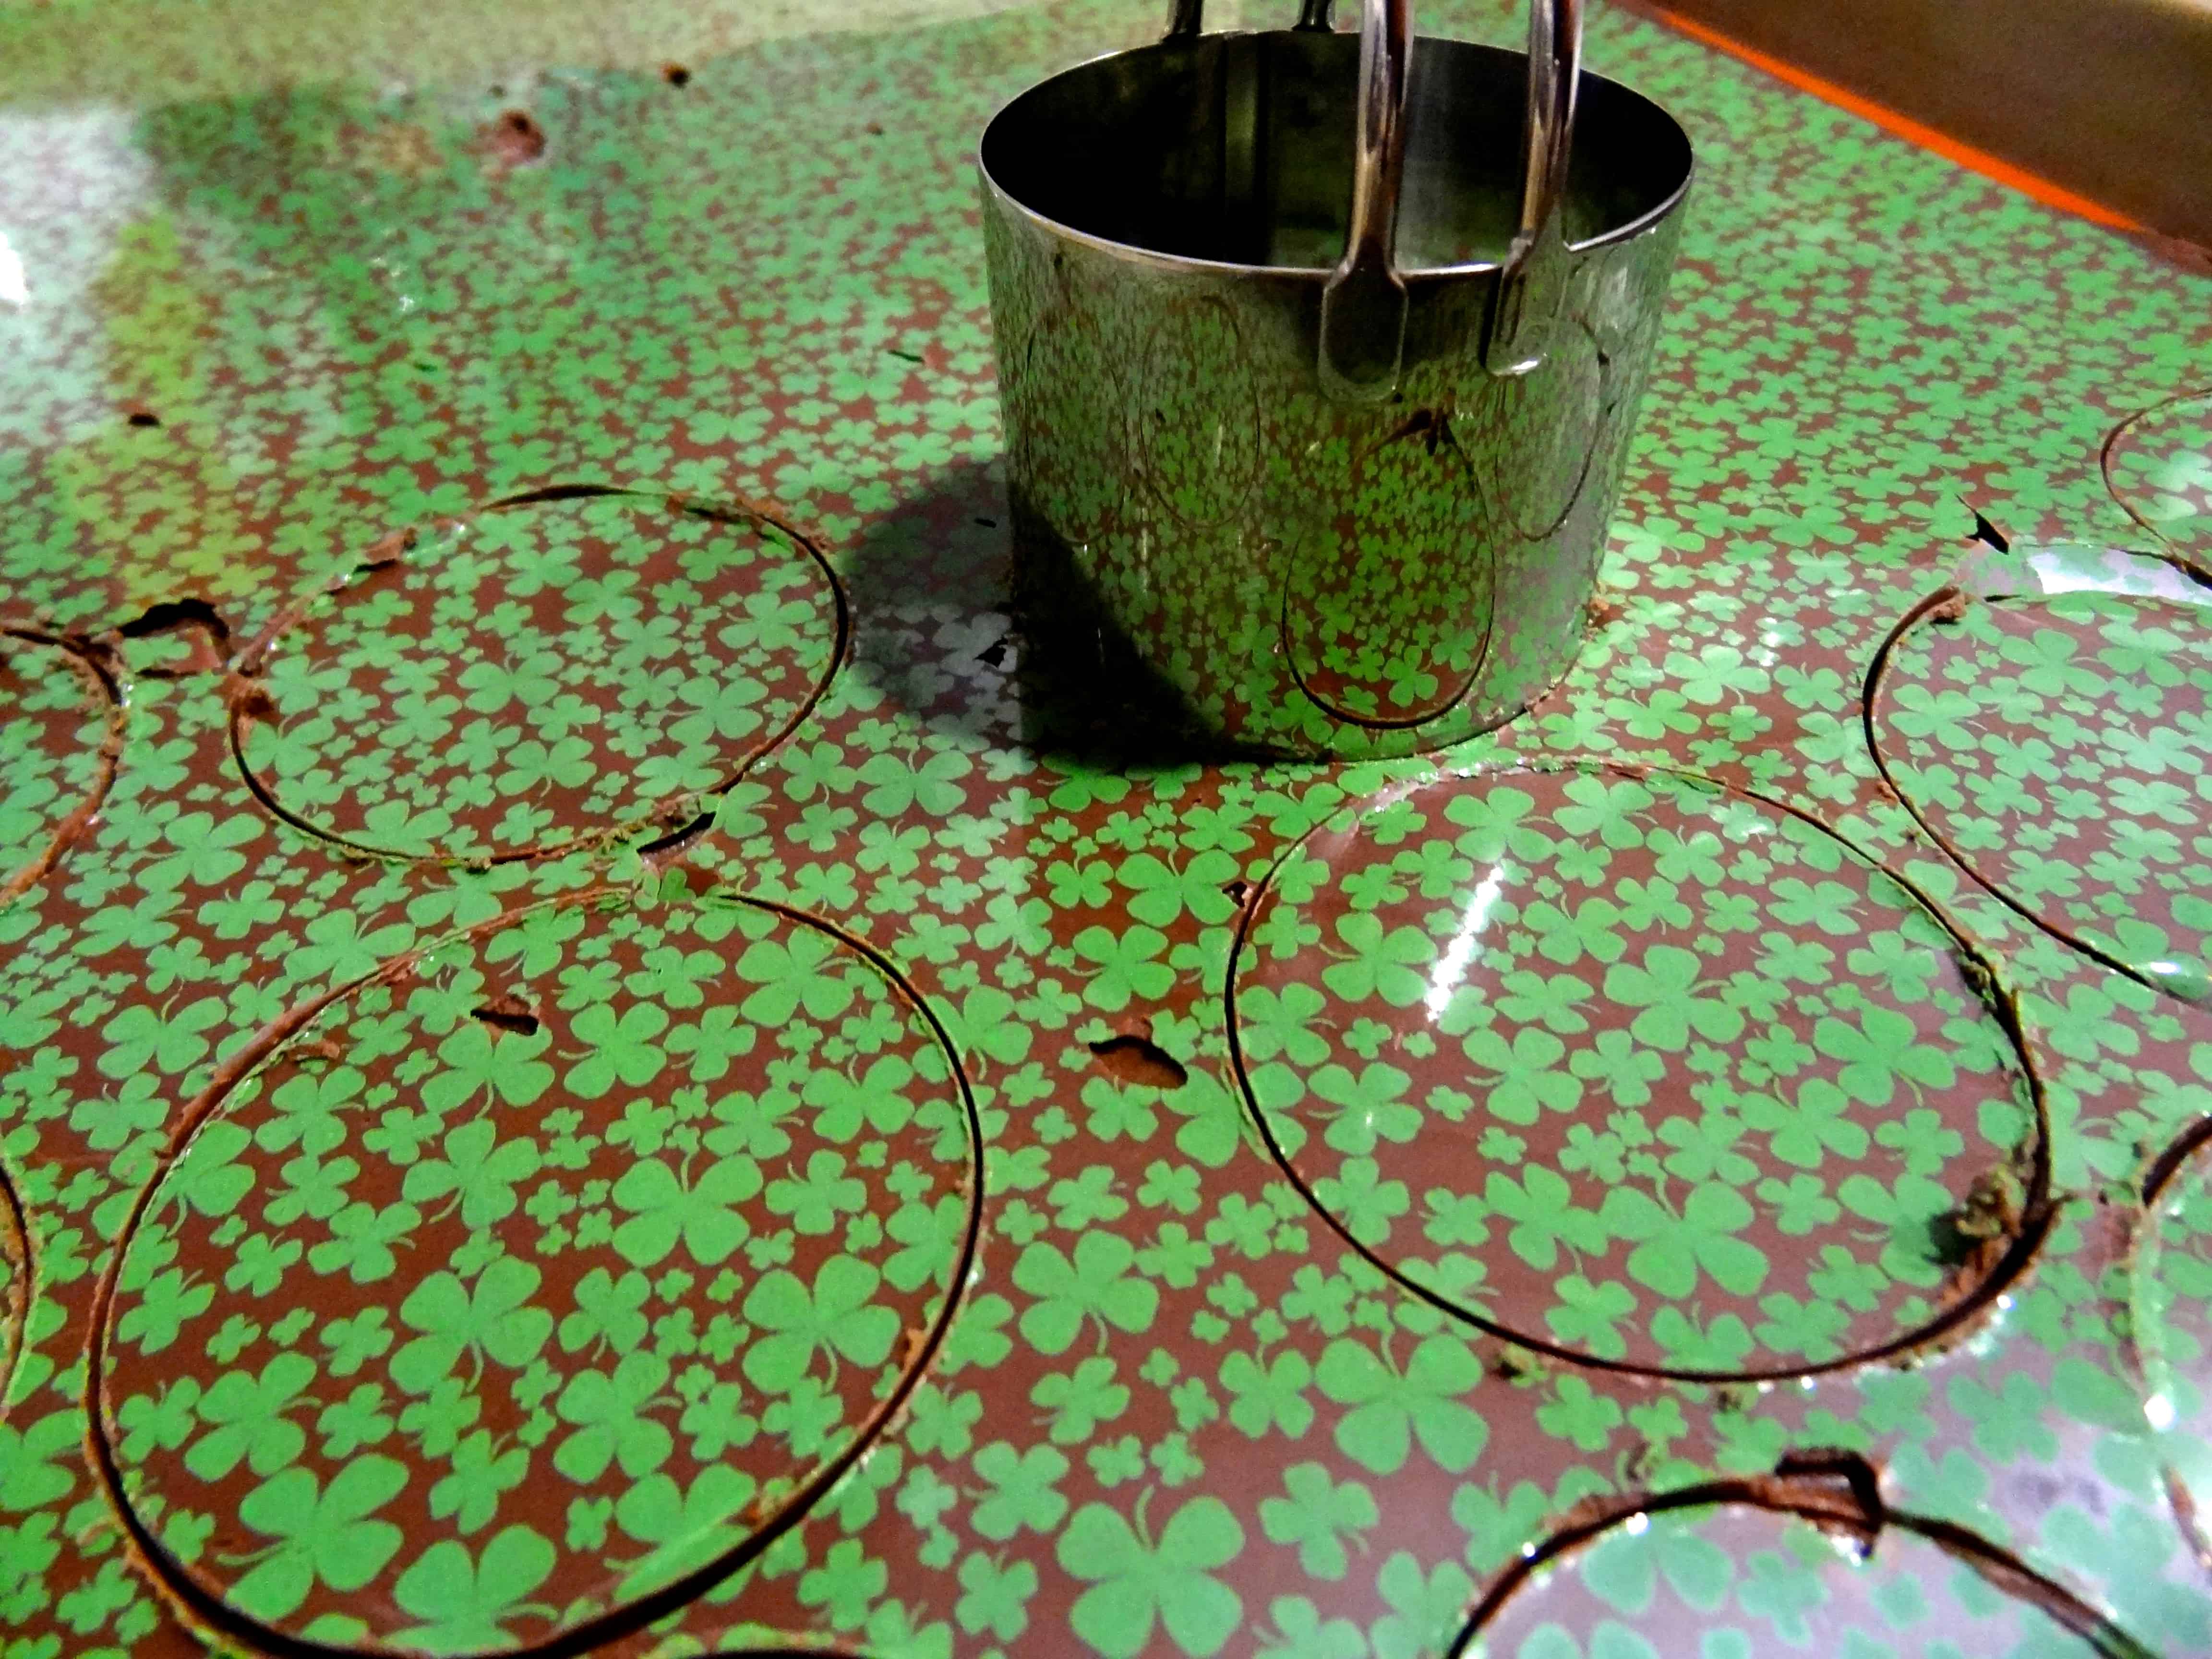
Transfer the chocolate cutouts with a spatula (to avoid melting and fingerprints) to your second prepared sheet pan or lined countertop to firm up completely. Decorate baked goods as desired.
Chocolate disks can be stored for several months (or the life of the chocolate, whichever comes first) in an airtight container in a cool, dry place. Stack them in layers separated by parchment paper to avoid damage to the transfer designs.
© Dafna Adler & Stellina Sweets, 2013.


8 Responses
Now you’ve got me going! Never dared trying this but you make it sound “fairly” easy! Thanks and Chag Sameach!
Thank YOU and Chag Sameach as well, Yael! 🙂 They really are pretty easy once you get used to working with the transfer sheets (I was surprised!), and they’re a lot of fun. In hot weather, it might be a challenge to get the chocolate to set at room temperature, but you can just stick them in the fridge. Let me know if you try!
love that you made these! i have the butch book on my bedside table but haven’t made anything for it yet! glad to know their recipes are good! your disks look awesome!
Thank you! I’ve been wanting to make them forever– now I’m a little obsessed with chocolate transfer sheets. 😀
I highly recommend trying some recipes– they are soooo good! It’s such a unique book, and I love their flavor combinations. I’ve had to make some frosting adjustments, but nothing serious. Let me know when you try!
Do I need to temper the chocolate? Thanks!
Hi Layla! Yes, unless you are using candy coating, you’ll want to use tempered chocolate to a) avoid bloom streaks and b) have that firm chocolate “snap”.