


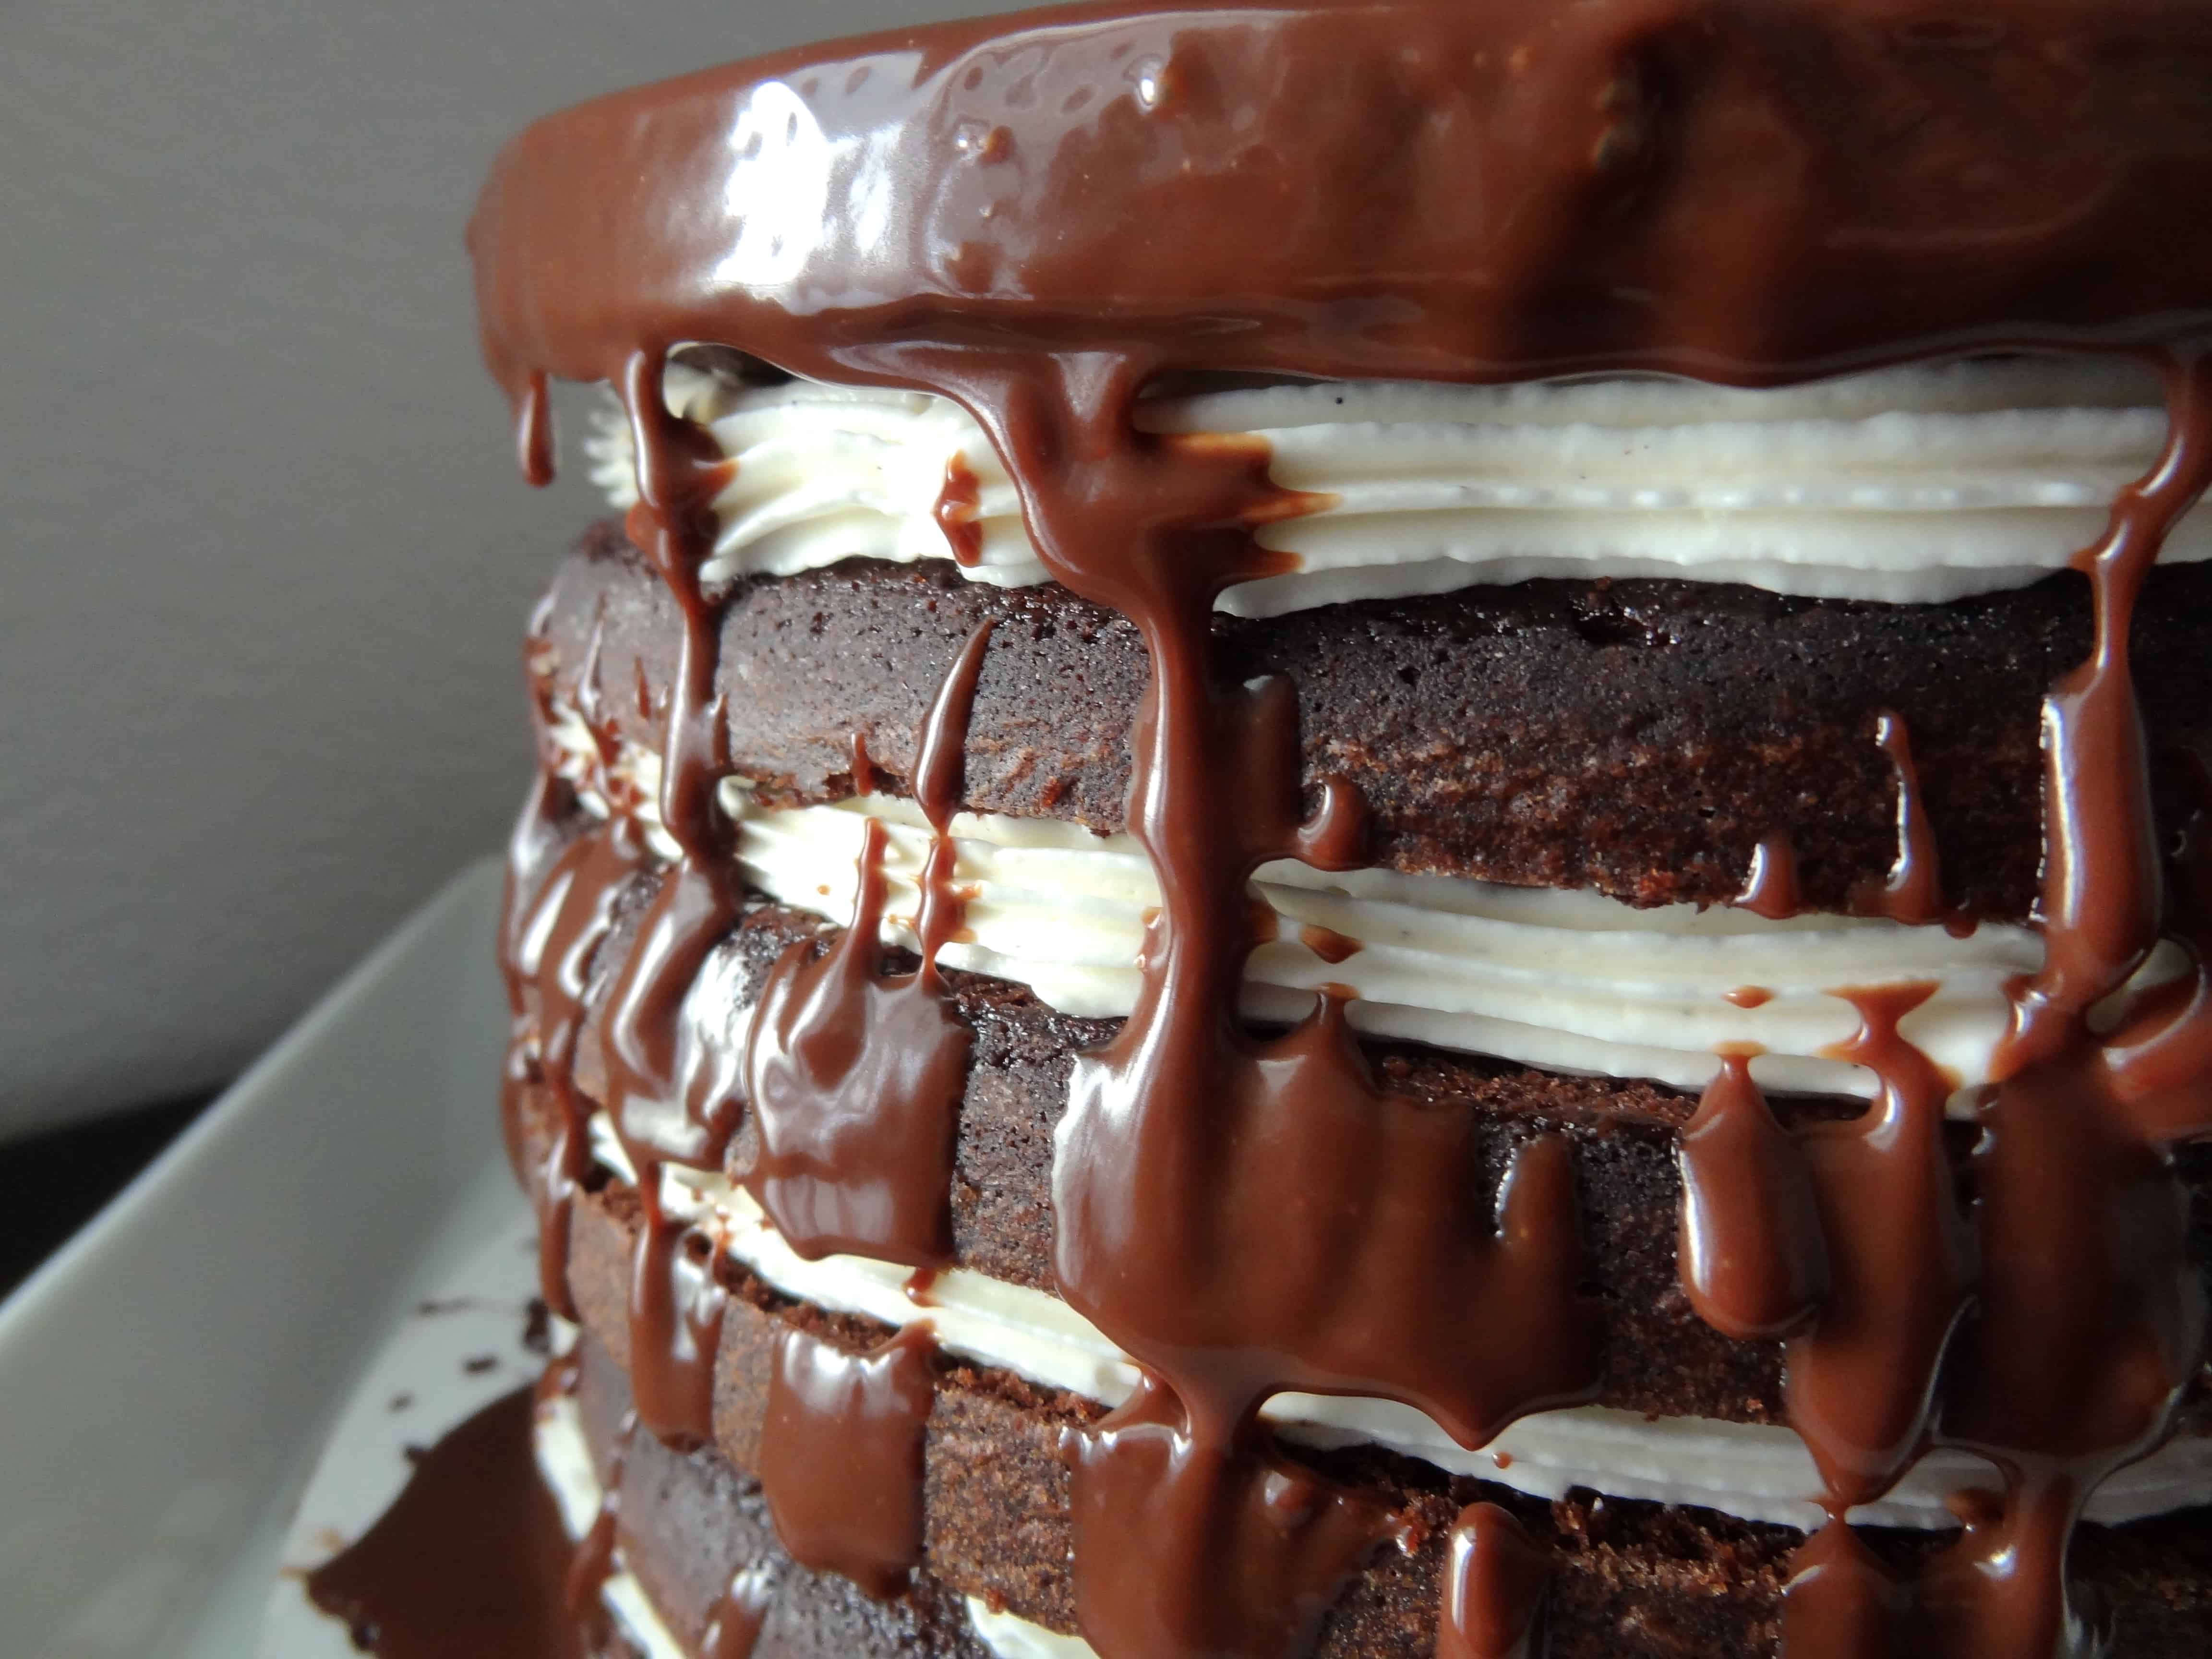
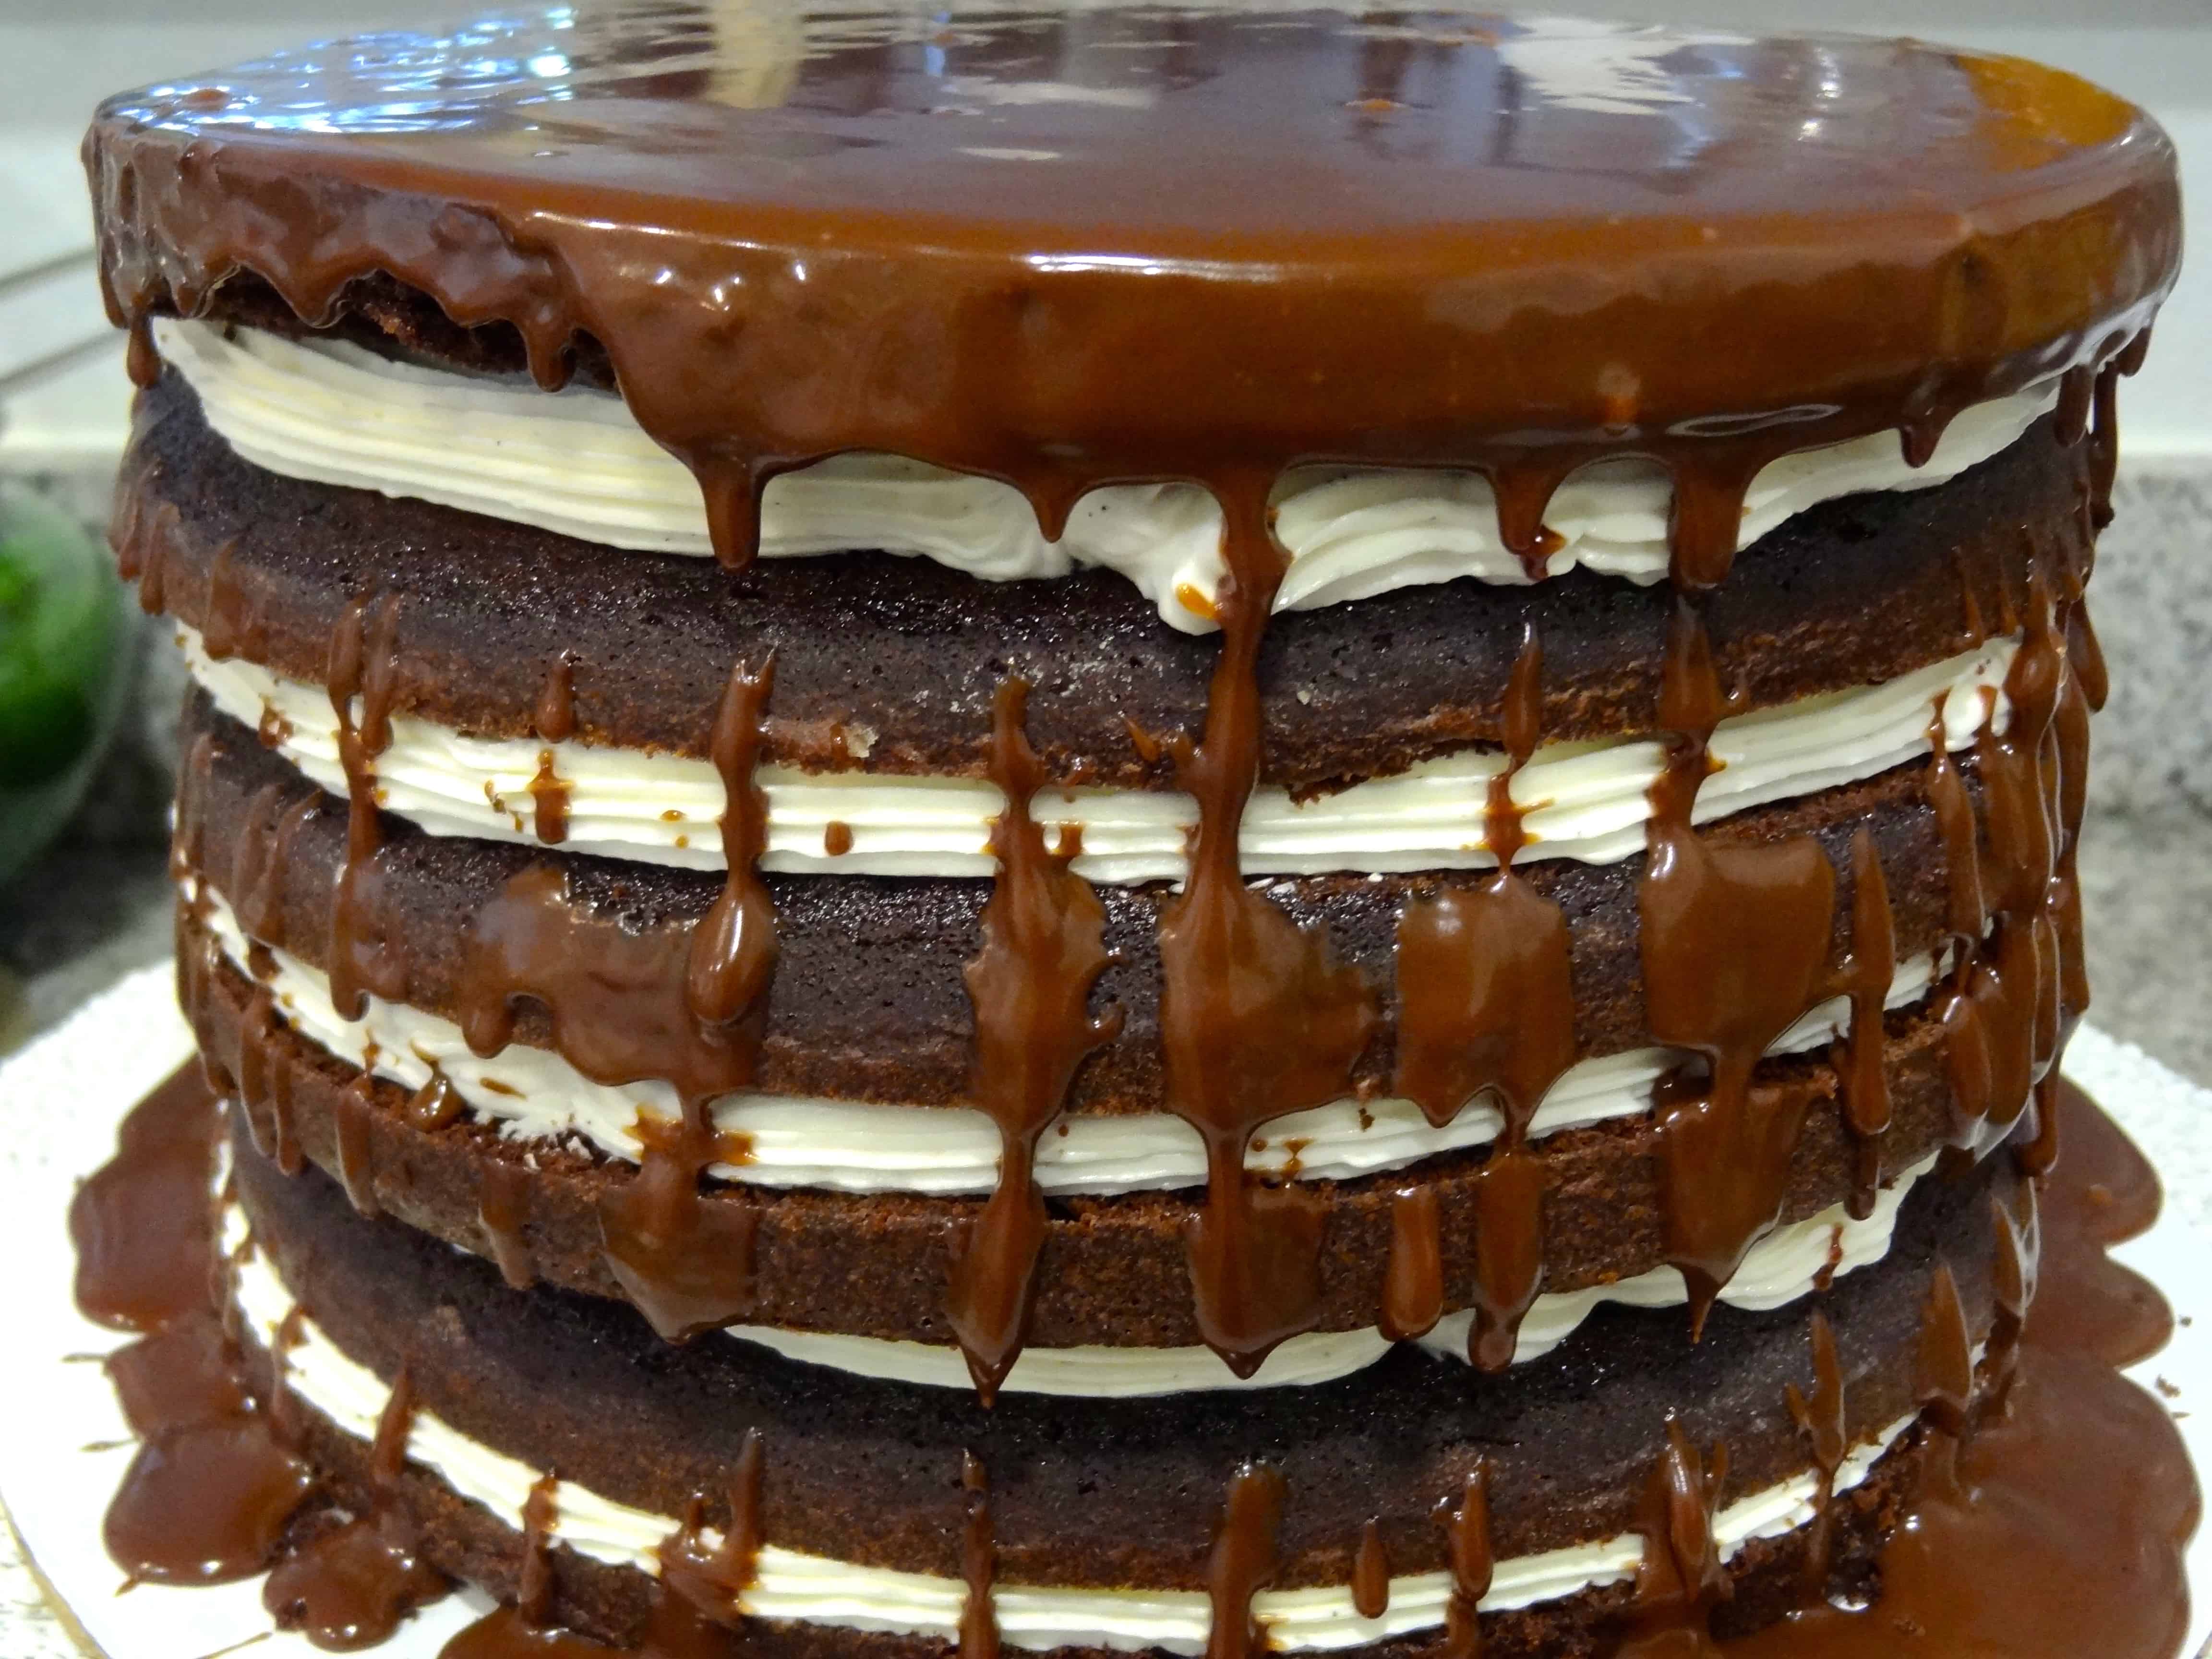
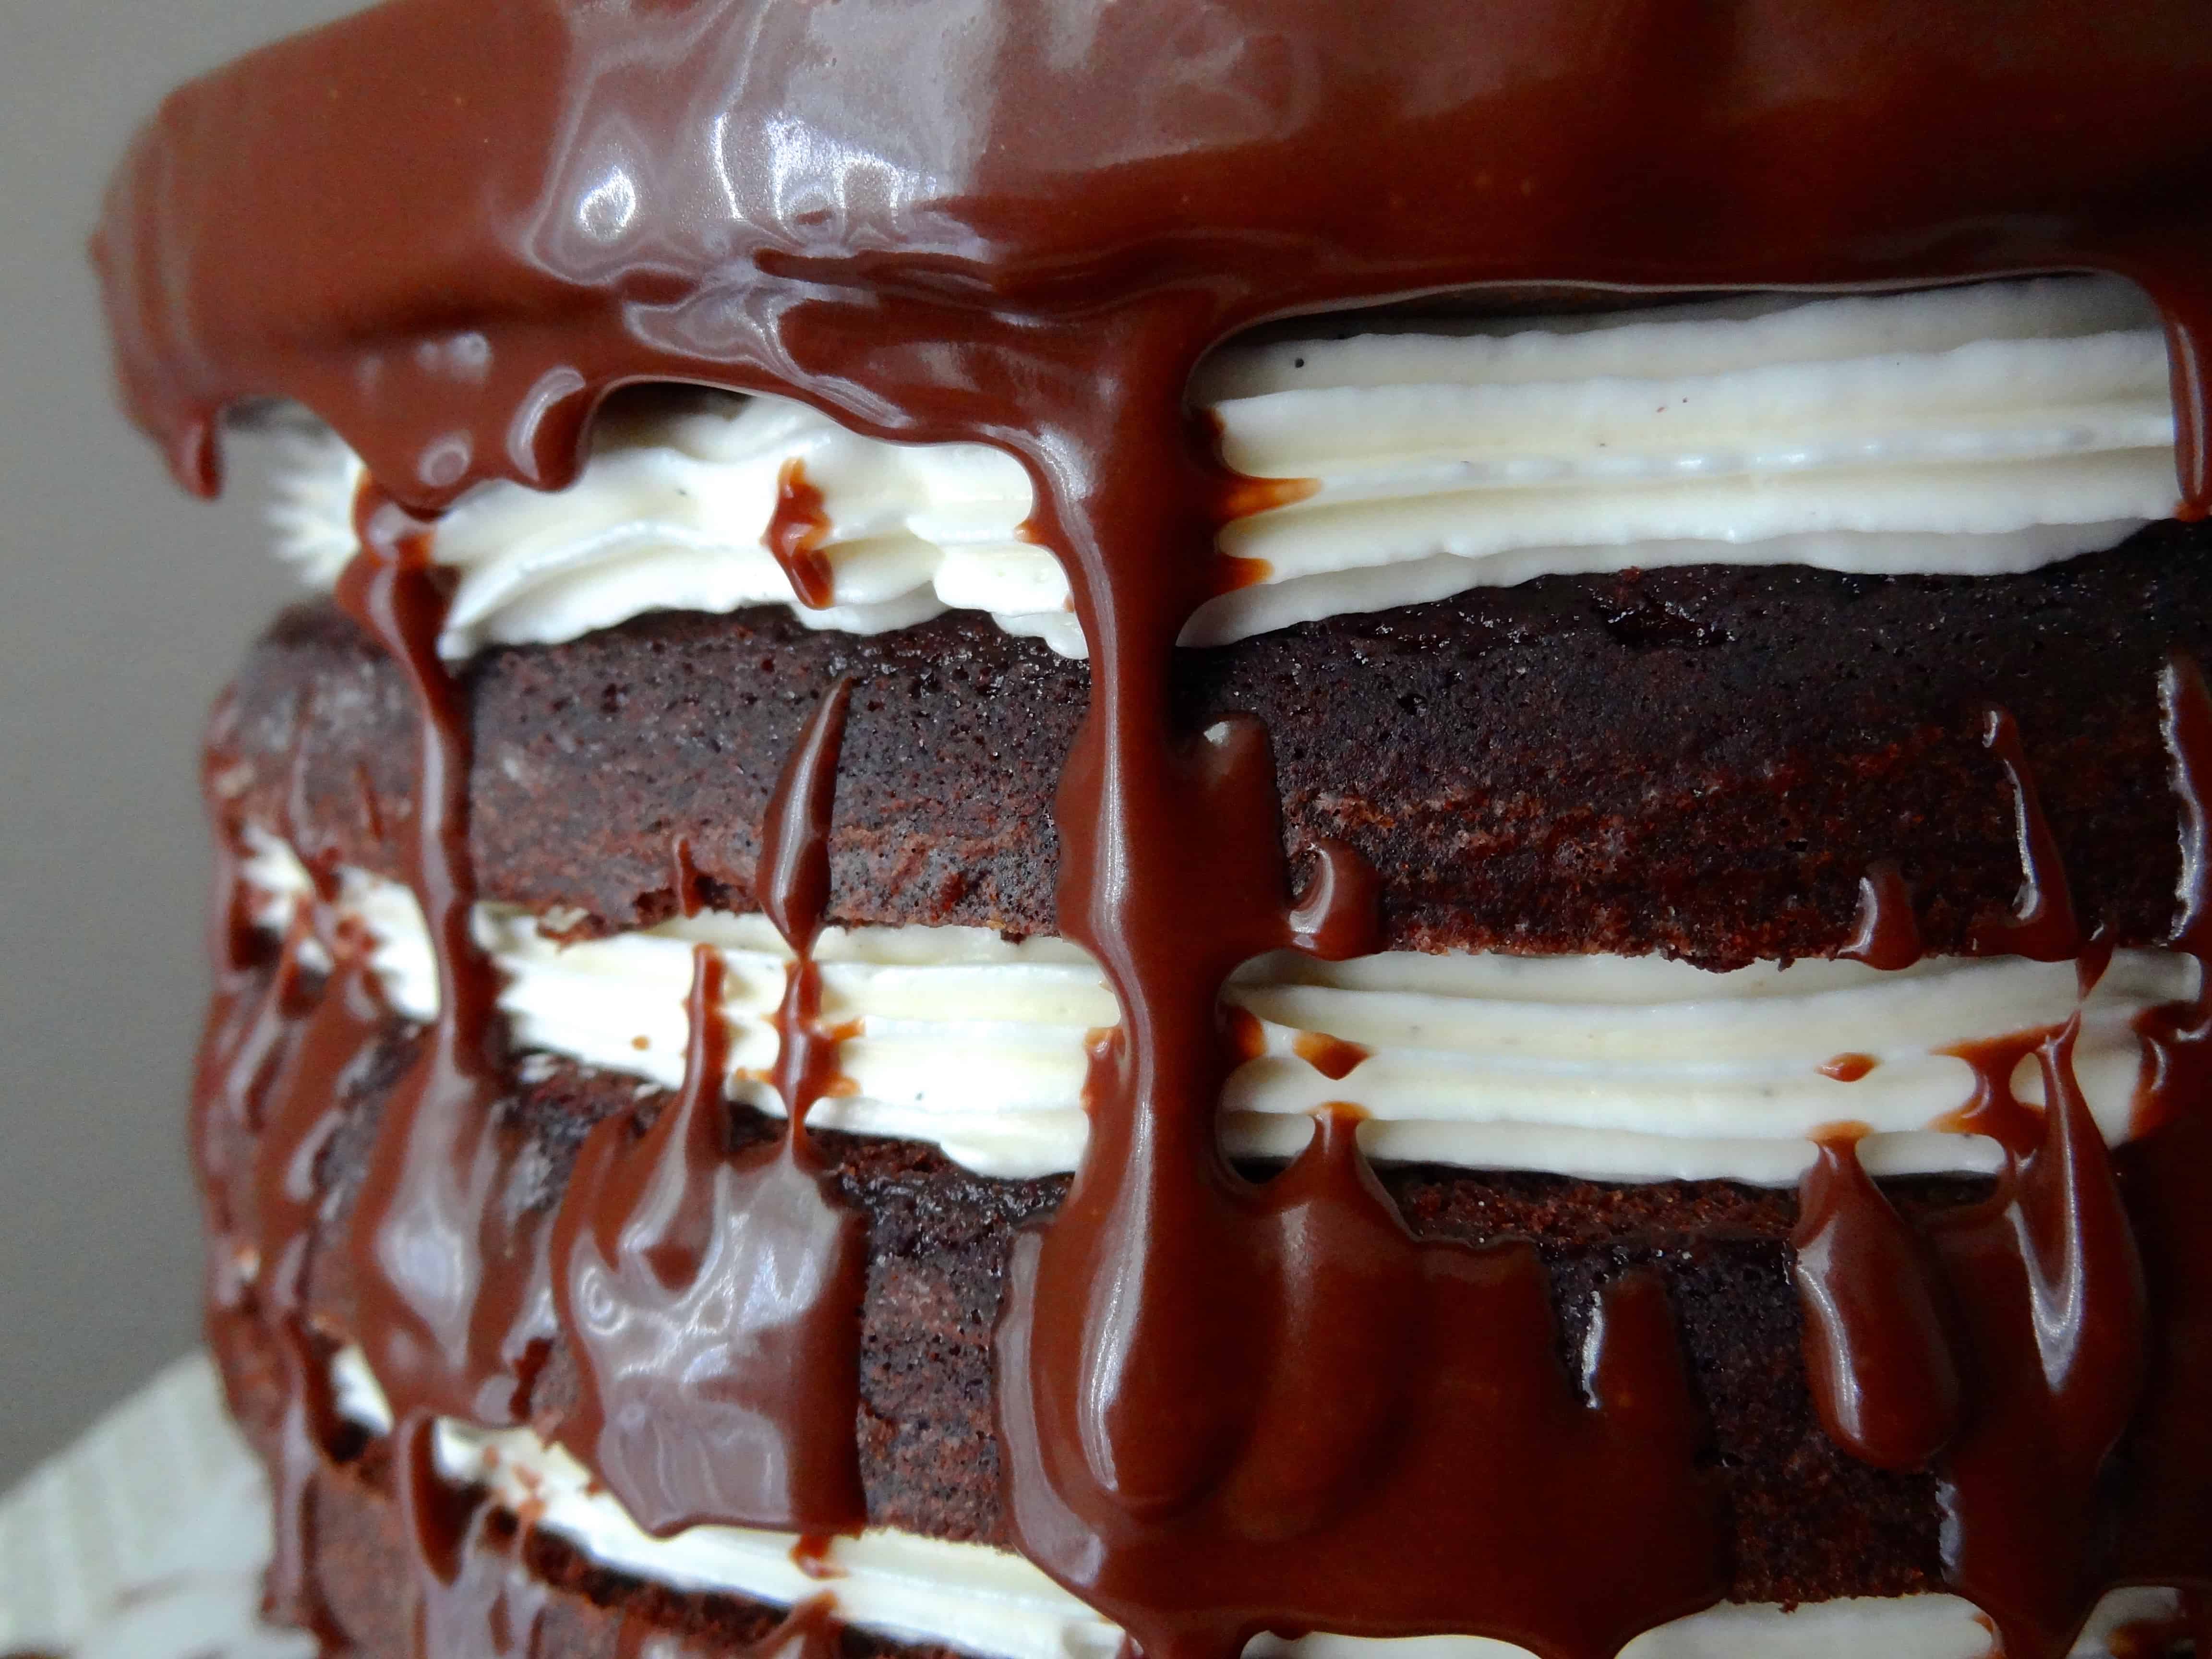
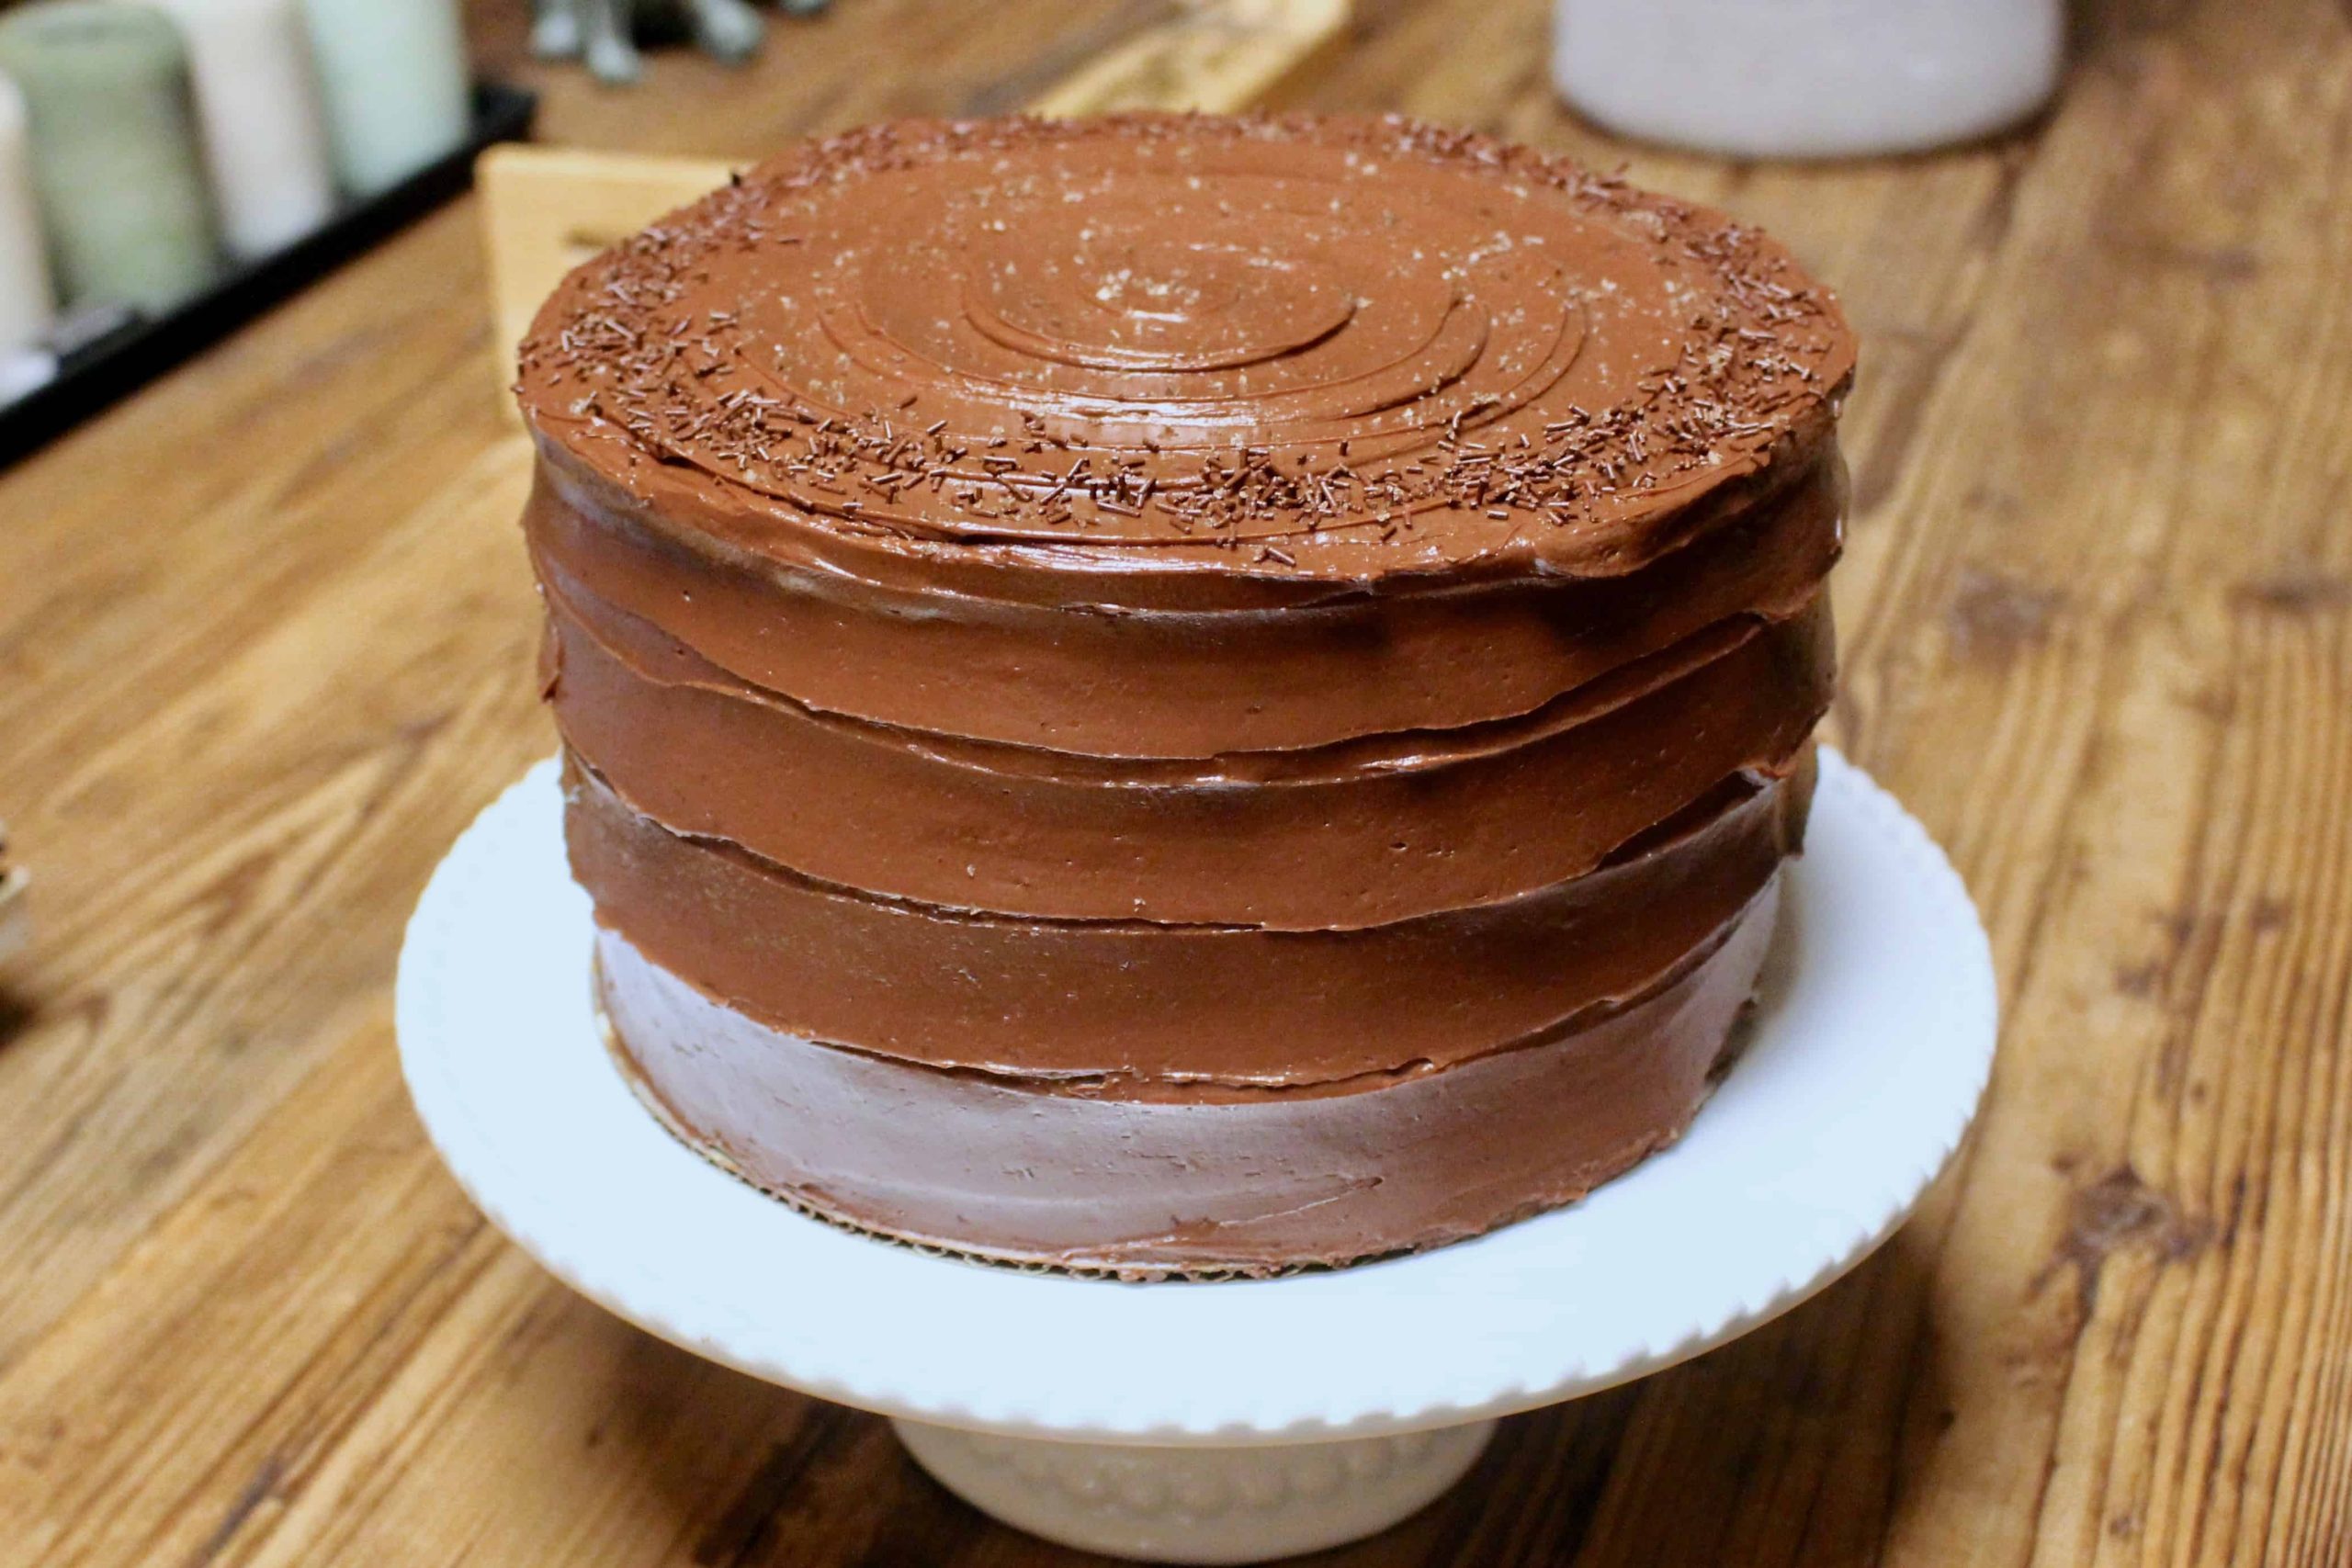
By definition, a recipe with the words ‘mile-high’ and ‘chocolate’ in the title really couldn’t be anything but mind-blowing; at the very least, it certainly got my attention. I had been really looking forward to the Mile-High Chocolate Cake with Vanilla Buttercream from Baked Elements on the Baked Sunday Mornings schedule for some time, and I’m so glad it came at such a time that a) I’m off crutches from my summer ankle surgery, and b) I can bring it to a family Labor Day BBQ to share with awesome people! 🙂 This cake features six thin layers of decadent chocolate cake with silky Italian buttercream sandwiched in-between, and a dark chocolate ganache poured over the top… In other words: GAH!
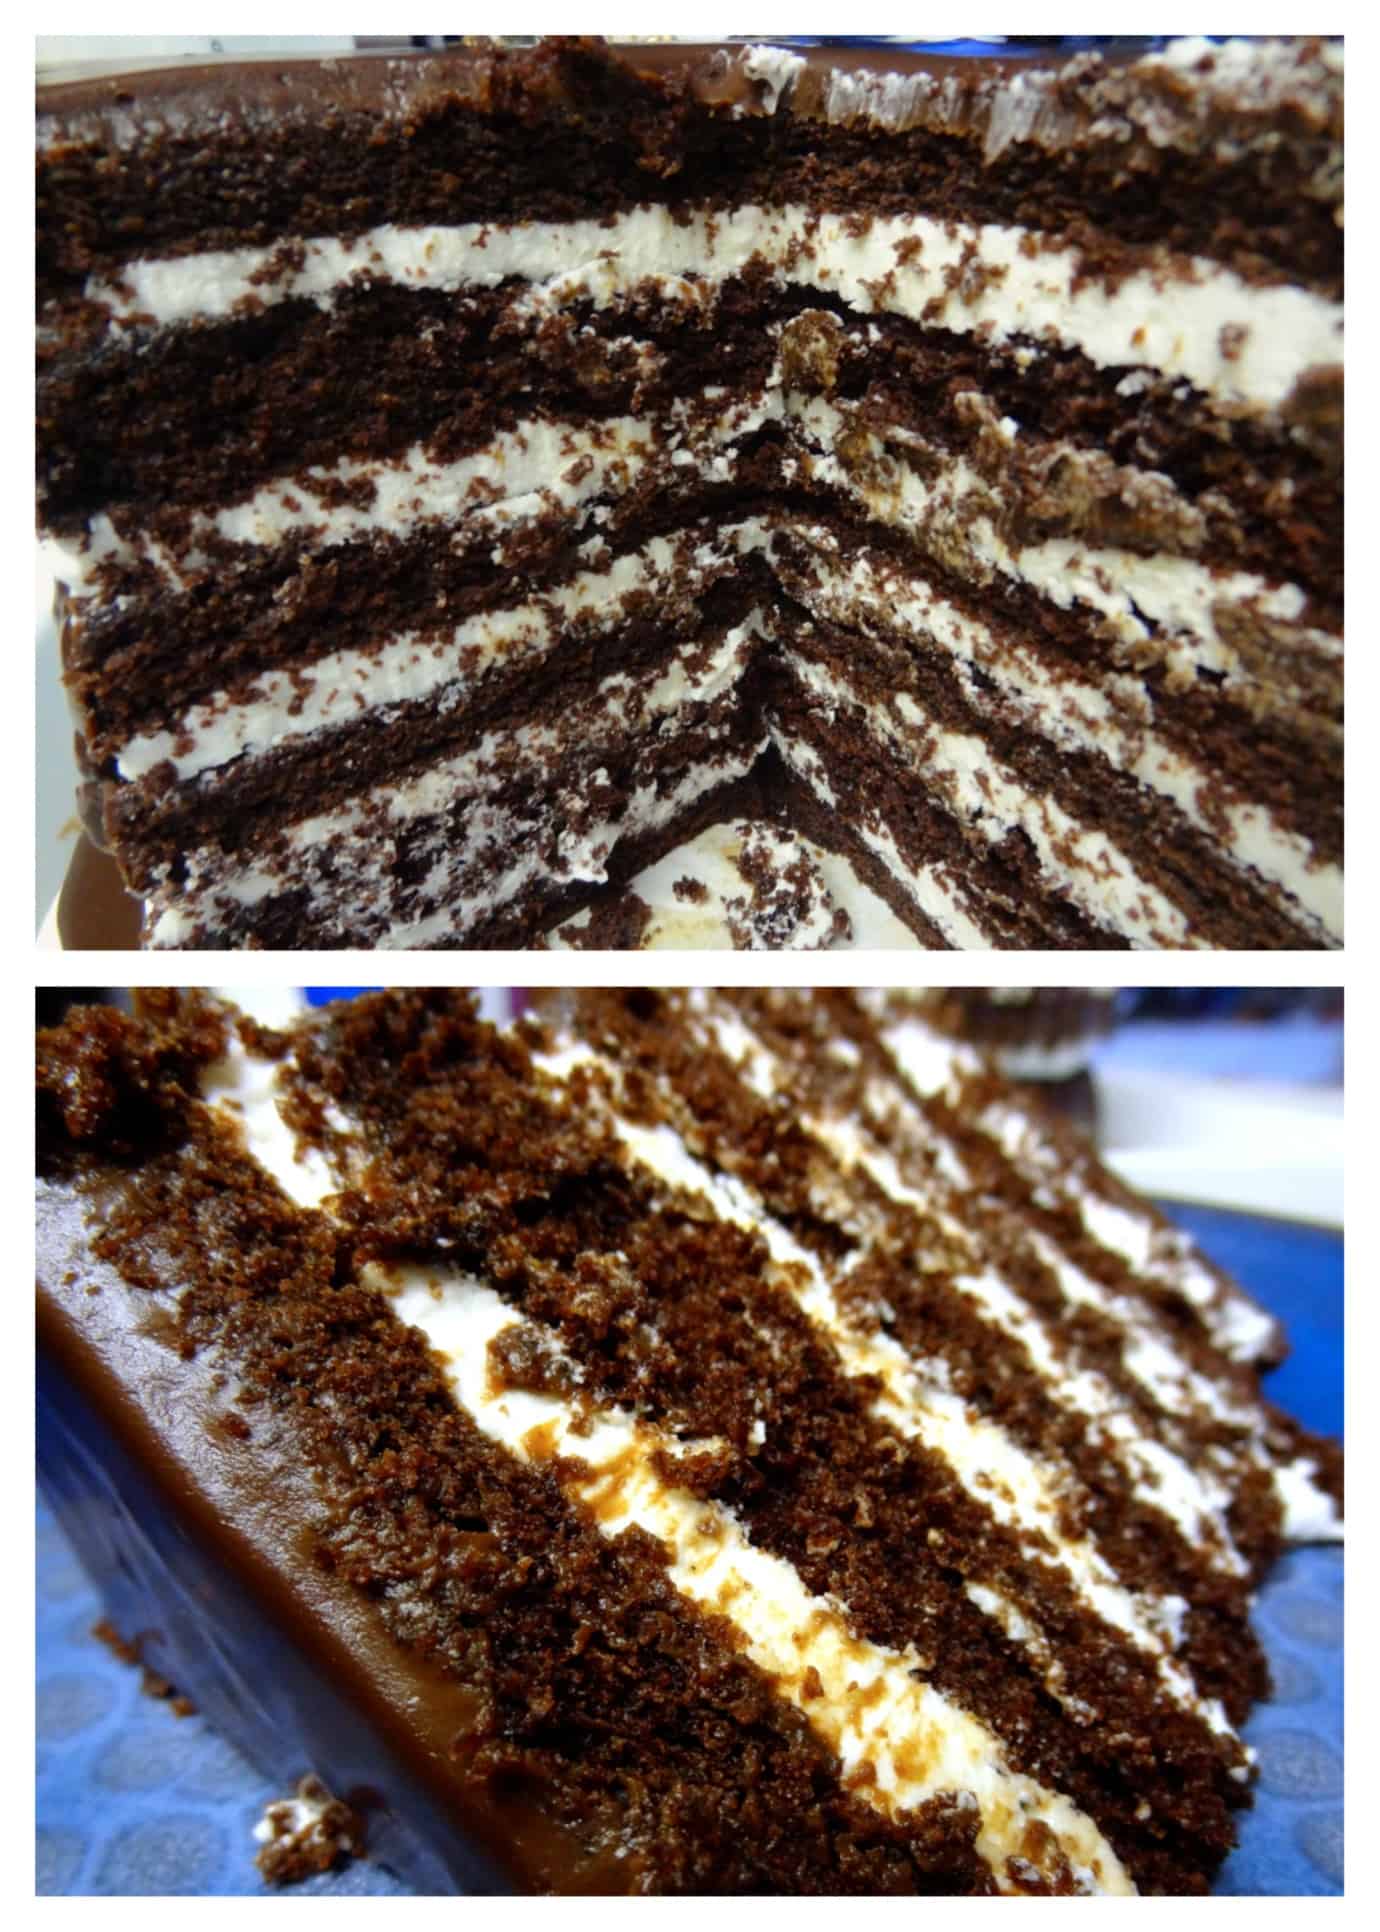
I have made neither a “mile-high” style cake, nor any cake with exposed sides before, so I thought this would be a fun decorating experiment. One of my favorite San Francisco bakeries, Miette, makes a cake in this style (though not six layers high!), which they call “Tomboy“, and I find it so pretty– simple, elegant, and just the right amount of decadence because the ratio of cake to frosting is perfect. I hoped to emulate that Miette style with this cake, so I decided to pipe my frosting around the edges of the cake layers in order to have neat, graceful buttercream layers peeking out between the chocolate cake layers. (On the inside, I just used an offset spatula though– shhh.) I can’t say it looks quite like theirs, but you get the general idea.
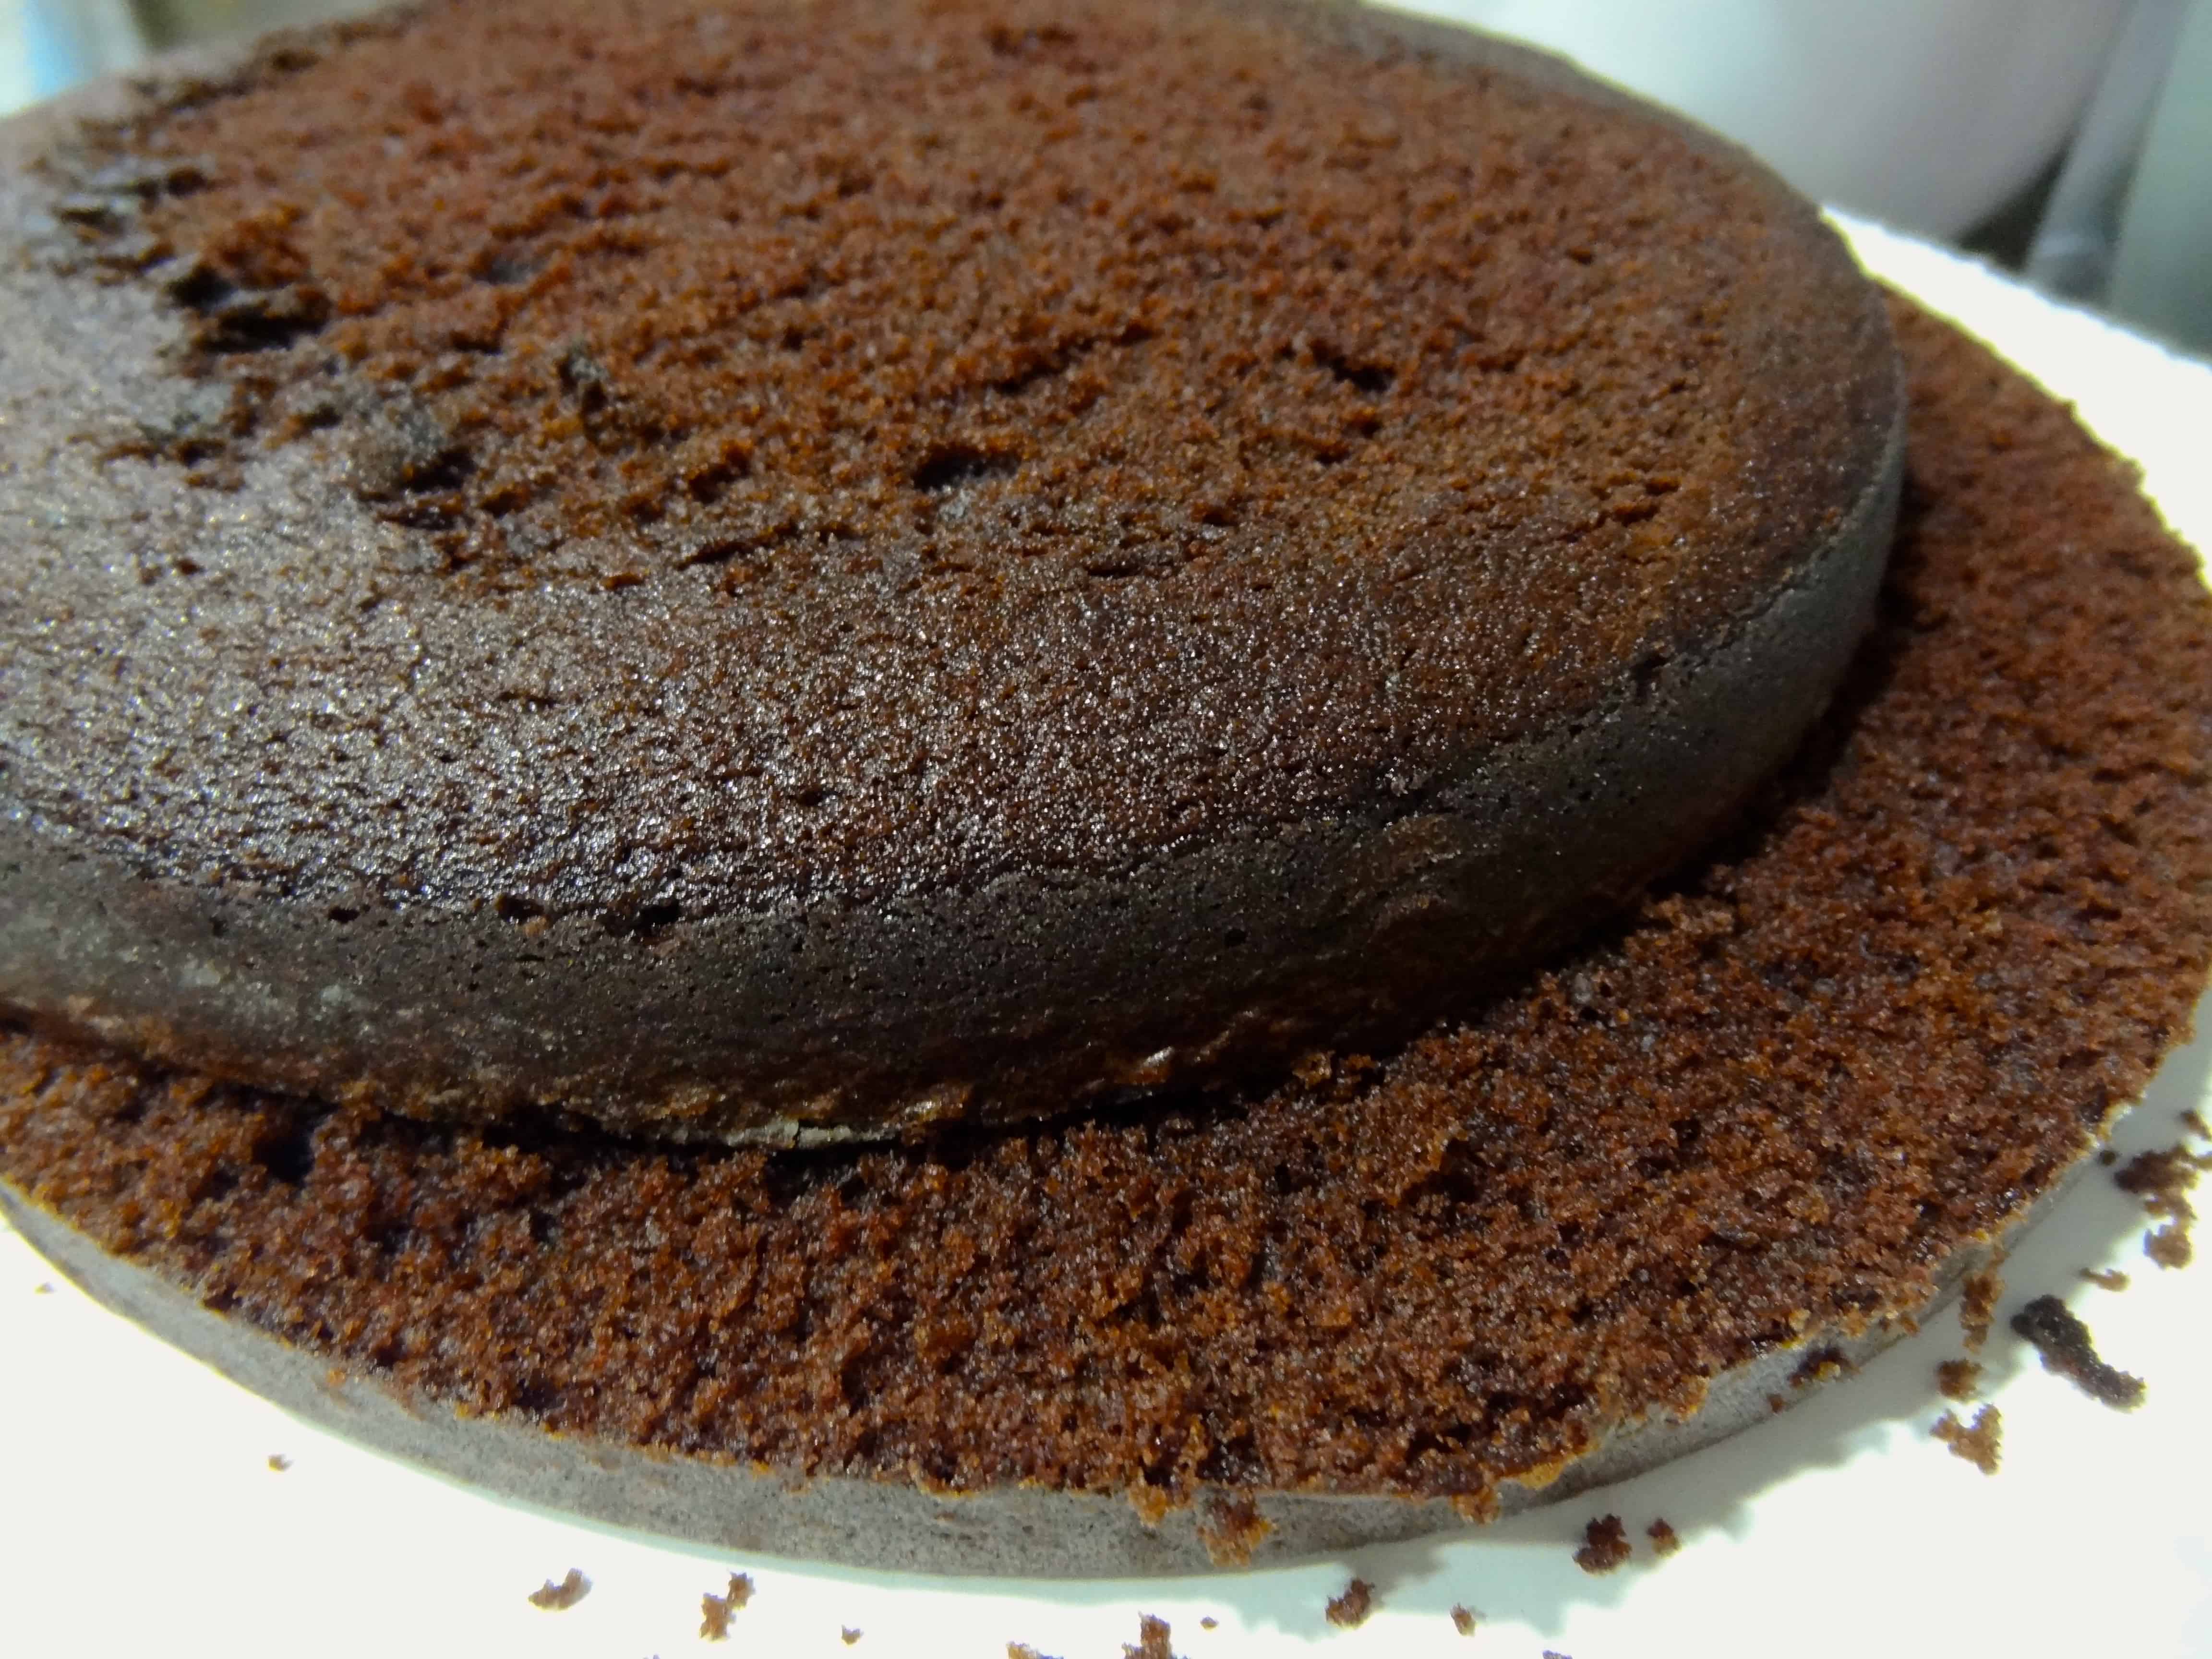
Much as I was looking forward to making this cake, it was not without its problems, but mostly because I took a risk using different cake pans. I haven’t had to re-bake in a while, but sadly, my successful streak ended here. The recipe calls for slicing three 8-inch cake layers in half crosswise (delicate business!), but I decided to implement a slight variation. I’ve been patiently waiting to use my new Celebration Layer Cake pans from Williams-Sonoma, which are designed to bake ultra-thin cakes for just such a layering occasion. Also, they have scalloped edges. Which makes me happy. However, because of the novelty shape, you cannot cover the pan bottoms with parchment circles, so I hoped that since the pans were (allegedly) nonstick, a coating of butter and flour would suffice to prevent the cakes from sticking. More wrong, I could not have been…
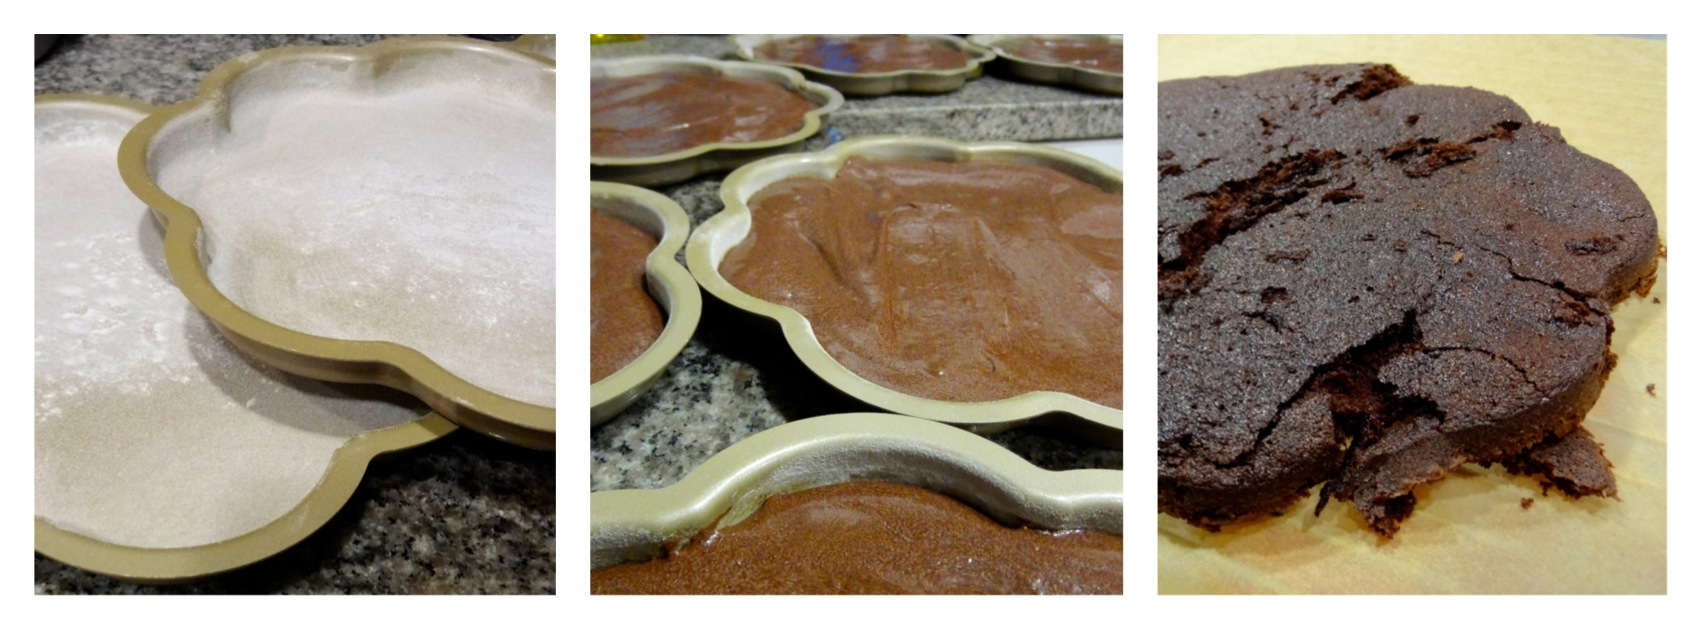
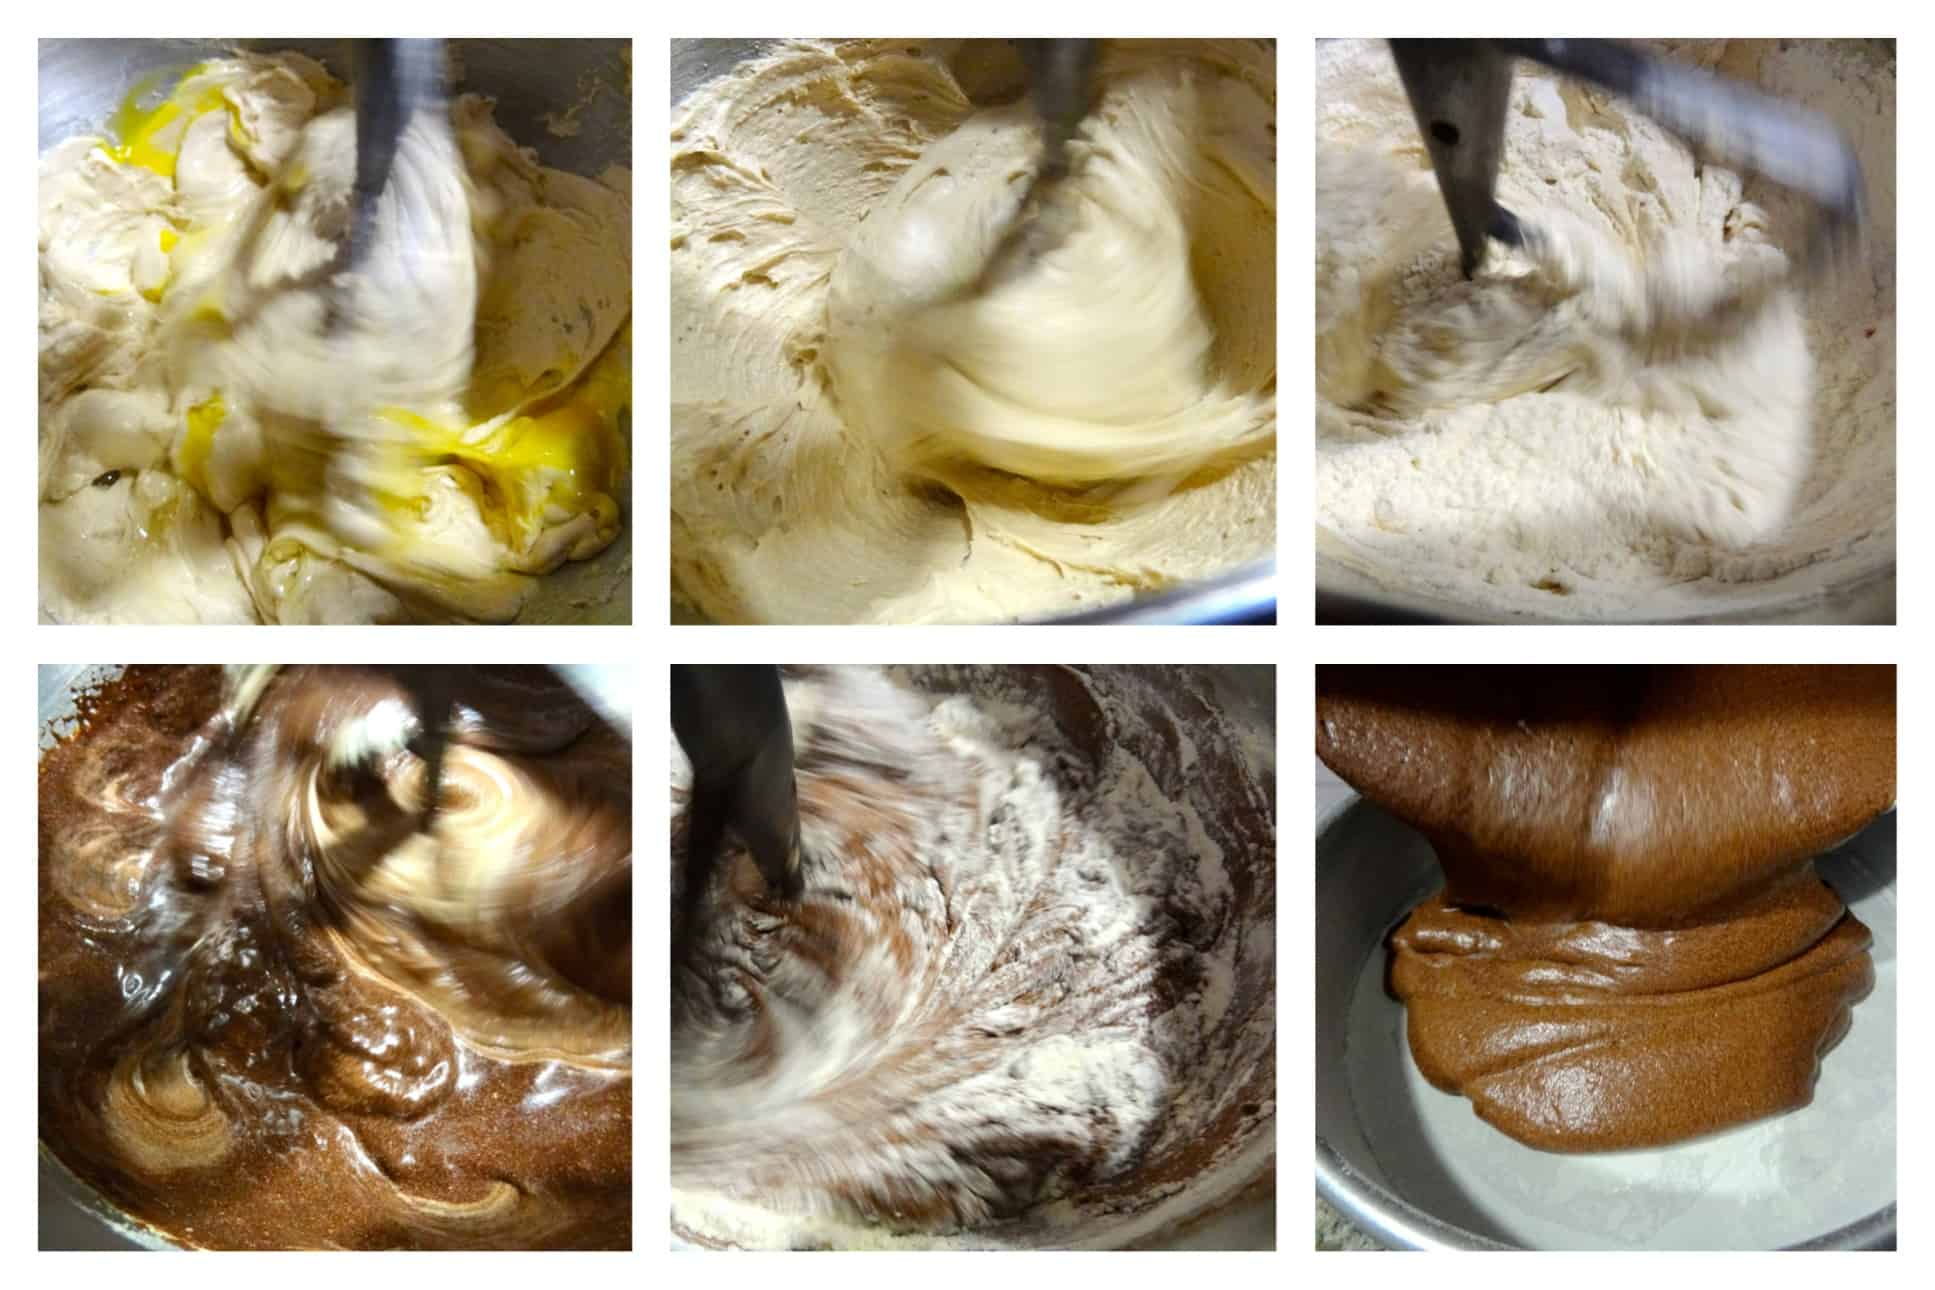
It seemed like a good idea at the time… And so, I set about re-baking for the first time in months, this time using the go-to 8-inch round pans and my trusty parchment! The cake batter is straightforward and similar to BAKED’s other chocolate cakes; start by creaming butter and vegetable shortening, then adding white and dark brown sugars. (I love dark brown sugar in chocolate cakes, as it imparts moistness and enhances the chocolaty flavor. WIN.)
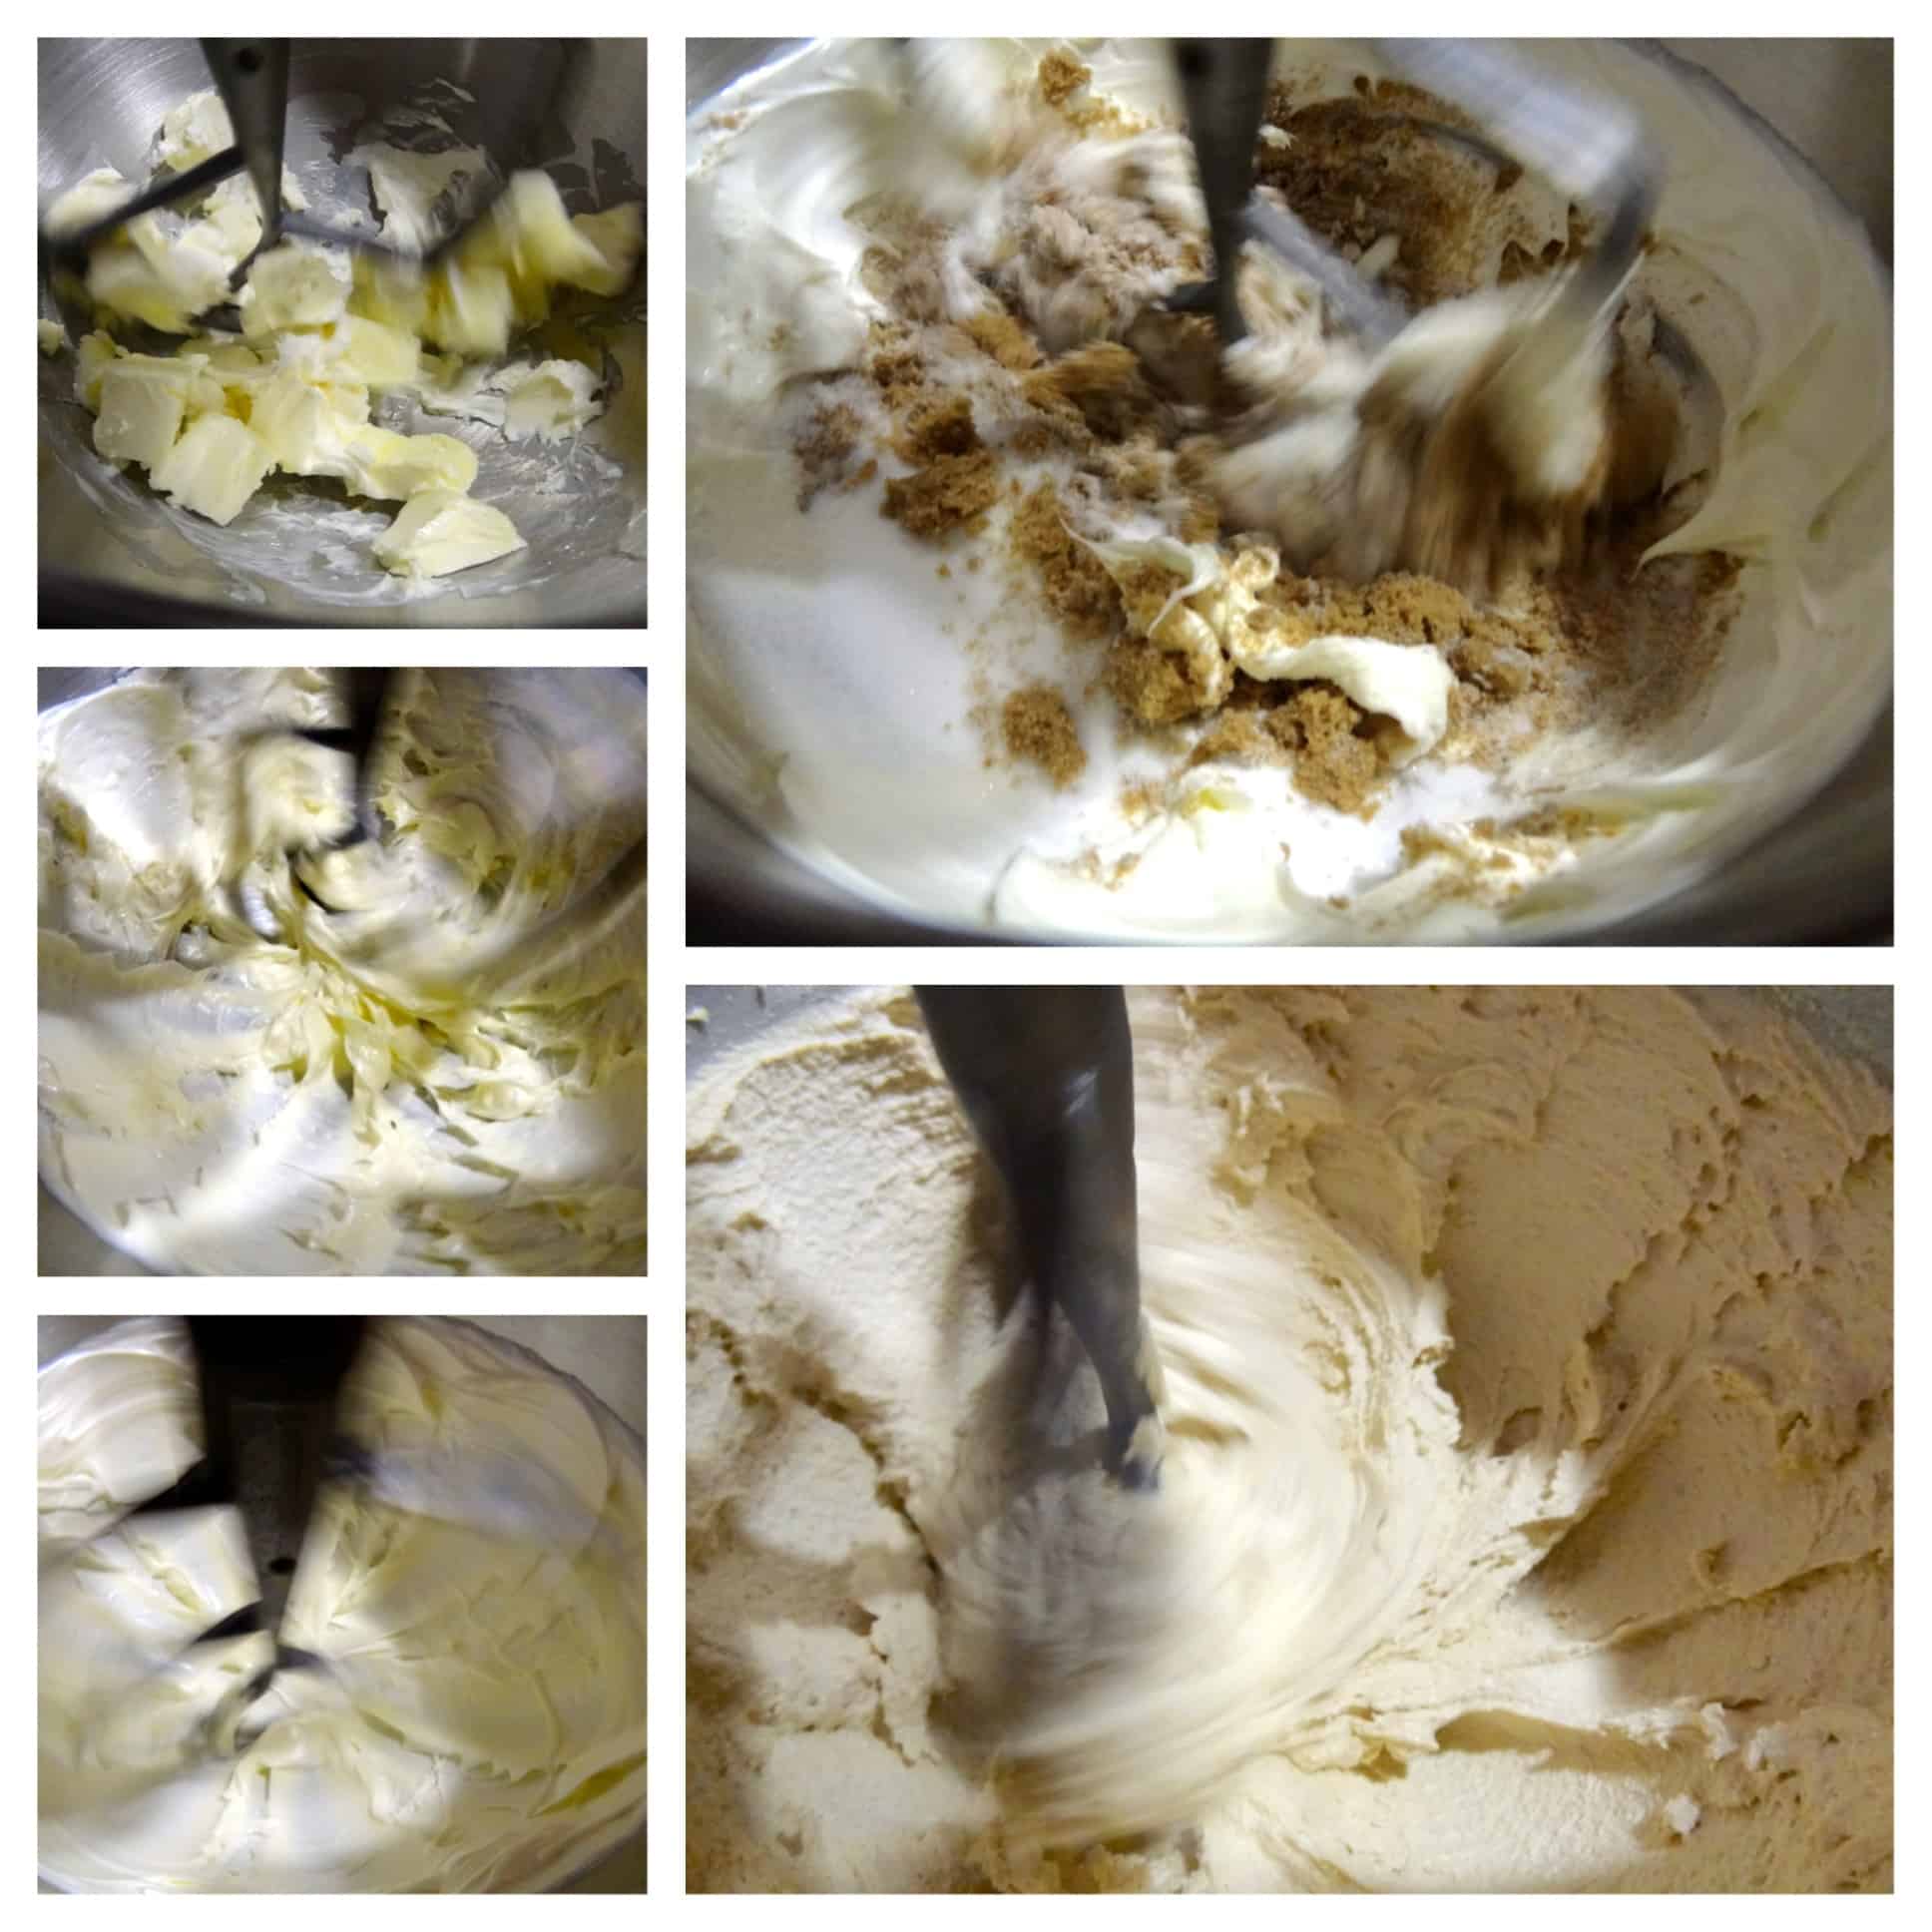
Next come the eggs and vanilla, followed by the dry ingredients alternating with a mixture of cocoa powder, water, and sour cream (made while preparing all the ingredients earlier). My BAKED chocolate batters usually look like they are grainy or not emulsified, so I tend to worry as I’m putting them in the oven, but my concern was all for naught, as the cakes baked up beautifully in 36 minutes. Once they cooled, I popped them in the freezer for easier cutting and handling, and this helped a great deal on the next step.
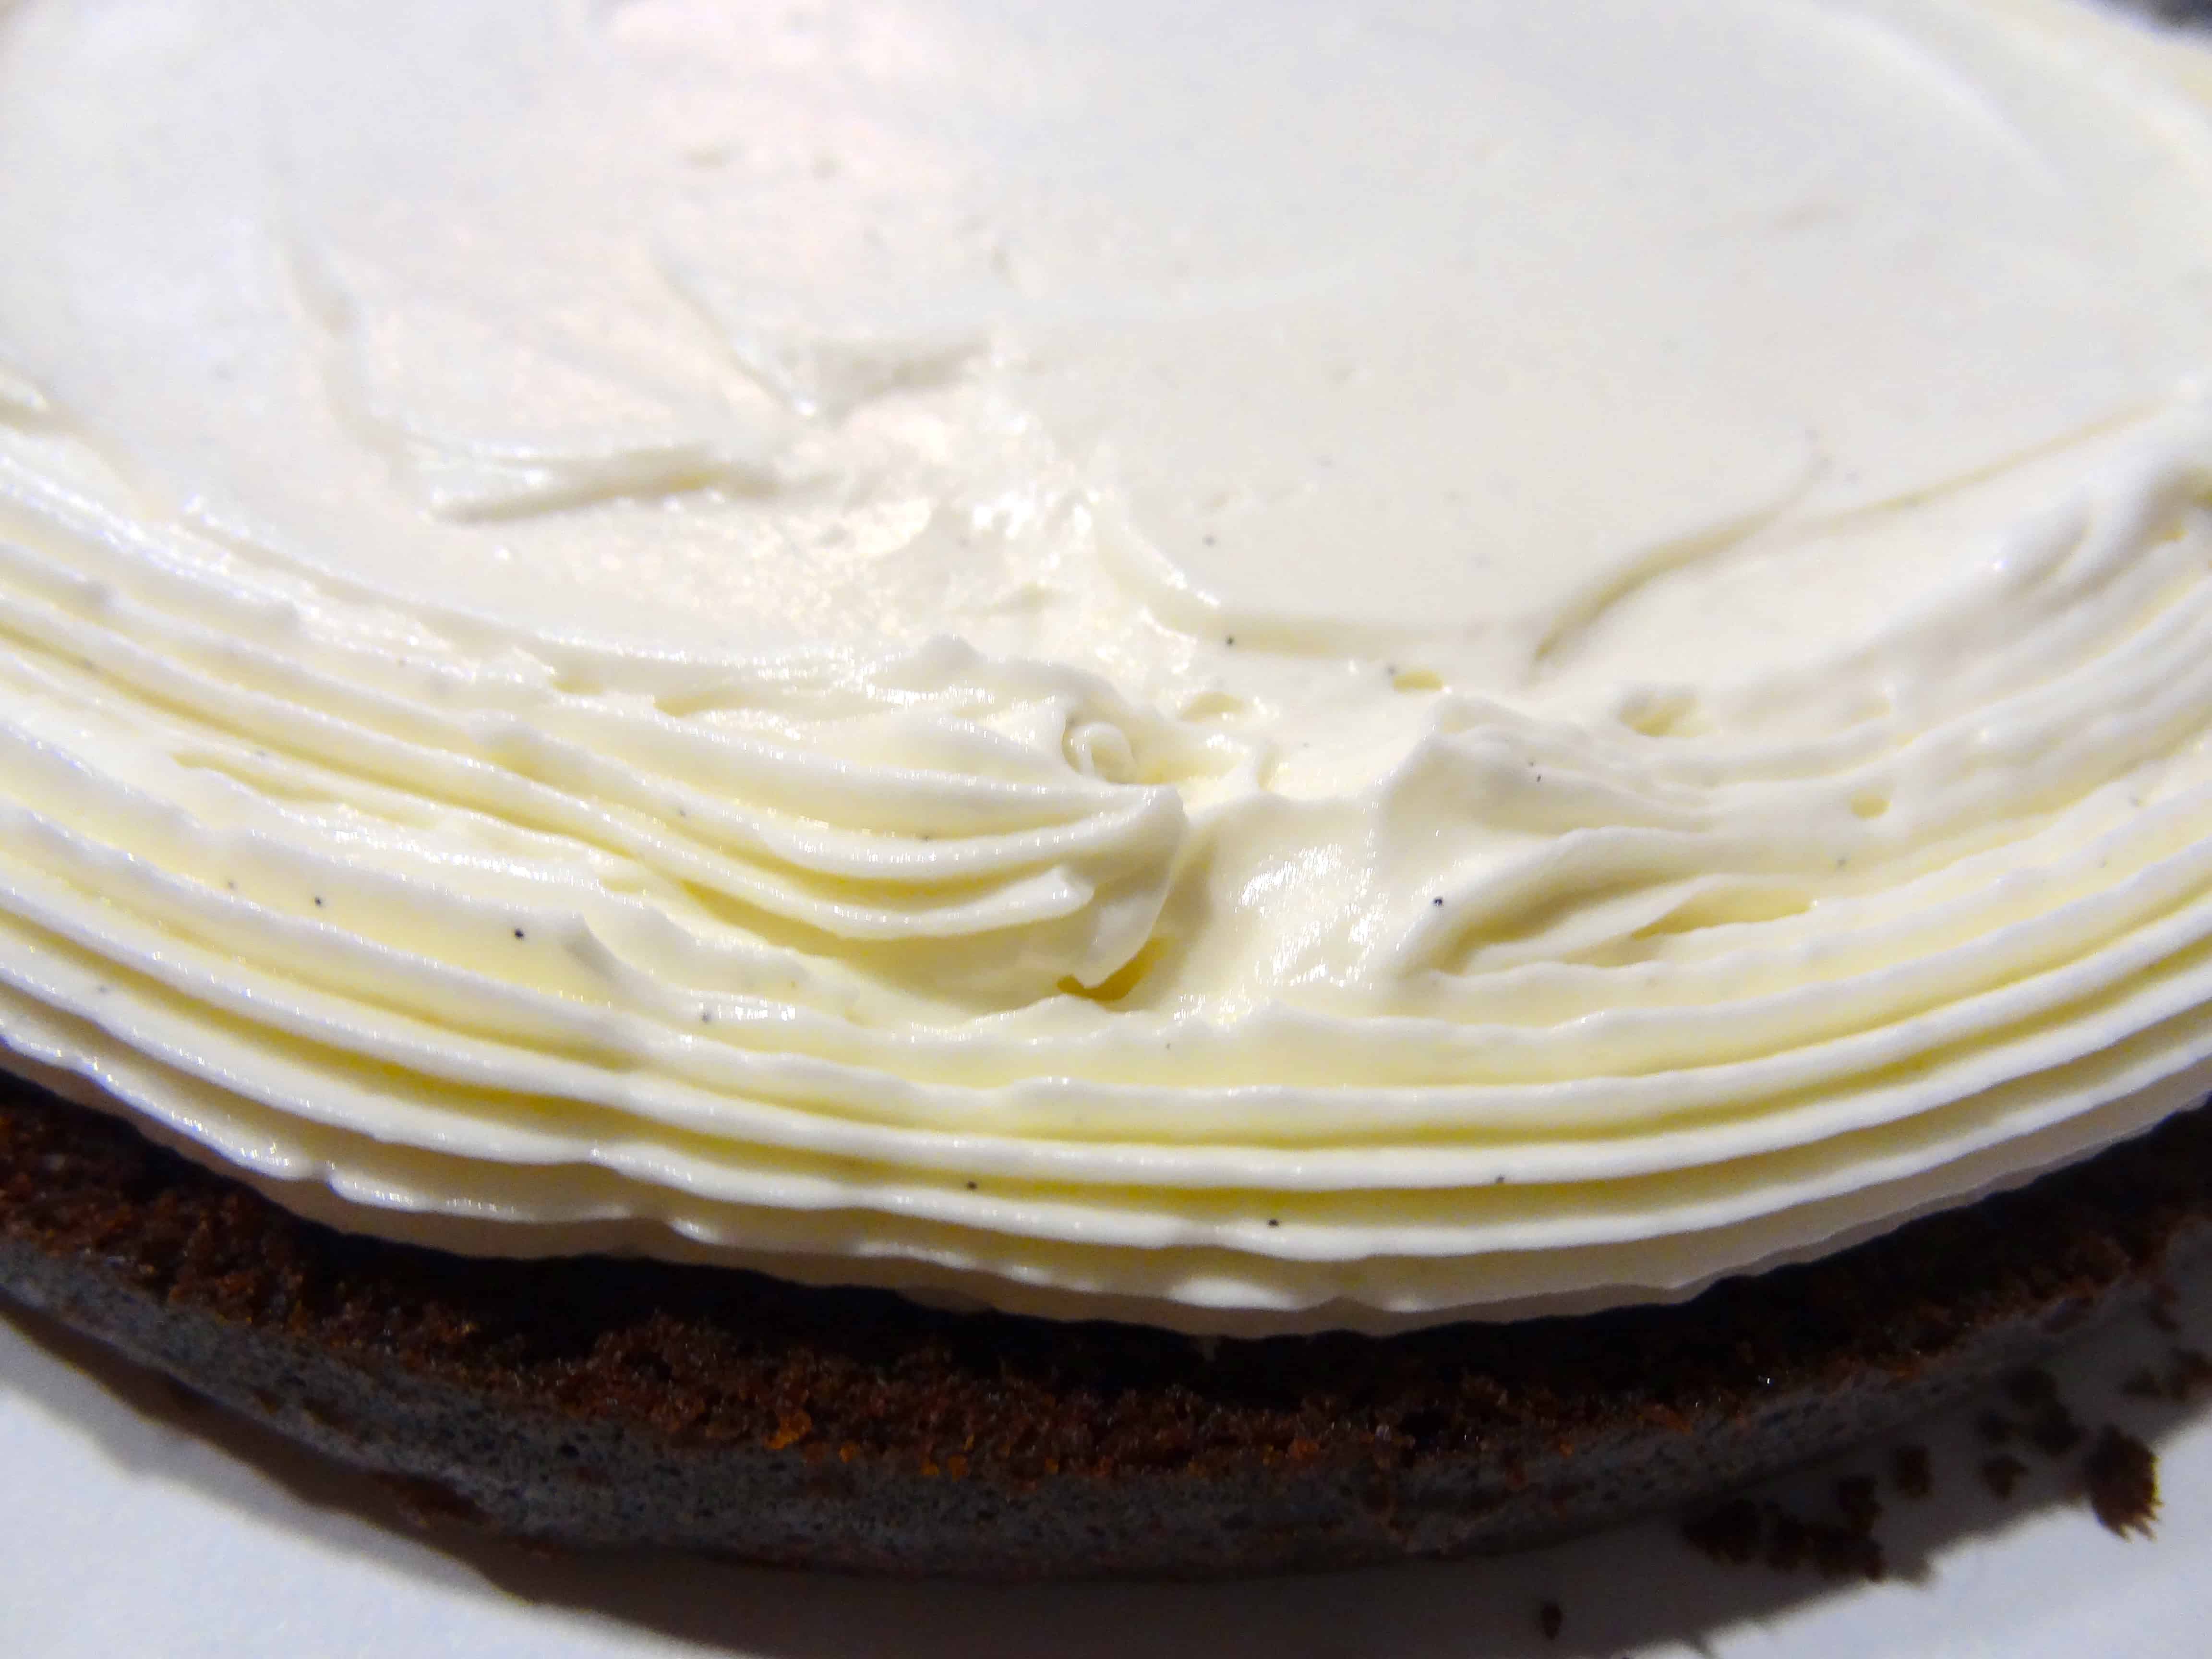
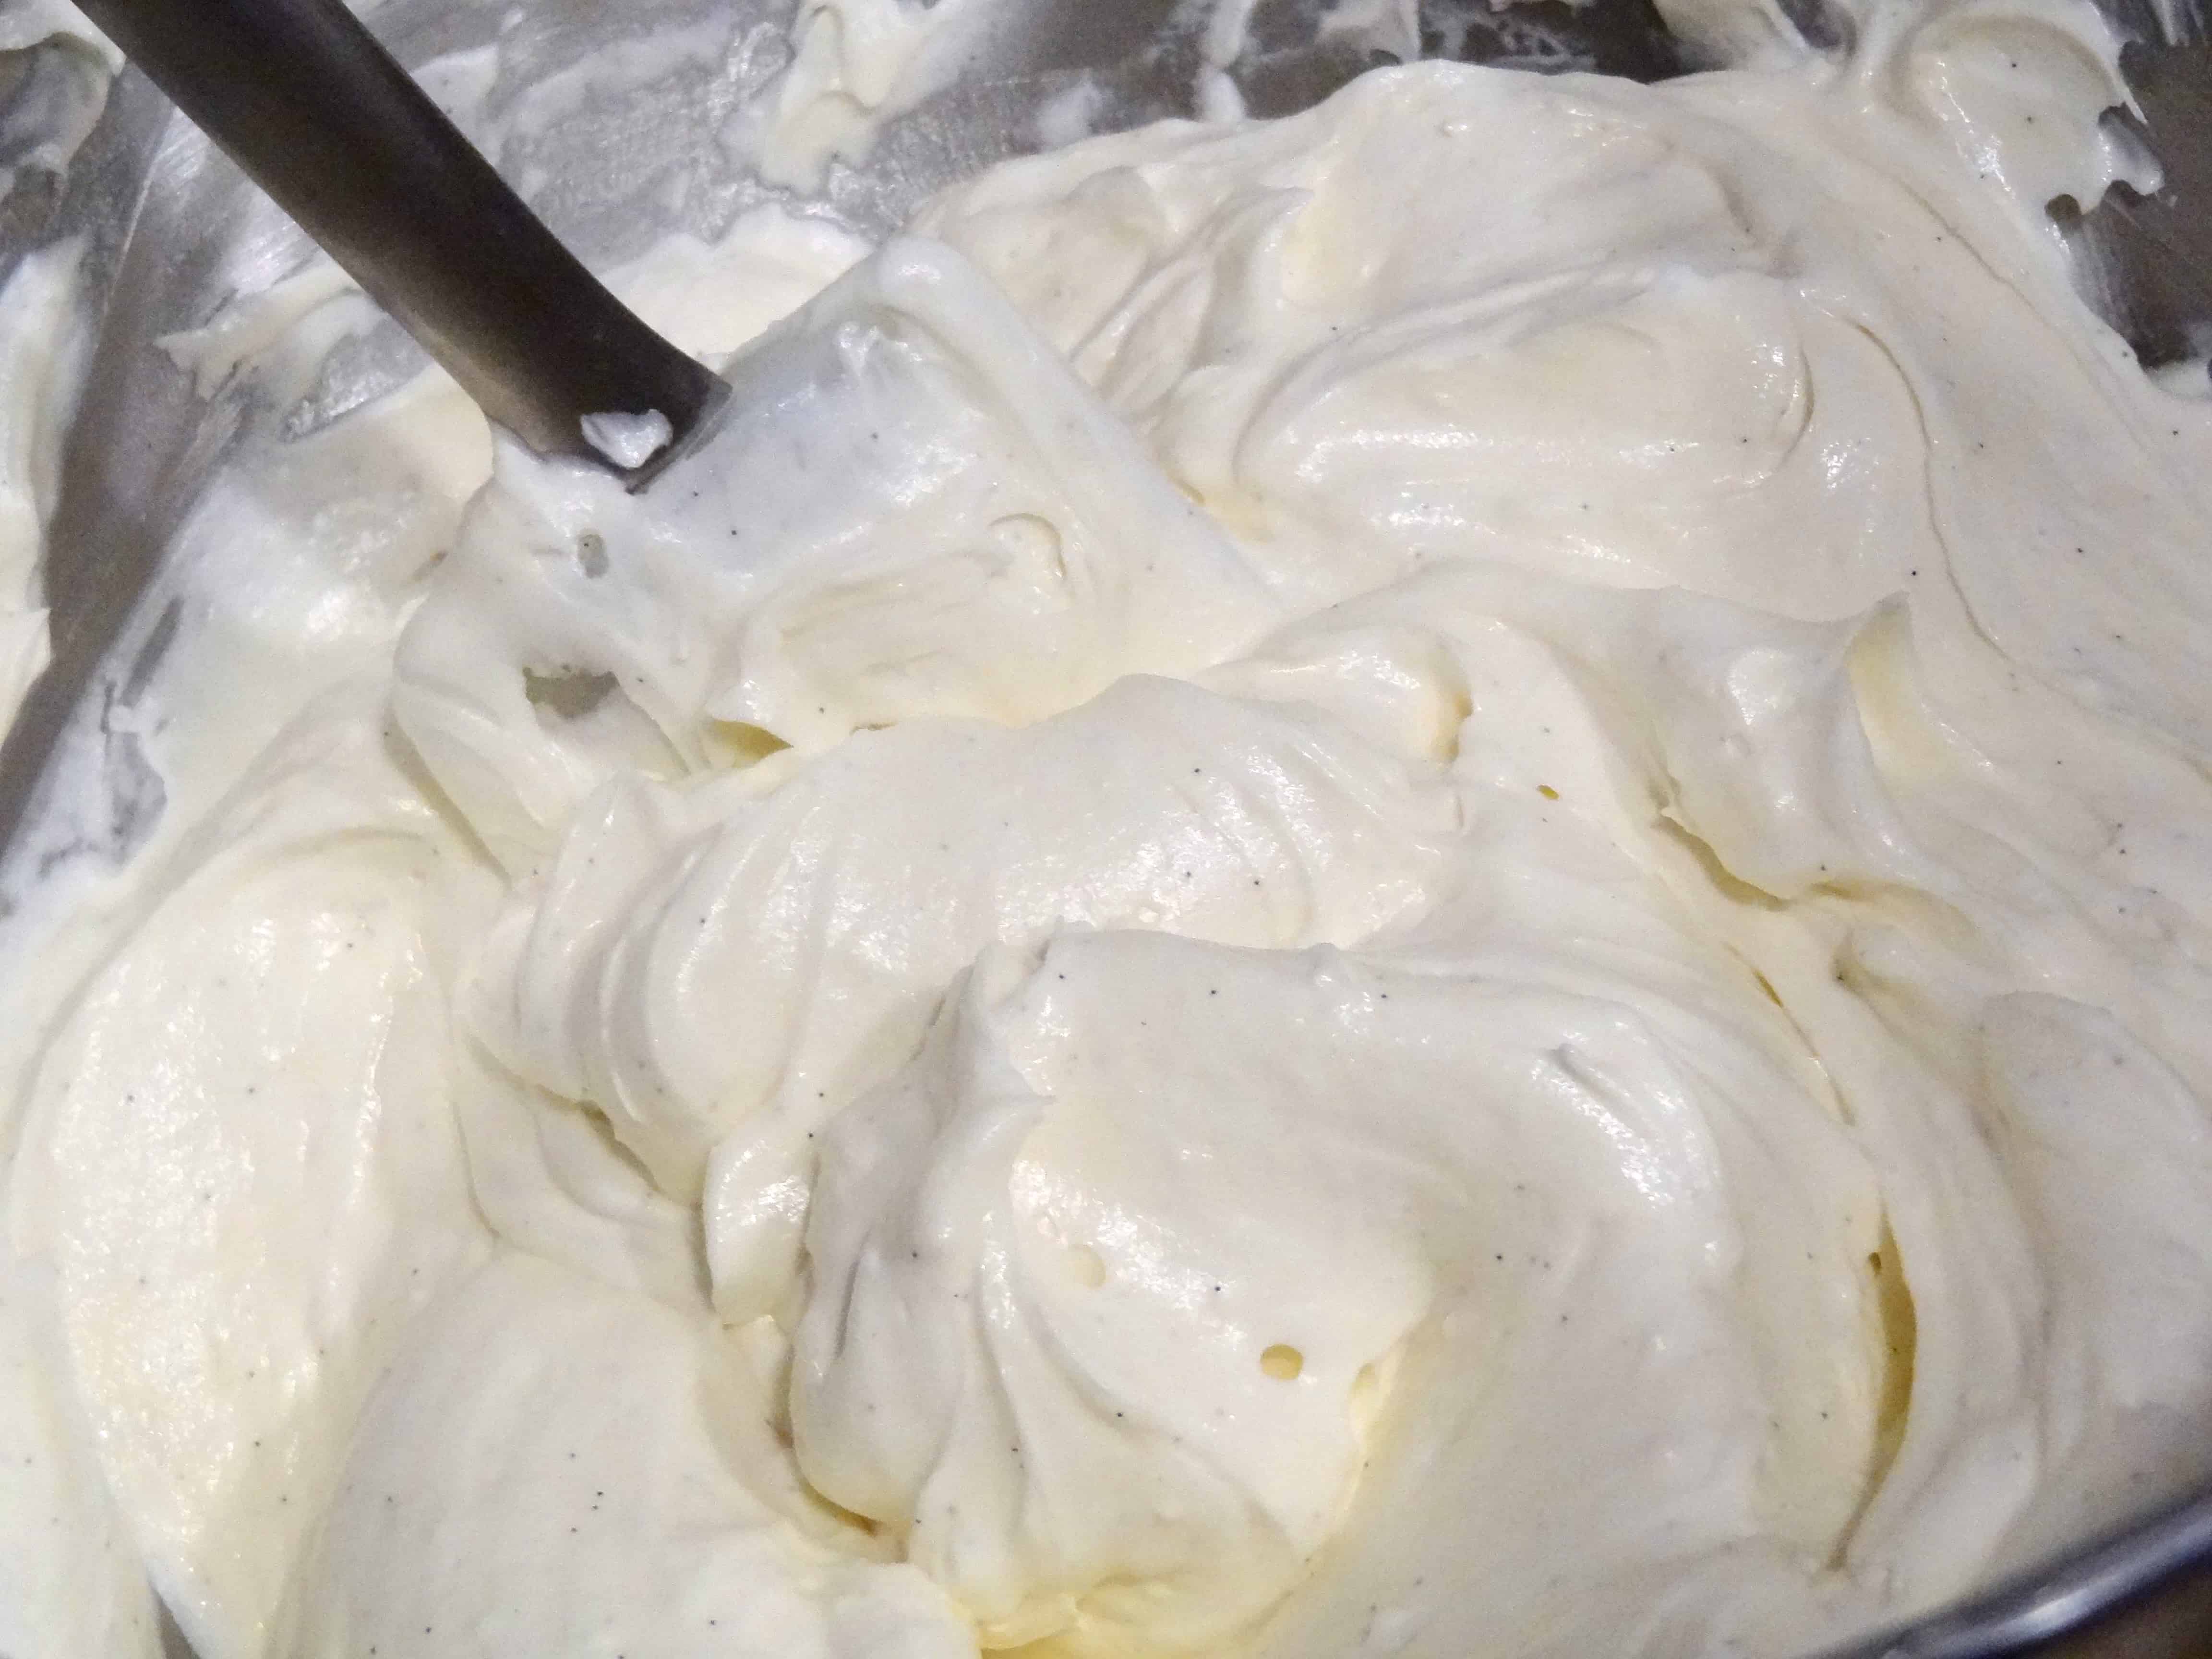
I have made Italian buttercream several times in the past, but not recently, so I was excited, yet also a little nervous, given my trials and tribulations with BAKED frostings (though I think I’ve come to the light at the end of the dark frosting tunnel). This is the real deal when it comes to buttercream; what we often call “buttercream” is not actually buttercream– in other words, that obscenely sugary stuff blanketing supermarket cakes and cupcakes is not buttercream. “American” buttercream is simply a mixture of confectioners’ sugar, butter, a little milk, and flavoring– no cooking involved. True buttercream is made with egg whites, like meringue, and one must cook either the egg whites or the sugar, depending on whether you are employing the Italian, French, or Swiss method. This recipe is the Italian version (my favorite), which involves cooking a sugar syrup, then slowly pouring it into the egg whites as they are beating in the mixer. The hot sugar “cooks” the egg whites, and the mixture will soon turn into a white, billowy cloud of buttercream ecstasy before your eyes. Where American “buttercream” makes your teeth ache with its saccharine-sweetness and discernible sugar granules, Italian buttercream is not terribly sweet and its light, ethereal texture is like satin on your tongue…
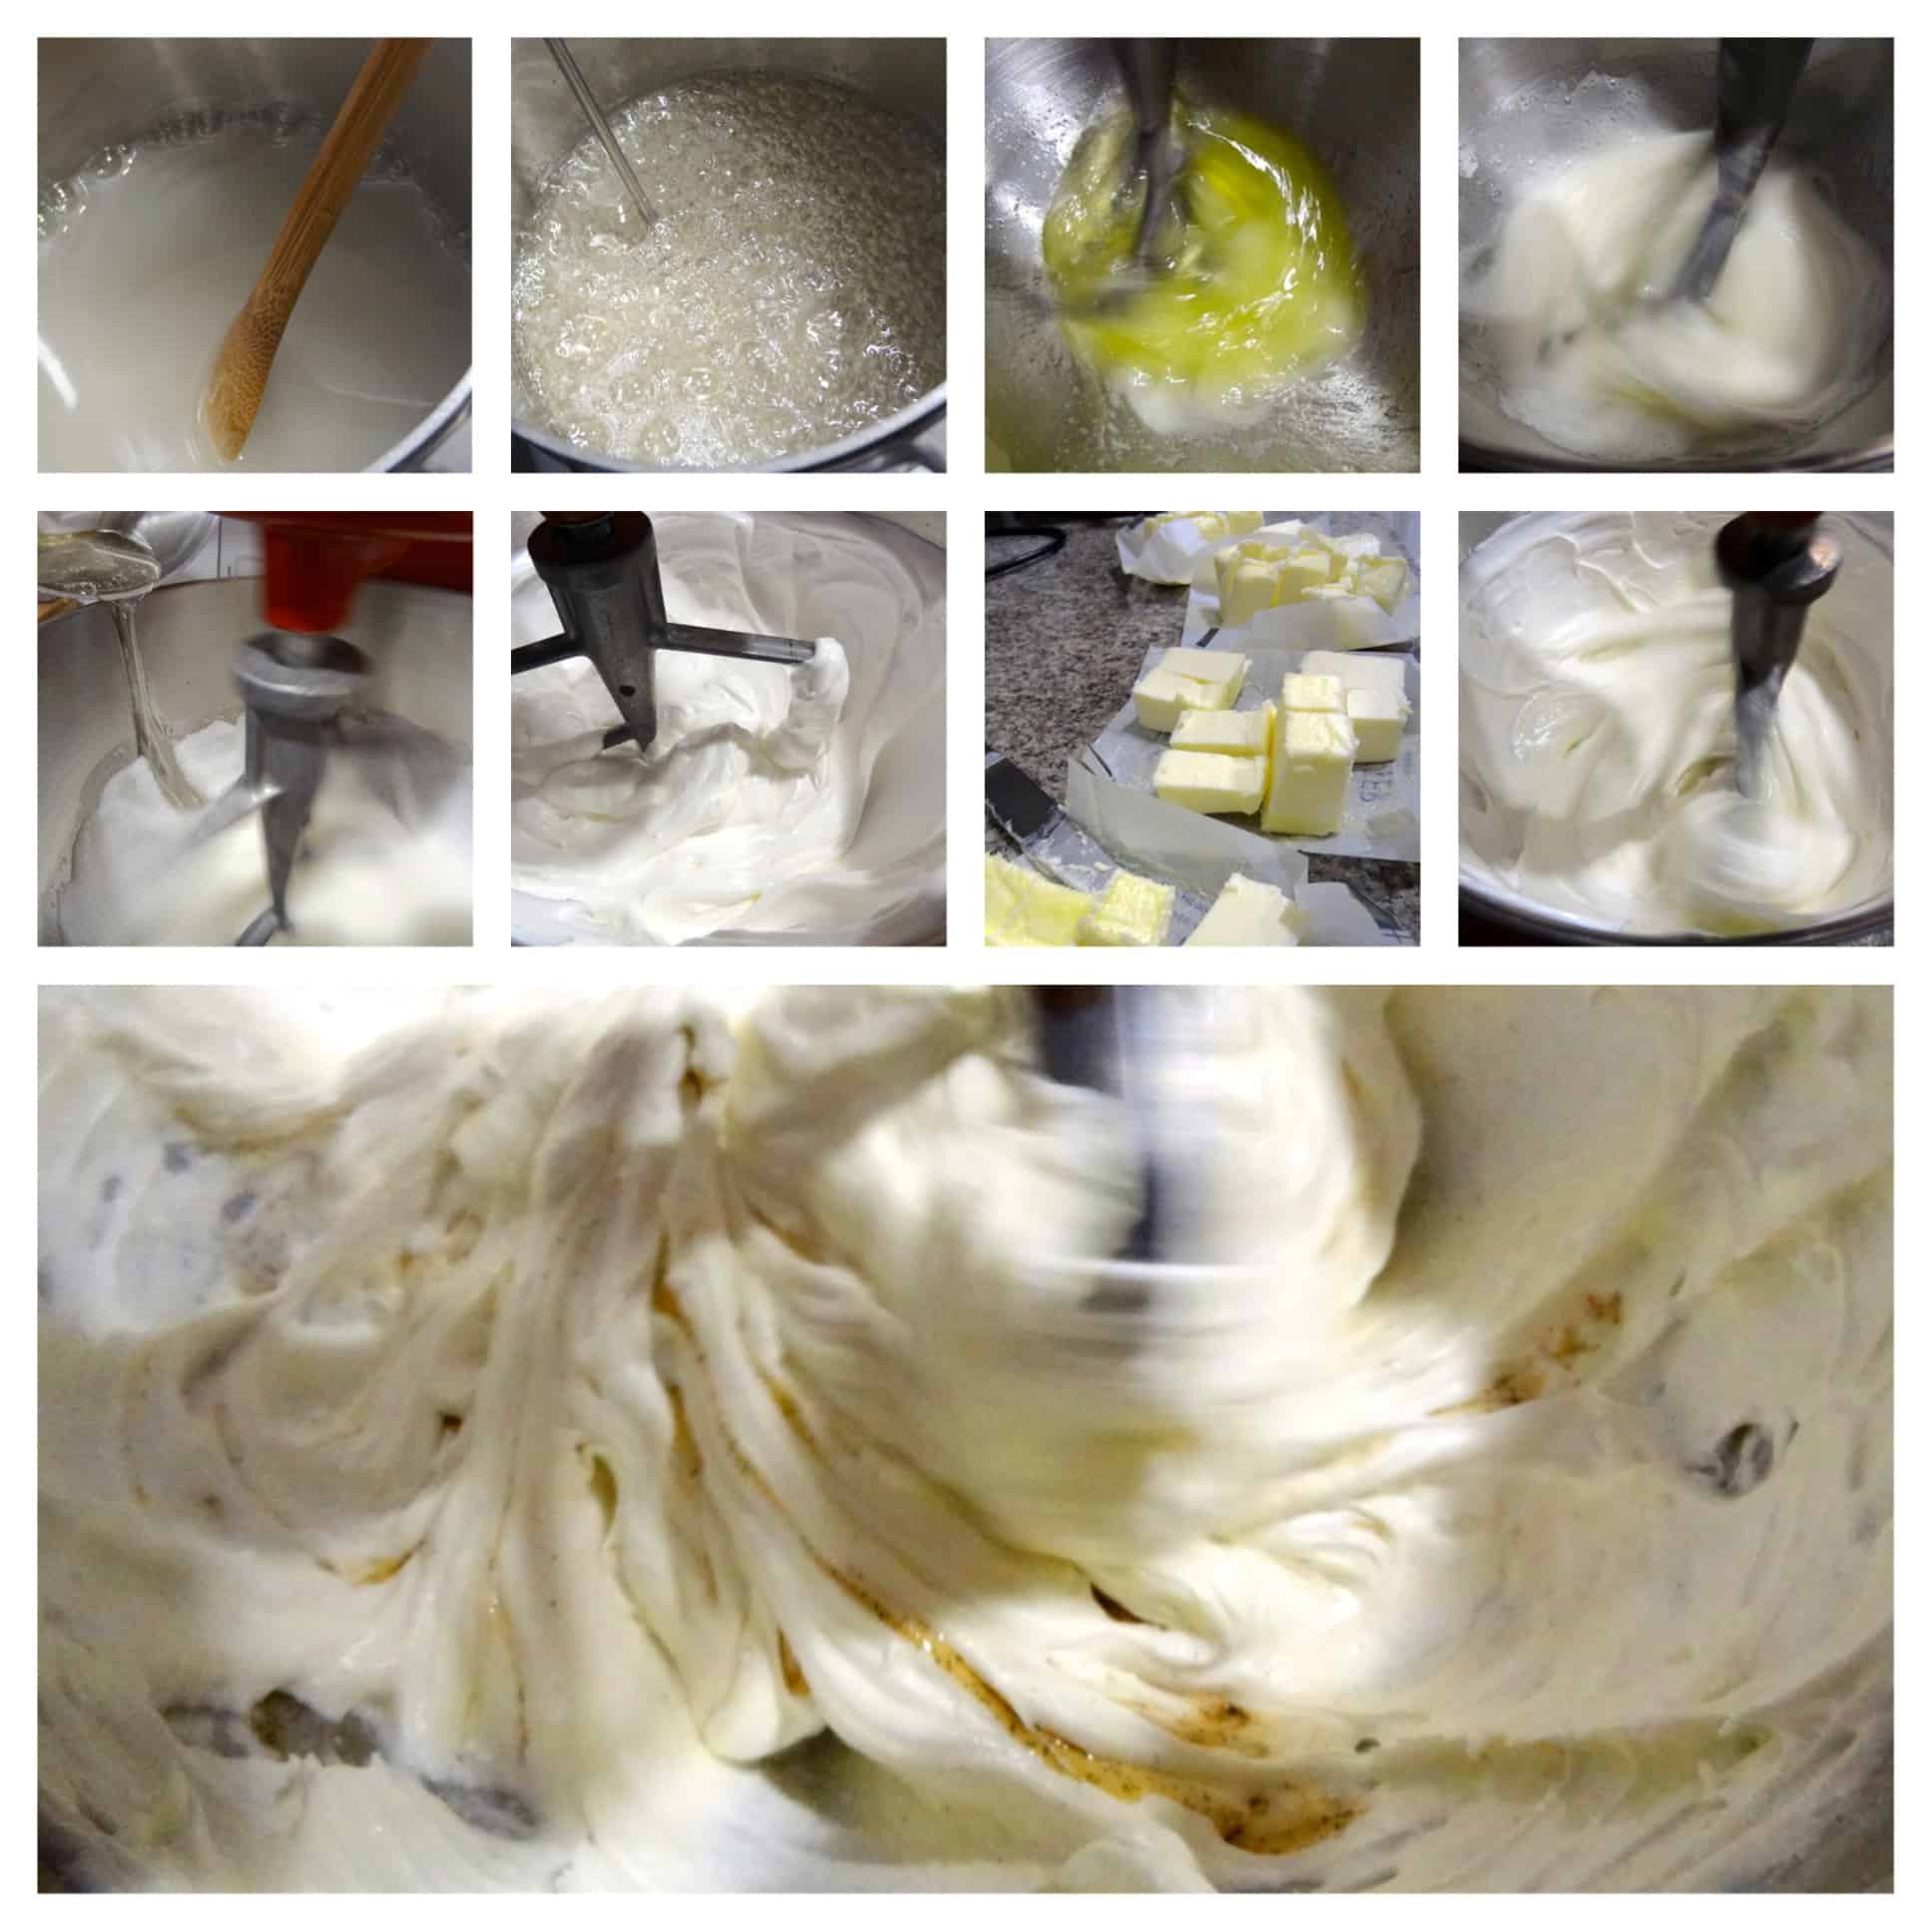
While minor, I did have a “breakage” issue with my buttercream. The sugar syrup and egg white steps were uneventful, and my bright white meringue was most pleasing. However, somewhere along the way while adding the FOUR STICKS of butter (yep, that’s a full pound), the mixture started to look curdled. Mind you, it’s typical for buttercream to go through stages– the meringue will deflate and become a little soupy, then you’ll see noticeable ribbons again as it builds volume, and yes, sometimes it falls apart. But BAKED’s instructions were spot-on: If the frosting breaks, warm the mixer bowl over a pot of simmering water for several seconds while whisking to lightly rewarm the mixture. Then put it back on the stand mixer and beat on high for a few more seconds. The buttercream magically came together, and all was well with the world. 🙂
I thought I would be skipping the cake-splitting step, but at least this way I got to practice my skillz. The recipe recommends freezing the cake layers so they are sturdier during handling, and I also utilized a technique that I learned years ago in a cake decorating class. This is easiest on a cake decorating turntable: Using a long, serrated knife (such as a bread knife), position the blade horizontally in the center of a cake layer and make a shallow cut all the way around the cake by slowly turning the table. (You can essentially keep the knife stationary.) When you get all the way around once, your line should join up with the starting point; a steady hand is important here. Keep going around the cake with your knife carefully, cutting deeper into cake along that same line. If you maintain your steady hand, you will eventually cut all the way through the cake layer evenly– voilà! If you do not have a turntable, you can do this by turning your cake plate carefully.
Given how fragile the cakes seemed to be, I was concerned that stacking the split layers might end in disaster, but I was, fortunately, wrong. (Maybe I should just worry less?!) To be sure, they must be handled with care; however, that brief stint in the freezer makes a world of difference. Not one of my six layers fell apart, even as I juggled them around to maximize my limited countertop space. The buttercream is a dream to work with– equally easy to pipe or spread. I found that my layers built up rather quickly to a cake height hitherto unseen in my kitchen!

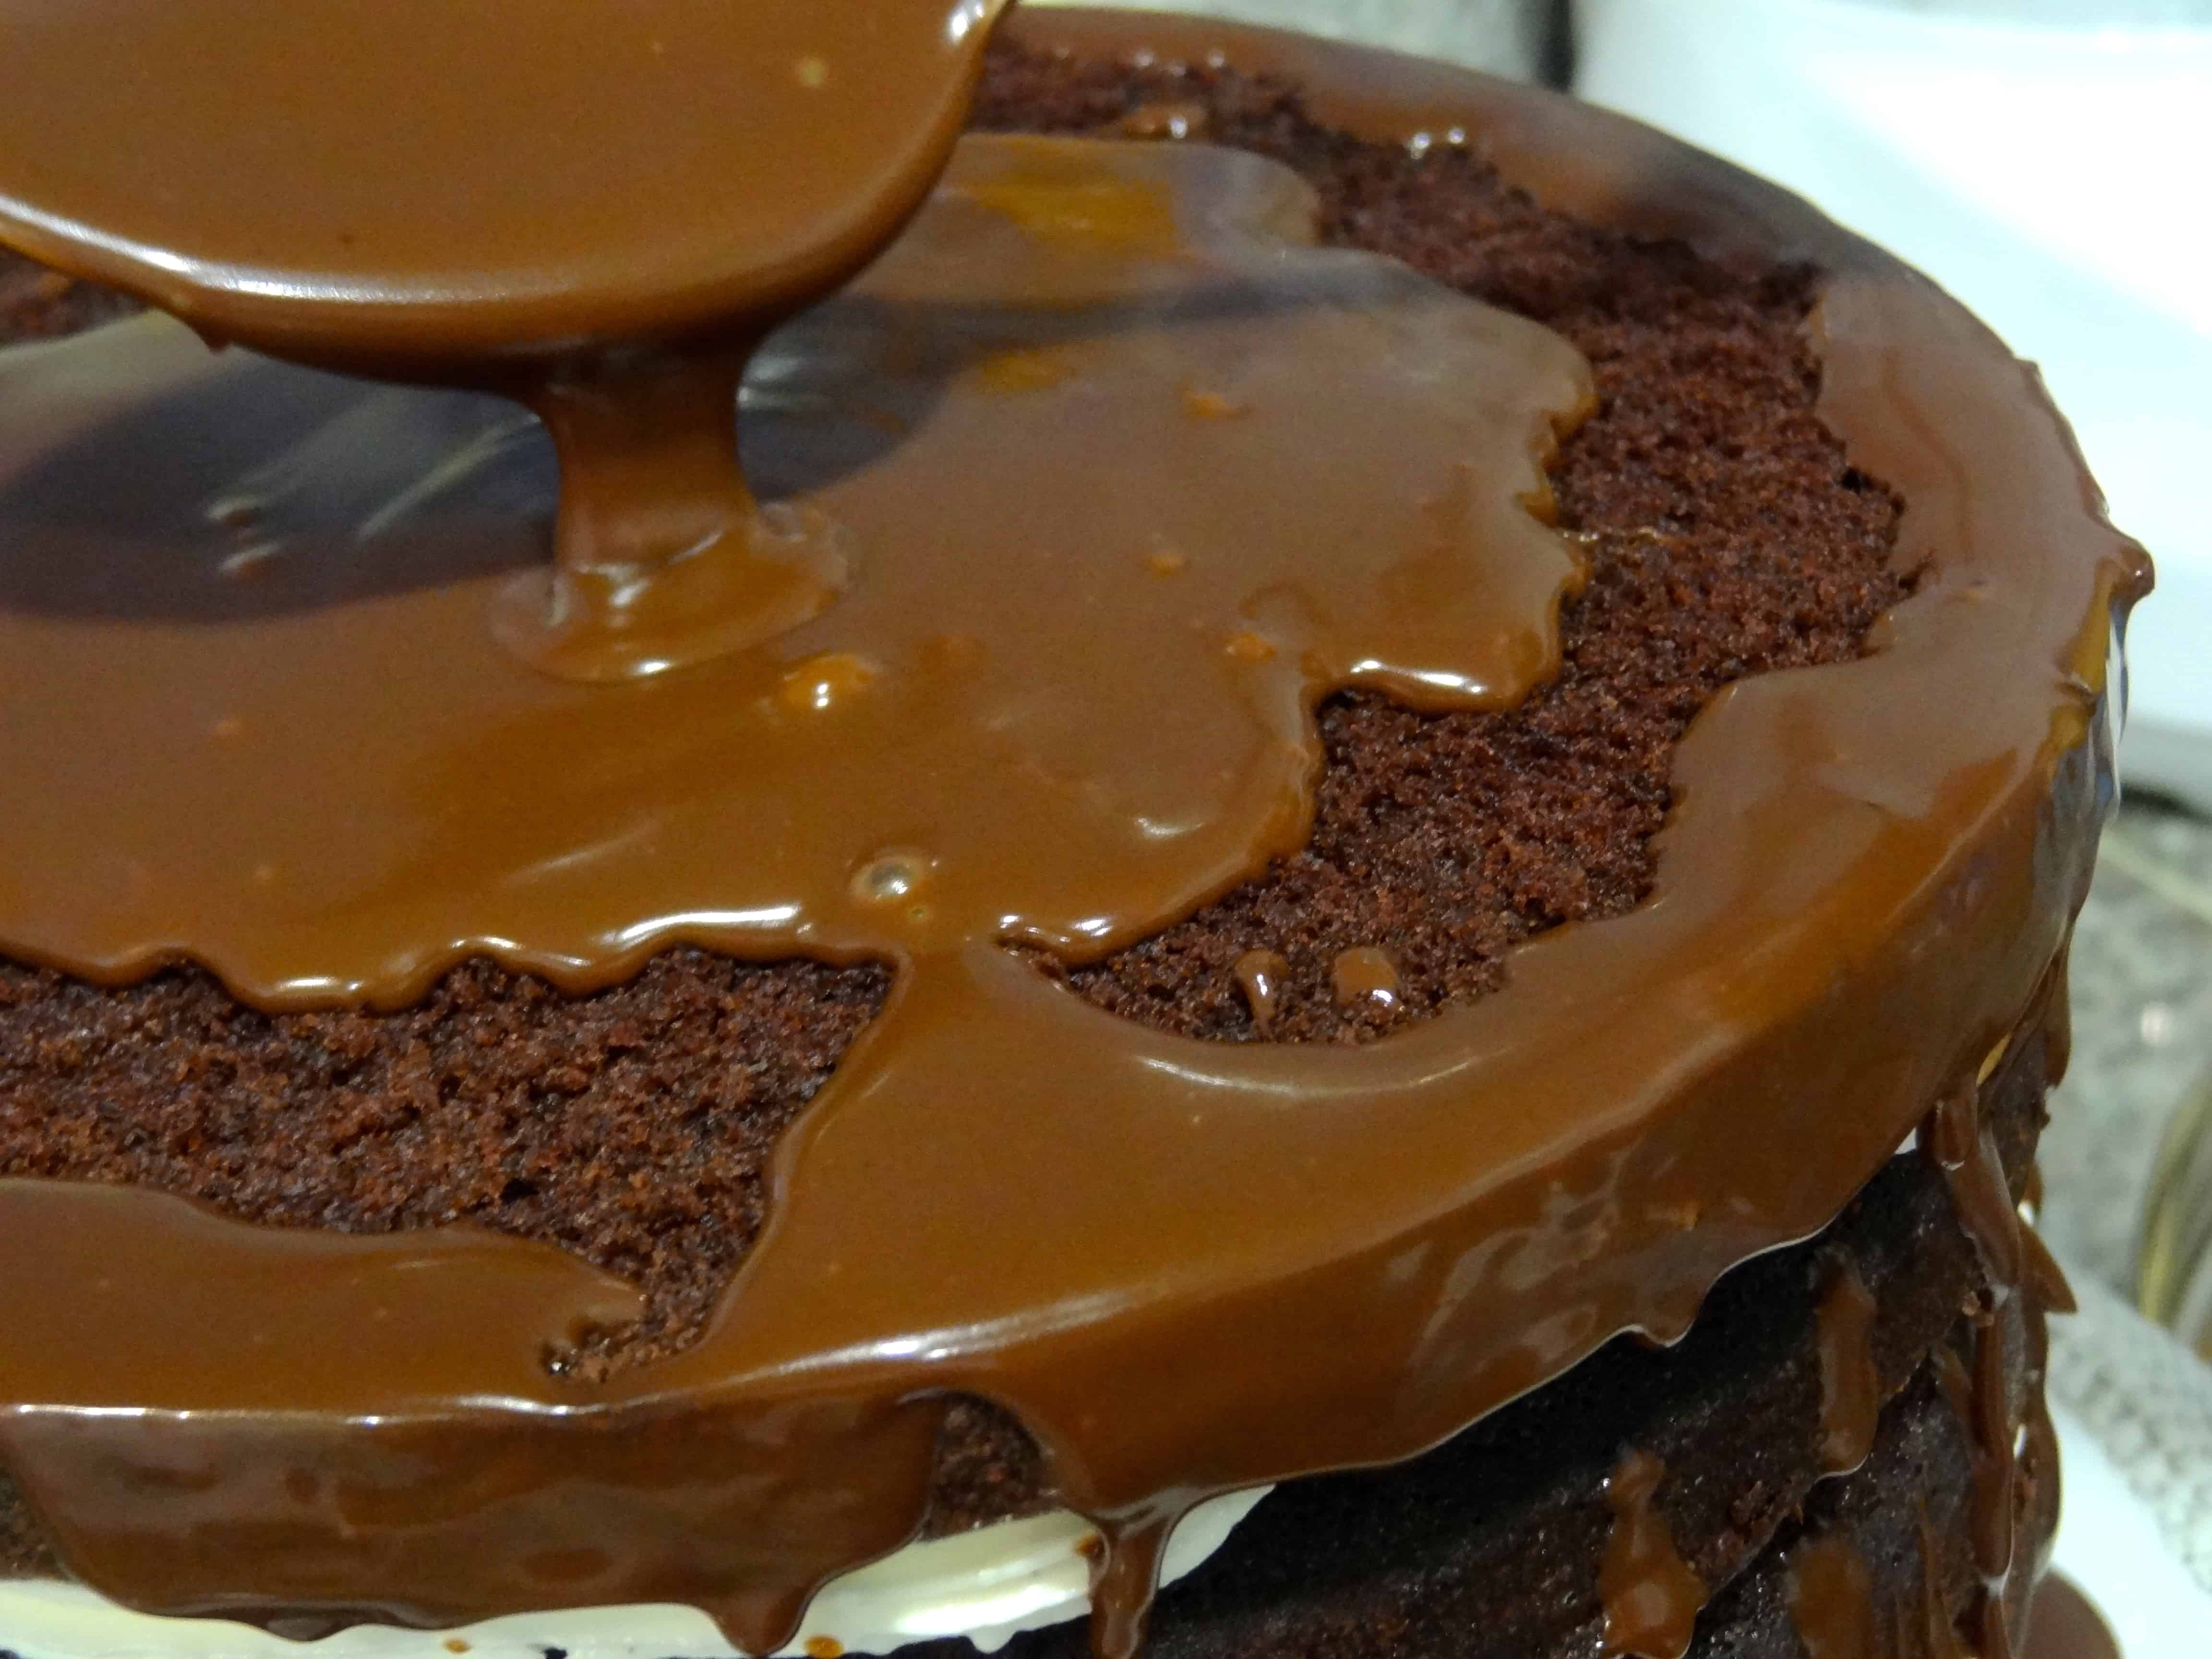
Finally, the cake is topped with a rich layer of chocolate ganache made with both dark and milk chocolate. TO. DIE. FOR. As with any chocolate dessert, it is essential to use high-quality chocolate; your finished product will only be as good as the chocolate you use. Although I’ve been experimenting with some artisan chocolates recently, I used my standby Guittard 72% Coucher du Soleil and 38% Soleil d’Or couverture wafers, as I wasn’t prepared to part with 10 ounces of TCHO, Valrhona, or Dandelion, in the event of another chocolaty mishap.

After an hour or so in the fridge, the ganache will be thick enough to drizzle, such that it drips luxuriously down the exposed sides of the cake. Start with spoonfuls at the edge of the cake, all the way around, then fill in the top and spread it out evenly to the edges… Aaaand commence drooling.
Tips for mile-high success:
- Give yourself a number of hours for ingredient prep, baking, and chilling.
- Stick to traditional round cake pans!
- I used room temperature rather than softened butter; I’m not sure how much difference this makes, but my cakes were devilishly moist and fluffy.
- Besides using a cake tester (which can be deceiving), I test my cakes for doneness based on “springiness”. Very gently press the center of the cakes, and if the impressions spring back slowly, the cakes are ready. (If the indentations remain in the surface, the cakes are not quite there and will likely sink if you take them out of the oven at this point. If they spring back quickly, the cakes might be overdone.)
- Be sure to freeze the cake layers before splitting, as written in the recipe.
- Handle the split cakes very gently, as they are quite soft and fragile.
- Cut the cake right out of the fridge for slices with clean edges. (Mine had been sitting out for a while, so it was softer and a little more difficult to cut neatly.)
- I had a surprising amount of ganache left over, and I think you can easily halve the recipe. I didn’t want to drown my cake!
- If you don’t want to have a pool of ganache at the base of your cake, use an 8-inch cake circle under your bottom-most layer (flush with the diameter of your cake) and place the stacked cake on a metal cooling rack. Pour the ganache over the cake, and the excess chocolate will drip onto rack; you can then place your cake on your intended serving platter with no mess at the bottom.
Now, cutting this puppy was an interesting challenge. Because it’s twice as high as most cakes, I attempted to cut thinner slices, and they tried valiantly to topple over; use a knife and a cake cutter to keep the pieces intact while transferring to the plates! As anticipated, this cake was rich, but I was actually surprised that it wasn’t overwhelming. (If I’m being honest, I wouldn’t have minded enrobing the entire cake in chocolate… I’m just sayin.) The non-sweet buttercream acts as a foil for the richness of the chocolate cake and glaze– I kept expecting the sweetness to creep up on me with each bite, but it never really did. The contrasting textures of the moist and fluffy cake, airy frosting, and thick ganache were a symphony in my mouth. It may not satisfy my deepest, darkest chocolate cravings, but I thoroughly enjoyed it, and it’s a great choice even for those who aren’t huge chocolate fiends because the vanilla buttercream lightens it up considerably. In other words, pretty much everybody will be exceedingly happy with you if you feed them this cake. (At the very least, they will be mighty impressed with your cake-stacking talents!)
Incidentally, I had to hold this cake in my lap on a platter uncovered for an hour in the car because it is SO tall– it needs a hat box! Fortunately there were no ganache spillage incidents. I have neither a cake carrier nor pastry boxes tall enough to cover it, but now I’m on the hunt…
This cake was a labor of love– very fitting for Labor Day, and well worth the effort. Check out Baked Sunday Mornings for the recipe for this rich, indulgent, and gloriously messy Mile-High Chocolate Cake with Vanilla Buttercream, and take a peek at the chocolaty goodness made my bakemates too! 🙂
© Dafna Adler & Stellina Sweets, 2013.

8 Responses
Beautiful cake. So glad you tried it again. Labor of love…love that! And bravo on travelling with this high cake. I definitely need to make it again, to get the buttercream right and be able to make the glaze. I love the cake itself, it is so good on its own.
Thanks, Sandra! This one was definitely an adventure– for a lot of us, apparently! Oh yes, this cake is so wonderful. The buttercream can be tricky, but I’m sure you’ll get it next time. And yes, the glaze is a must– I’m still nibbling on the leftovers… 😉
This looks incredible and sinful!!!! 🙂
Thanks, Leslie! I think it’s a keeper. 🙂
Looks awesome Dafna! I was so sad for you when i saw the picture of the broken layers on instagram! Glad it all worked out in the end!
Thanks! Yeah, I was pretty bummed– I had such high hopes for those cute pans, but at least I had time to re-bake. Sometimes simple is better! I’d love to make this one again… if I can find something to keep it in! 😉
Wow, beautiful cake!
Thanks, Andrea! 🙂