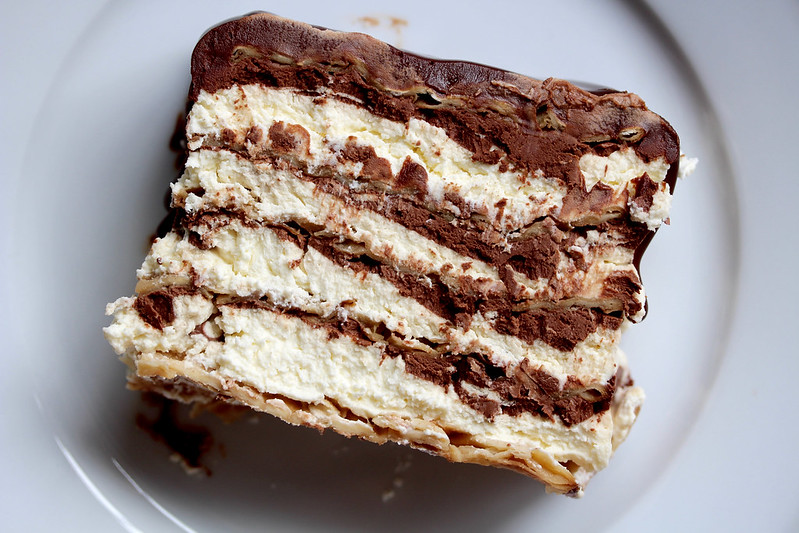
Two years ago I discovered Robicelli’s Tiramatzu, and Passover has never been the same. Seeing as how I live on the far side of the North American continent from Robicelli’s, I set about figuring out how to make my own version— this thing had to be on my Passover table! I would simply replace the ladyfingers with matzah sheets soaked in coffee, make coffee-infused ganache, and make some sort of a mascarpone mousse, right? This little experiment led to entanglements with gelatin, and quite a lot of work to make the creamy mousse that could stand up on its own (versus an actual tiramisù which is contained in a dish and needn’t be so structured). It turned out pretty well, especially for a first attempt, and especially for a gelatin novice, but I felt that the mascarpone filling could be improved upon. I reached out to Alison Robicelli via Twitter with a few questions, which she graciously answered. As it turns out, they use semifreddo rather than mousse… In other words, I had made it WAY more complicated than it needed to be! I vowed to rework it, but I didn’t get a chance last year, and since we were hosting a Seder at our house this year, it was the perfect opportunity to experiment on my guests try again. Can I just tell you how much easier this version is?? I mean, it seriously took less than half the time of the first version, because it did not require blooming and melting gelatin, messing up the gelatin (seems like a requirement when learning to use it), and then whipping the mixture in the stand mixer. For those new to semifreddo, it is like a cross between ice cream and frozen mousse, and does not require churning in an ice cream machine. Basically I mixed the ingredients in my stand mixer, which took maybe two minutes, and the mascarpone layer was ready to use.
The only other minor thing that I didn’t like about my first version is that the matzot stayed brittle, whereas they were soft and wavy-looking in the Robicelli’s masterpiece. I kept the method the same, soaking the matzot in cold-brew coffee, but I let them absorb enough liquid that they were almost falling apart. The other change is that I put the whole thing in the freezer since semifreddo is a frozen dessert. Wait, wait– STOP. I keep throwing around the word ‘semifreddo’, which is what I *thought* I was making, but I should clarify before I mislead you. When I checked on my matzah tower in the freezer after several hours, I was surprised to find that it was frozen solid! Every time I’ve made semifreddo, it’s been quite soft and scoopable, starting to melt minutes out of the freezer. And then I realized that I forgot to add eggs… As my people say, OY. While there are some semifreddo recipes without eggs, I think the mixture would have been softer and lighter with the eggs; at first I thought I would have to go back to the drawing board, but I realized after thawing it that the texture was quite nice and there was no melting (which means it’s portable). In the end, it was sort of a mousse after all, but without gelatin.
What I recommend is freezing it overnight to set everything and help the matzah stay soft, but not soggy. Then move it into the fridge several hours before serving to thaw it out– it will not be cuttable from the freezer, even with a hot knife. It’s best to serve it cold and creamy, with the different textures intact– in the sweet spot between frozen and soggy-from-sitting-in-the-fridge. I think that if you simply chill it in the fridge to begin with, it would get soggy pretty quickly. In other words, this dessert has a short shelf life, but I promise it’s worth it! However, you can make it several days ahead and store it in the freezer, so there is an upside. (I may yet try a third version next year that is a properly melting semifreddo…)
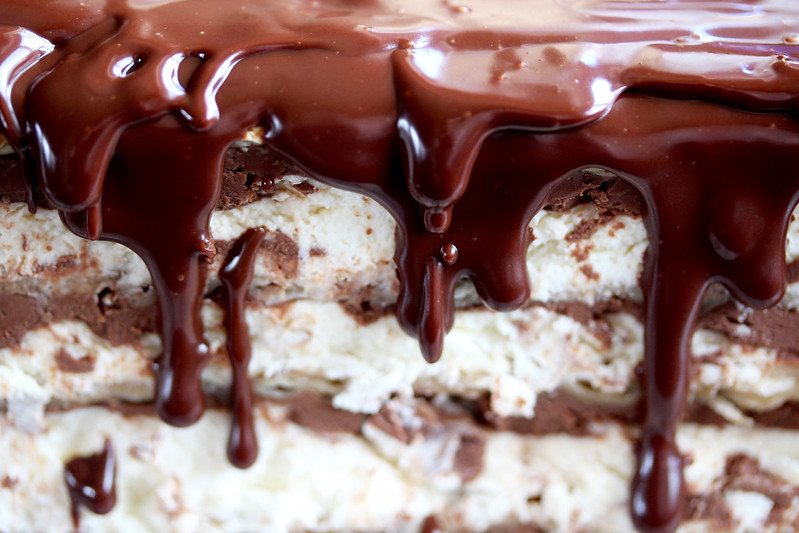
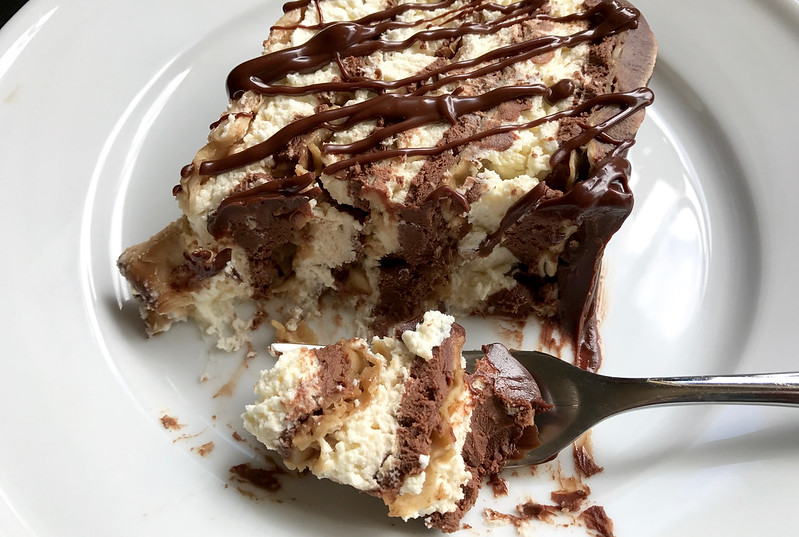
I otherwise didn’t change the method, which is to say, I constructed a structure using a square cake mold and acetate to hold the tiramisu, into which I placed three layers each of matzah, mascarpone, and coffee-infused ganache, with another matzah on top and a final thick layer of ganache applied right before serving. I would also recommend holding back a bit of ganache so you can drizzle it onto individual slices, because well, we all need a little more chocolate in our lives, do we not?? (Especially on Passover.)
Matzah Tiramisu Cake 2.0
Inspired by Robicelli’s Tiramatzu
Yields 12-16 servings
You can make this “cake” as many layers as you want, and you can adjust the thickness of the mousse layers. I went with 5 layers, but you can certainly stack more or fewer, and adjust your quantities of mascarpone and ganache accordingly.
This recipe does take some planning ahead due to the chilling and thawing time, but the active prep time is fairly short.
I made the ganache in 2 batches– one for the layers inside the tiramisu, and one for the top layer, which goes on gooey after the whole thing has been frozen and thawed. This way, it can drip over the sides, and you can drizzle extra chocolate onto individual slices. Alternatively, you can make all the ganache at the same time and finish the tiramisu with ganache on top (add together the quantities for both ganache batches), but that top layer will solidify with the other layers and won’t drip down the sides. You make the call.
For the espresso ganache batch #1 (adapted from Food & Wine):
- 15 ounces good-quality bittersweet chocolate, chopped
- 1 ½ cup + 1 tablespoon heavy whipping cream
- 1 ¼ teaspoons instant espresso powder
- 4 teaspoons Kahlúa liqueur
For the mascarpone filling:
- 24 ounces (about 3 cups) Italian mascarpone cheese, softened
- 2¼ cups heavy whipping cream
- 3 tablespoons confectioners’ sugar
- ⅛ teaspoon kosher salt
For the espresso ganache batch #2:
- 6 ounces good-quality bittersweet chocolate, chopped
- ½ cup + 2 tablespoons heavy whipping cream
- ½ teaspoon instant espresso powder
- 1 ½ teaspoon Kahlúa liqueur
For tiramisu assembly:
- 20 ounces cooled espresso or strong coffee, or cold-brew coffee (I used Stumptown Cold Brew)
- 5 matzahs (7″ squares), or the number of your choice, plus a few extras on standby in case some fall apart during soaking
Prepare the cake mold:
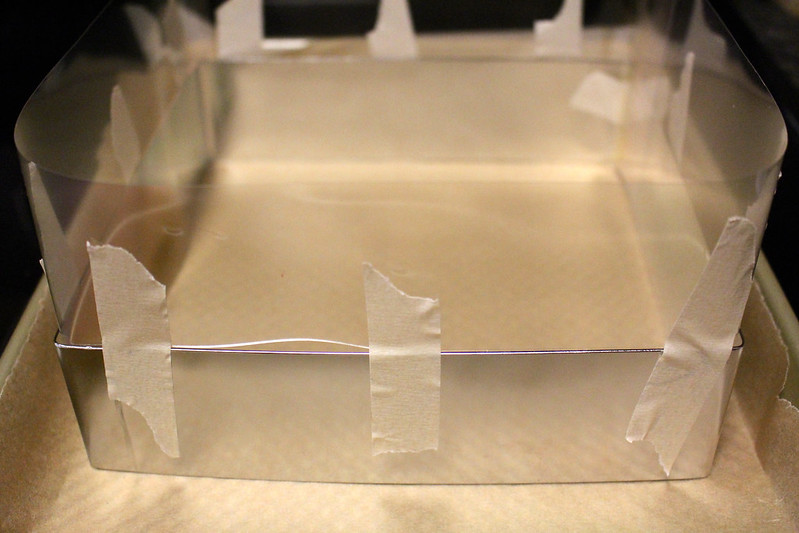
Line a quarter-sheet pan or small platter with parchment paper. Line the interior of a 7″ square cake mold with acetate that is about 4″ high. Try to push it into the corners as much as possible; tape it to the metal from the outside all the way around, and secure the ends of the acetate to each other on the outside of the acetate (between the acetate and the metal– like I said, a little tricky). Do not tape the acetate to the inside of the metal square— you will not be able to remove the cake with its acetate wrapper when unmolding the tiramisu. Place the prepared square on the lined pan and set aside.
Make Batch #1 of ganache:
Place the chocolate in a heatproof bowl. Heat the cream in a small saucepan just until it starts to boil. Remove the pan from the heat. Whisk in the espresso powder until it has dissolved. Slowly pour the hot cream over the chocolate and let it stand for 1-2 minutes. Gently whisk the chocolate until it is melted, smooth, and homogenous, starting in the center and working your way outward. Add the Kahlúa and whisk until incorporated. Let the ganache cool to room temperature or until thickened enough to spread. Set aside.
Make the mascarpone filling:
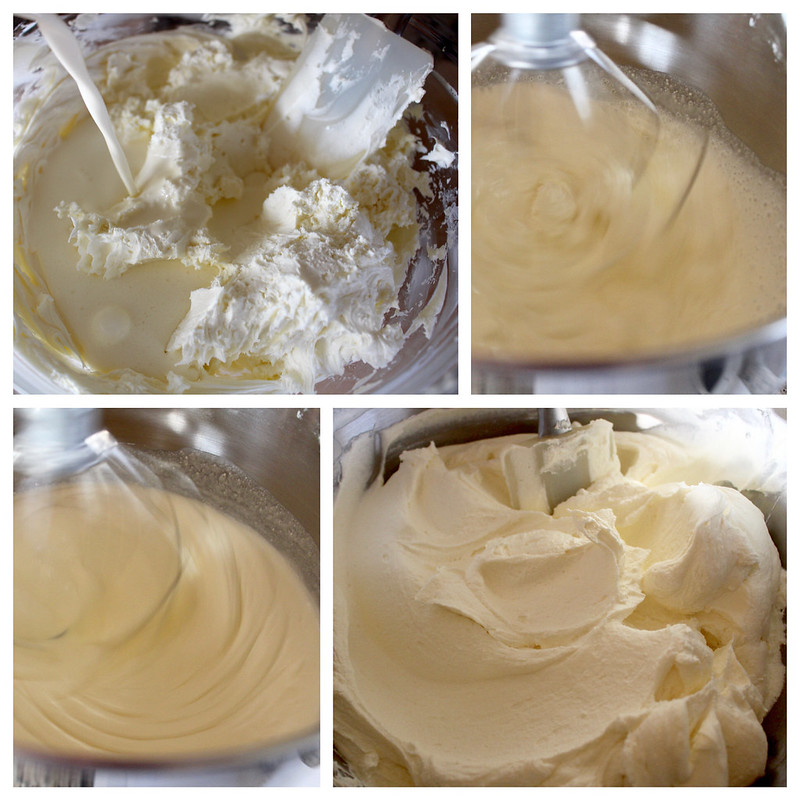
Place the mascarpone in the bowl of a stand mixer and mash it with a rubber spatula to loosen it. Fit the mixer with the whisk attachment and add the heavy cream; beat on medium speed until the mixture is starting to thicken and the whisk draws lines through it. Stop the mixer and add the confectioners’ sugar and salt; whip to medium-firm peaks– do not overbeat.
Assemble the tiramisu:
Retrieve the prepared cake mold and pan/platter. Pour the coffee into a shallow vessel with enough room to lay the matzahs flat; I used a rimmed quarter-sheet pan. Soak 1 matzah, flipping it a few times, for 1-2 minutes, so that the matzah is fully hydrated on both sides and is nearly falling apart. Very carefully lift it out of the coffee and let the excess coffee drip back into the pan. Place the matzah into the bottom of the acetate-lined square. If it starts to tear, soak a new piece of matzah– you’ll want an intact piece on the bottom.
Scoop about 1 cup mascarpone mousse onto the matzah and spread it in an even layer to the edges of the square all the way around. The bottom layers are a bit awkward to smooth out because it’s hard to jam an offset spatula in there, but it doesn’t have to be perfect. Pour about ½ cup ganache on top of the mousse and spread it in an even layer. Repeat with 3 more layers of matzah, mascarpone, and ganache. If your matzot fall apart during soaking, as long as the pieces are big enough to patch together inside the mold, it’s fine to use them. If they are too crumbled, soak new ones. After those 3 middle layers, add 1 more layer of matzah on top, and this should be an intact piece like the bottom one. Cover the acetate carefully with plastic wrap to the best of your ability– Glad Press n’ Seal Wrap works well here because it can grip the acetate and metal mold. Place the whole thing in the freezer on a level surface and freeze for at least 10 hours.
About 8 hours before you plan to serve the tiramisu, remove it from the freezer. Pick up the whole thing and peel the parchment from the bottom (don’t throw it out). Remove the tape pieces from around the cake mold. Carefully remove the square mold from around the acetate. This part is tricky, because it may be difficult to pull the mold up and over the acetate. Take it slowly and gradually, wiggling it as needed to loosen it. If you have someone else nearby to help you, pick up the tiramisu block from the bottom and have the other person pull the mold down. Either way, get it off!
Place the tiramisu, still wrapped in acetate, back onto the parchment on the tray and transfer it to the refrigerator to thaw. (You can leave it on the countertop for an hour to speed it up a bit before putting it in the fridge.) When it has reached your desired level of softness, proceed with the ganache topping.
Make Batch #2 of ganache:
Repeat the same steps as above in Batch #1. Allow it to cool and thicken slightly, but not too much– when the warm ganache hits the cold tiramisu, it will firm up quickly, and you want it thin enough to drip all sexy down the sides.
Have ready whatever platter on which you plan to serve the tiramisu. Remove the tiramisu from the fridge. Detach the tape holding the acetate together and peel it from around the tiramisu. Your “cake” should now be a free-standing matzah tower.
You can cut it either before or after pouring the ganache. What I like to do is cut the square in half so you have two skinny “loaves”, with the interior layers exposed– I show this cut side as the front of the dessert. Transfer each one to the serving platter using a sturdy flat spatula to hold them underneath. Pour about ⅓ of the ganache over the top of one tiramisu loaf, allowing it to drip slowly over the edges on all four sides. Use an offset spatula to coax the ganache to the edges if needed. (You can also pour it around the edge carefully and then fill in the middle on top– whatever method you prefer.) Repeat with the second half of the tiramisu. Alternatively, you can put the whole thing on the platter and pour ⅔ of the ganache over it, then cut it afterwards.
Allow the ganache to set for 10 minutes in the fridge. Cut it into crosswise slices (from the short sides) and serve with extra ganache drizzled on top.
© Dafna Adler & Stellina Sweets, 2017.


