
Happy 2018– I hope your year is off to a positive start! Did you have a salad this week? Okay good, so we can get back to business. I mean, I do feel a renewed push to eat healthy every January, but mostly to balance out the sweets that I have no intention of giving up. 😉 That is just never a resolution of mine– I fully believe that it’s possible to eat well, be fit and healthy, and still enjoy the most delicious of treats in moderation on a regular basis. Because COOKIES.
Every year I like to reflect on my baking experiences of the past year and make some resolutions for the upcoming 12 months. As far as baking growth in 2017, I enjoyed playing with tahini and trying new things like pavlova and babka– I am in heavy experimentation with babka flavors at the moment AND I’M SO HAPPY ABOUT THAT. Yeast doughs have always scared me– I’ve never had a natural feel for dough. I finally found one that I want to make over and over again, and I can already see improvement, though it’s definitely a process of ups and downs. I continue to struggle with custards and pastry cream, and I didn’t dig into laminated pastry much, both of which I’d wanted to tackle. Actually, that’s not entirely true– I tried to make inverted puff pastry dough for an Italian dessert, and it was a complete train wreck… a buttery, confusing, expensive train wreck. I may or may not come back to that one soon, depending on whether I can get some guidance, as I don’t know currently how I’d make it better. Fortunately, most of my experiments did not involve wasting 6 sticks of beautiful European butter and feeling like I got stabbed in the heart.
Anyway, for the next couple of months, I’m envisioning lots of black sesame, coconut, and tahini– feels right at this time of year, and they are ingredients with so much potential for interesting variations on traditional desserts. I also realized that heaps of decadent chocolate have been conspicuously absent from this blog recently, which I promise is not intentional, and I plan to rectify that sad state of affairs as soon as possible. I’m hoping to spend more time with creams and custards, pie dough, savory pastry (particularly of the Middle Eastern variety), and advanced cake decorating. Because, you know, I like to take it easy. 😉
For some reason, I tend to gravitate toward baking with pretzels around New Year’s; I think I like the sweet and salty symbolism. The past year definitely had some highlights, especially some amazing travel and food that induced many joy-filled moments, but there are some ongoing challenges in my life and in the world (hence the “salty” part) that cannot be ignored, even though a heavy dose of emotional eating sure feels good for a while. I’ve never been one to look through rose-colored glasses– I tend to be a realist– so I like how “sweet and salty” honors both the positive things and the challenges of the year that just wrapped up, and the as-yet-unforeseen ones in the coming year.
Okay, that’s enough waxing philosophical for now! When I first paged through the new Smitten Kitchen book, one of the recipes that immediately caught my attention was the Pretzel Linzers with Salted Caramel, and I knew that would be the one to ring in the new year. Guys, I really like lacing baked goods with crumbs of other baked goods– know what I mean? These cookies have finely ground pretzel crumbs sifted into the flour, such that every bite of the cookies also magically tastes like pretzels, and that could not make me happier. (I love doing this with graham cracker or Oreo crumbs for a similar effect.) A traditional linzer cookie contains finely ground nuts, and Deb Perelman swapped in pretzels like the genius that she is. Because of course she thought of that!
OH. I have to stop for a second to share a total fangirl moment. I’ve been really lucky in the past several years to meet most of my baking/cooking idols at cookbook events, cooking classes, etc. One of the few who have eluded me was Deb. (I definitely lingered at one of her favorite Lower East Side bakeries, Zucker Bakery, the last time I was in New York City, in case she happened to stop by for a fix of babka roses or mocha alfajores, but alas, my telepathic beckoning was all in vain, and there was no sign of Deb.) I finally got the chance to meet her on her recent tour to promote the new book, and she was just as personable, warm, hilarious, self-deprecating, and Jewish-girl-next-door as I imagined. She probably doesn’t want to be my BFF as much as I want to be hers, but maybe someday we can braid each other’s hair and have slumber parties. At least I got to tell her how much her recipes mean to me, especially her Jewish holiday recipes that have helped me start my own holiday traditions in my home.
https://www.flickr.com/photos/stellinasweets/38780036885/in/album-72157662545563027/
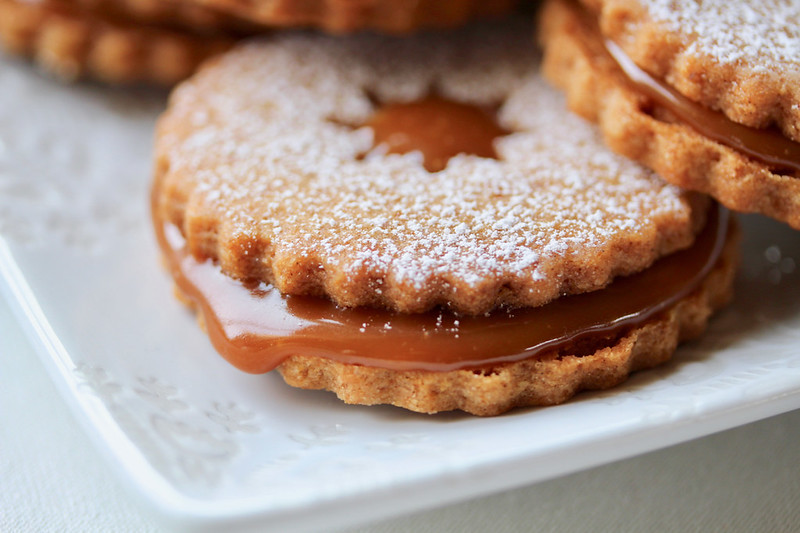
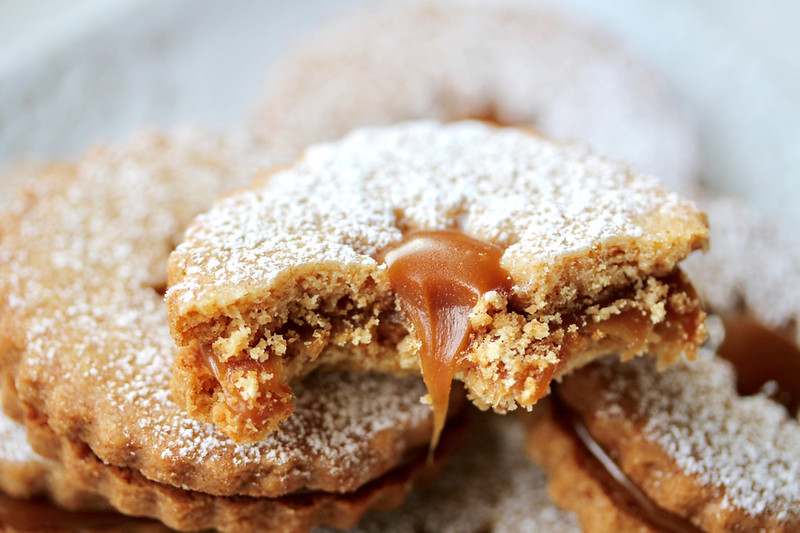
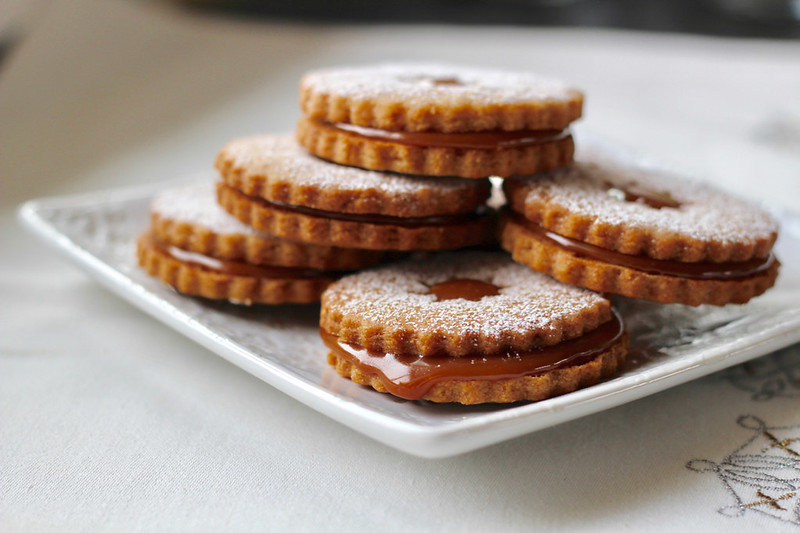
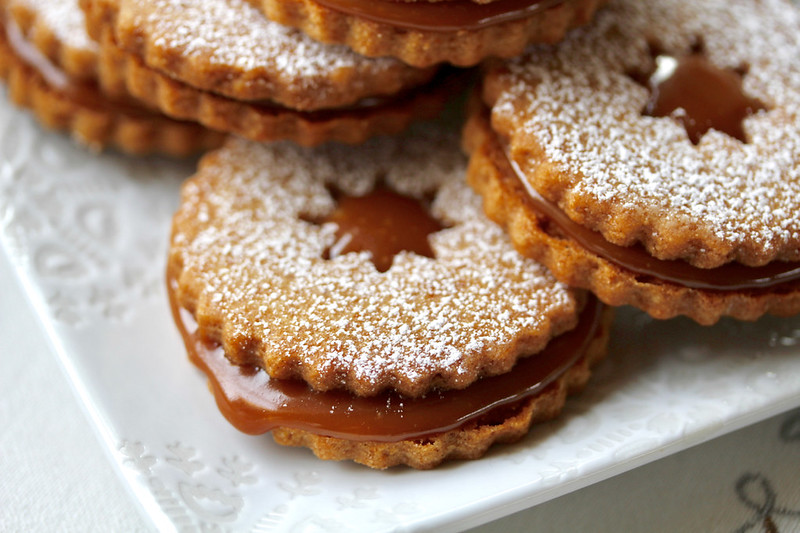
Okay, I digress– back to pretzels. So in-between the very excellent pretzel-y cookies is a thick salted caramel that pulls away in gooey strings when you take a bite and drips out of the cookies all sexy– if you slightly overfill them, intentionally or not, like I did. 😉 The combination of the sweet and salty cookies and caramel are a perfect match, and if you’re anything like me, you might seriously contemplate not letting anyone else know that you made them so you can eat them all yourself. But since I’m trying to be a better person, I did bring them to work; I figure it’s best to start off the year with some good karma.
A few recipe notes:
- The dough was challenging to work with, but ultimately turned out very cool; it is not as elastic and cohesive as a regular cookie dough, so it needs careful handling. I wasn’t sure if I’d done it right because it was quite sandy coming out of the food processor– my dough did require some kneading to bring all the crumbs together into something resembling a mound, despite instructions to the contrary. She says that the dough can be rolled out between sheets of parchment and doesn’t need a long rest in the fridge. Those instructions can be found here— I personally prefer to shape the dough into discs and rest it in the fridge so that the sugars concentrate, which increases caramelization and toffee undertones during baking. (I learned this at a super nerdy chocolate chip cookie cooking class.) I also found that the dough was easier to work with after re-rolling the scraps.
- I took a lot longer to make these than Deb intended, but I think they turned out better for it. Also, Baking OCD is a bitch like that. 😉 It took me a while to grind and sift the pretzel “flour” because I wanted to make sure it was very fine, and there were lots of slightly bigger pretzel crumbs, which I set aside for another use. (I picked up a super handy sifting scoop recently that has made tasks like these very easy.)
- I tend to underbake cookies, which is fine for a thick chocolate chip cookie, but not so great for sandwich cookies that get soggy once the filling sits for a while. I baked them to be purposely crispy– 11 minutes for the tops with the holes cut out, and 12 minutes for the solid bottoms. I’m so glad I gave them a little extra time– the cookies were perfectly crisp and stood up to the caramel without getting the least bit soggy (for several days), unlike the other time I made linzer cookies.
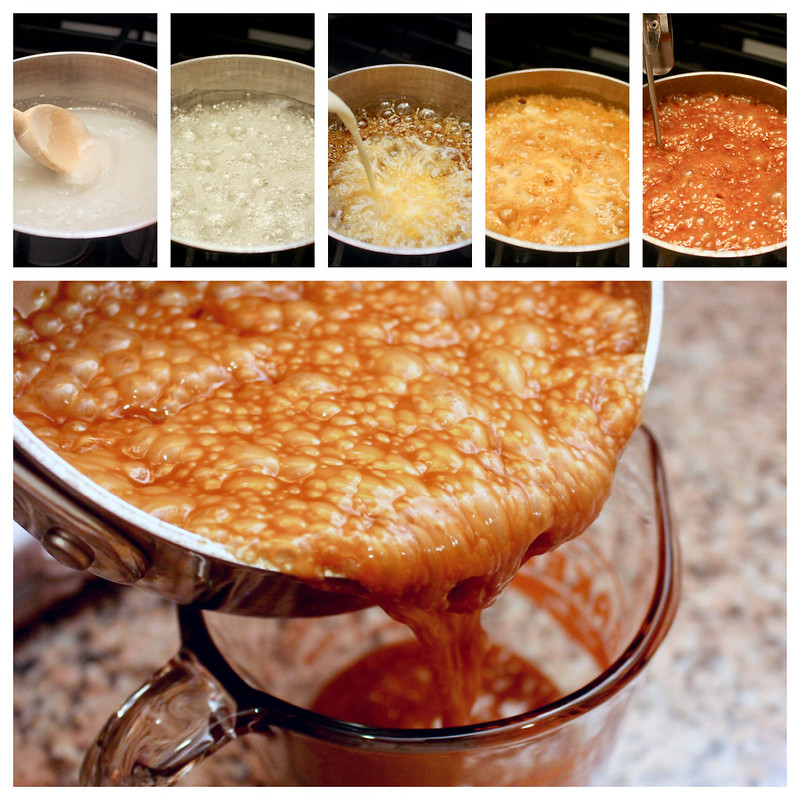
- Make sure you use a taller saucepan for the caramel than I did in the photos below– I was not thinking when I added the ingredients! It will bubble up a lot when you add the cream. I added it a little at a time to avoid it boiling over.
- I slightly overfilled some of the cookies and ran out of caramel, so I filled the remaining 5 with peanut butter, which was an excellent combo! (I daresay that speculoos, nutella, and chocolate ganache would also make fine substitutes.) I think I waited too long to pour the caramel, as I had to re-warm it a few times, and it was quite thick, which made it harder to control the amount I was putting on each cookie. By the time the cookies had settled the next morning, many tops had slipped way off their foundations, so you really do only need 1 teaspoon of caramel on each one. (Although I rather enjoyed biting into a thick filling layer, so you be the master of your own sandwich cookies, and don’t let anyone else tell you how much is too much caramel in your life.)
Sweet and salty linzer cookies are a happy omen for a good year, in my humble, cookie-centric opinion. This recipe, while time-consuming, is completely worth the effort, and the cookies would be just as at home during the holidays, the springtime, or frankly, any day ending in ‘y’.
Pretzel Linzers with Salted Caramel
Adapted from Smitten Kitchen Every Day by Deb Perelman
Yields about 25 cookies
For the cookies:
- 3½ cups small pretzel twists
- 1½ cups (195 grams) all-purpose flour (I use King Arthur Flour, which weighs in at 180g)
- 1 cup (200 grams) granulated sugar
- ¼ cup (53 grams) light brown sugar
- ¾ teaspoon baking powder
- ½ teaspoon coarse or kosher salt
- 1 cup (2 sticks/225g/16 tablespoons) unsalted butter, cut into medium-sized chunks (cold is fine)
- 1 large egg
For the caramel filling:
- ½ cup heavy cream
- 2 tablespoons unsalted butter
- ½ teaspoon coarse or flaky sea salt
- ⅔ cup (130 grams) granulated sugar
- ¼ cup golden syrup or light corn syrup
For assembly:
- Confectioners’ sugar
Make the dough:
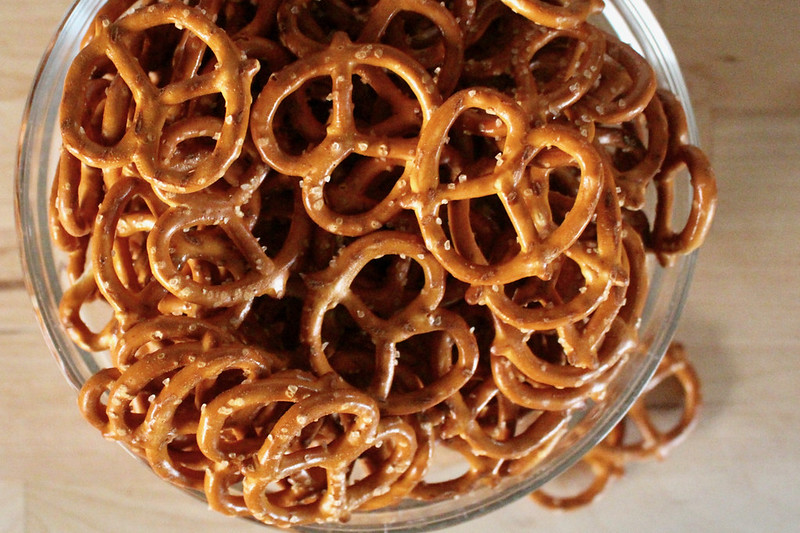
Place the pretzels in the bowl of a food processor fitted with the metal blade. Grind them down until they are very powdery; you can’t overdo it. Set aside 1½ cups (155 grams) of the pretzel “flour” and reserve any remaining flour or larger bits for another use. (As much as I blended, I had a combination of powder and larger pieces, so I ground more pretzels until I had enough pretzel powder for the recipe.)
Empty the food processor and return the measured amount of powdered pretzels to the bowl. Add the flour, granulated and brown sugars, baking powder, and salt. Pulse a few times to combine the ingredients evenly. Add the butter pieces and the run the machine until the mixture has a coarse sandy texture. Add the egg and continue to blend just until the dough starts to form large clumps. If you squeeze it in your hands, it should hold together.
Dump the dough bits onto a clean work surface and use your hands to bring them together into a mound as best you can, lightly kneading if needed– it will still be somewhat sandy. Divide the dough in half and form each into a disk, then wrap them tightly in plastic wrap. Let the dough rest in the fridge for at least 8 hours, or up to 24 hours.
Shape & bake the cookies:
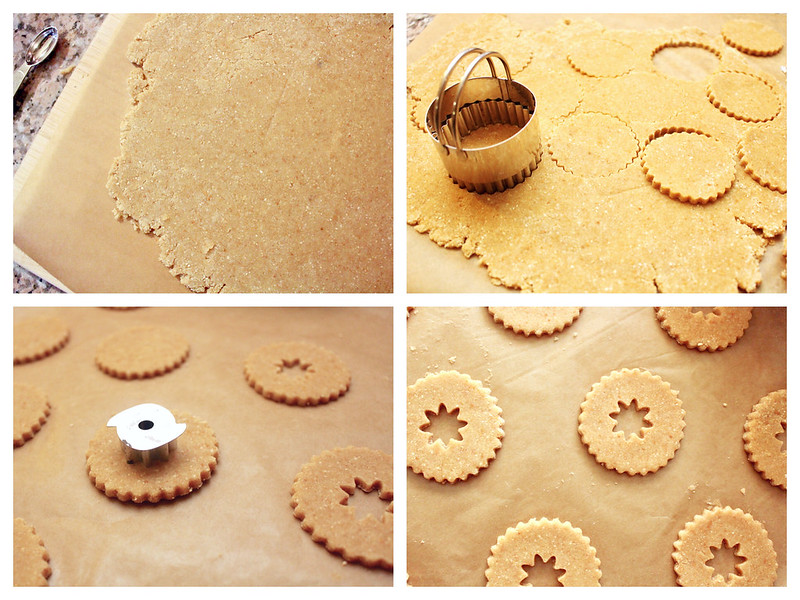
Preheat an oven to 350°F and position a rack in the center. Line a rimless baking sheet with parchment paper. Retrieve one dough disk from the fridge and place it on a lightly floured work surface. Roll it out about ⅛” thick and carefully transfer it to the baking sheet. It is more fragile (less elastic) than a typical cookie dough and will need careful handling. Put another sheet of parchment on top. Roll out the second piece of dough and transfer it to the top piece of parchment paper, so that the dough flats are stacked. Move the baking sheet into the freezer until the dough is firm, about 15 minutes.
Remove the top dough and parchment sheet from the freezer and place the dough on a work surface; put the parchment sheet on another rimless cookie sheet.
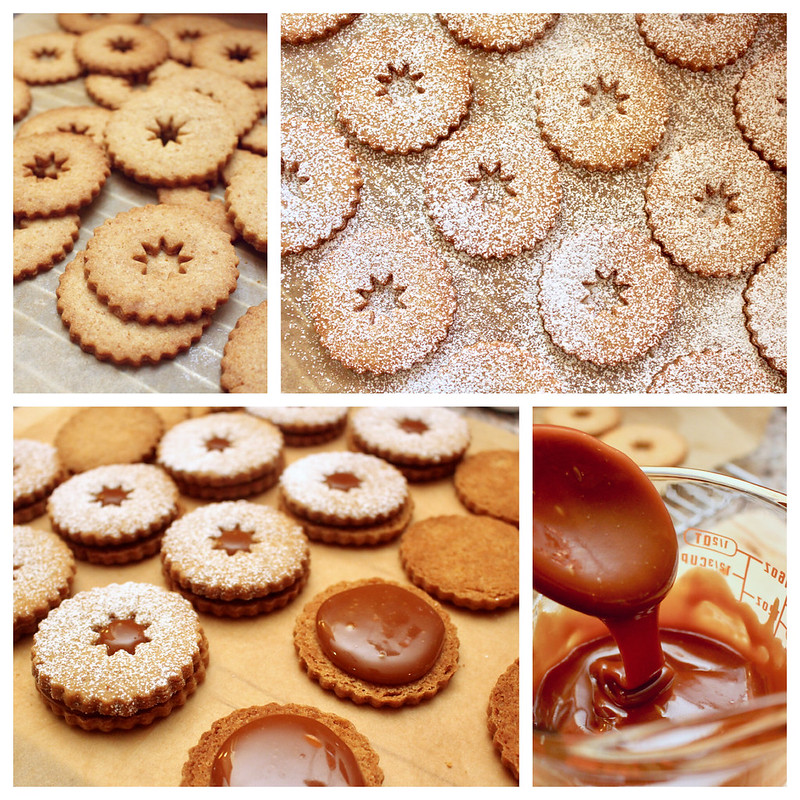
You can use anywhere between a 1½” to 2½” round fluted cutter to cut out the cookies, and a ½” or ¾” fluted cutter for the centers. (I used one of the interchangeable shapes from a linzer cutter set and a fluted biscuit cutter.) Cut as many of the big circles out as you can, then position the small cutter in the center of each round and cut out the middles; transfer each cookie to the parchment-lined cookie sheet, spacing them about 2″ apart. (The original recipes says to cut out the centers first, as it helps the cookies keep their shape, but I didn’t have any trouble with that; my priority was fitting as many circles as possible before re-rolling the scraps.) Keeping the dough cold helps the cookies keeps their shape and makes it easier to move them. If it warms up and softens, put the dough back in the freezer for a couple of minutes to firm up. Re-roll the scraps and repeat.
Transfer the pan to the oven and bake for about 10-12 minutes, or until the edges are golden. (It’s important for these cookies to be crisp enough to hold up to the filling.) Set the pan over a wire cooling rack, and slide the pan out from under the parchment after about 5 minutes. Let them cool completely on the rack.
Remove the second sheet of dough with the pan from the freezer, keeping the parchment sheet on the pan. Repeat the rolling, cutting, and baking process above, except do NOT cut out the centers– these will be the bottoms and should remain whole. (Make sure you have the same number of tops and bottoms, and if not, adjust accordingly.) This tray may need an extra minute more than the cookies with the centers cut out.
Make the caramel:
While the cookies are baking, place the heavy cream, butter, and salt in a small saucepan and heat on medium-low until the butter melts, and stir everything together into a smooth mixture. (This can also be done in a heatproof bowl in the microwave.) In a separate medium saucepan, stir together the granulated sugar and golden or corn syrup over medium heat until the sugar dissolves and small bubbles form along the edges of the pan. Stop stirring and cook until the mixture turns a deep amber in color (305–310°F on a candy thermometer, but I eyeballed it). Remove from the heat and slowly stream in the warm cream mixture and stir to combine (it will bubble up). Put the pot back on the burner and cook the caramel until it is copper in color (245–250°F), then pour it into a heatproof cup with a pouring spout. Let it cool until it thickens a bit, but not so much that it becomes difficult to pour, 15-20 minutes.
Assemble the cookies:
Arrange the cookie lids (with the cutouts in the middle) in a single layer and sift confectioners’ sugar evenly on top. Arrange the cookie bottoms upside down in a single layer. Stir the caramel and pour or spoon about 1 teaspoon slowly onto each bottom, stopping about ¼” from the edge. You can always add or remove a tiny bit as needed. Repeat with the remaining cookie bottoms, then carefully place a lid on each one, pressing them lightly together so the caramel squeezes out to the cookie edges. I do a few at a time so that the caramel doesn’t firm up too quickly while waiting for a lid. If the caramel cools so much that it’s too hard to pour, put it in the microwave for a few seconds and give it a stir to loosen it. The cookies can set up for a few hours at room temperature, or you can put them in the fridge for 5–10 minutes. If any lids slide out of place, just nudge them back.
Make Ahead:
The dough can be made 6 months ahead and stored in the freezer, well wrapped in plastic and placed in a ziplock bag. The cookies can be made 2 weeks ahead and stored in an airtight container in the fridge, according to Deb; I just kept them in the container at room temperature, and they were fine for several days.
© Dafna Adler & Stellina Sweets, 2018.
SaveSave
SaveSaveSaveSaveSaveSave









2 Responses
I’ve been dying to make these! Someone keeps eating the pretzels I bring home for the dough… I am going to have to find a way to hide my “dough pretzels”. Thanks for all the tips 😀 These look absurdly good.
LOL! I know what you mean– we need a secret stash. 🙂 You’re welcome, I hope you like them– it’s a pretty special recipe in my opinion. Deb is a genius!