


This is a shoutout to all the teachers and educators who just finished another school year a couple of weeks ago– summer vacation is in full swing! CAN I GET A HALLELUJAH. In my non-baking life, I’m a high school counselor, and I am one among many rejoicing in the splendid days of summer’s freedom. Now, let me be clear– I love my students; they are wonderful, bright, inspiring humans whom I am (mostly) sad to see go at the end of the year. But come, let’s say, mid-May, I run out of steam for whining, parent demands, pleas for special treatment, and insistence that I said they could have a free 7th period next year. At that point, the longing for summer kicks into overdrive with travel reveries (I’m blogging from Italy—squeal!!), fantasies of sleeping in, and the desperation to escape the anxiety-and-depression-filled daily grind for just a couple of months. Public Service Announcement: Without the summer break, educators would be completely bonkers! 😉

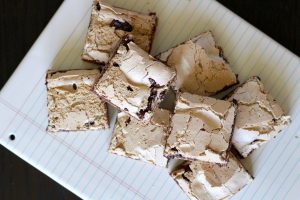
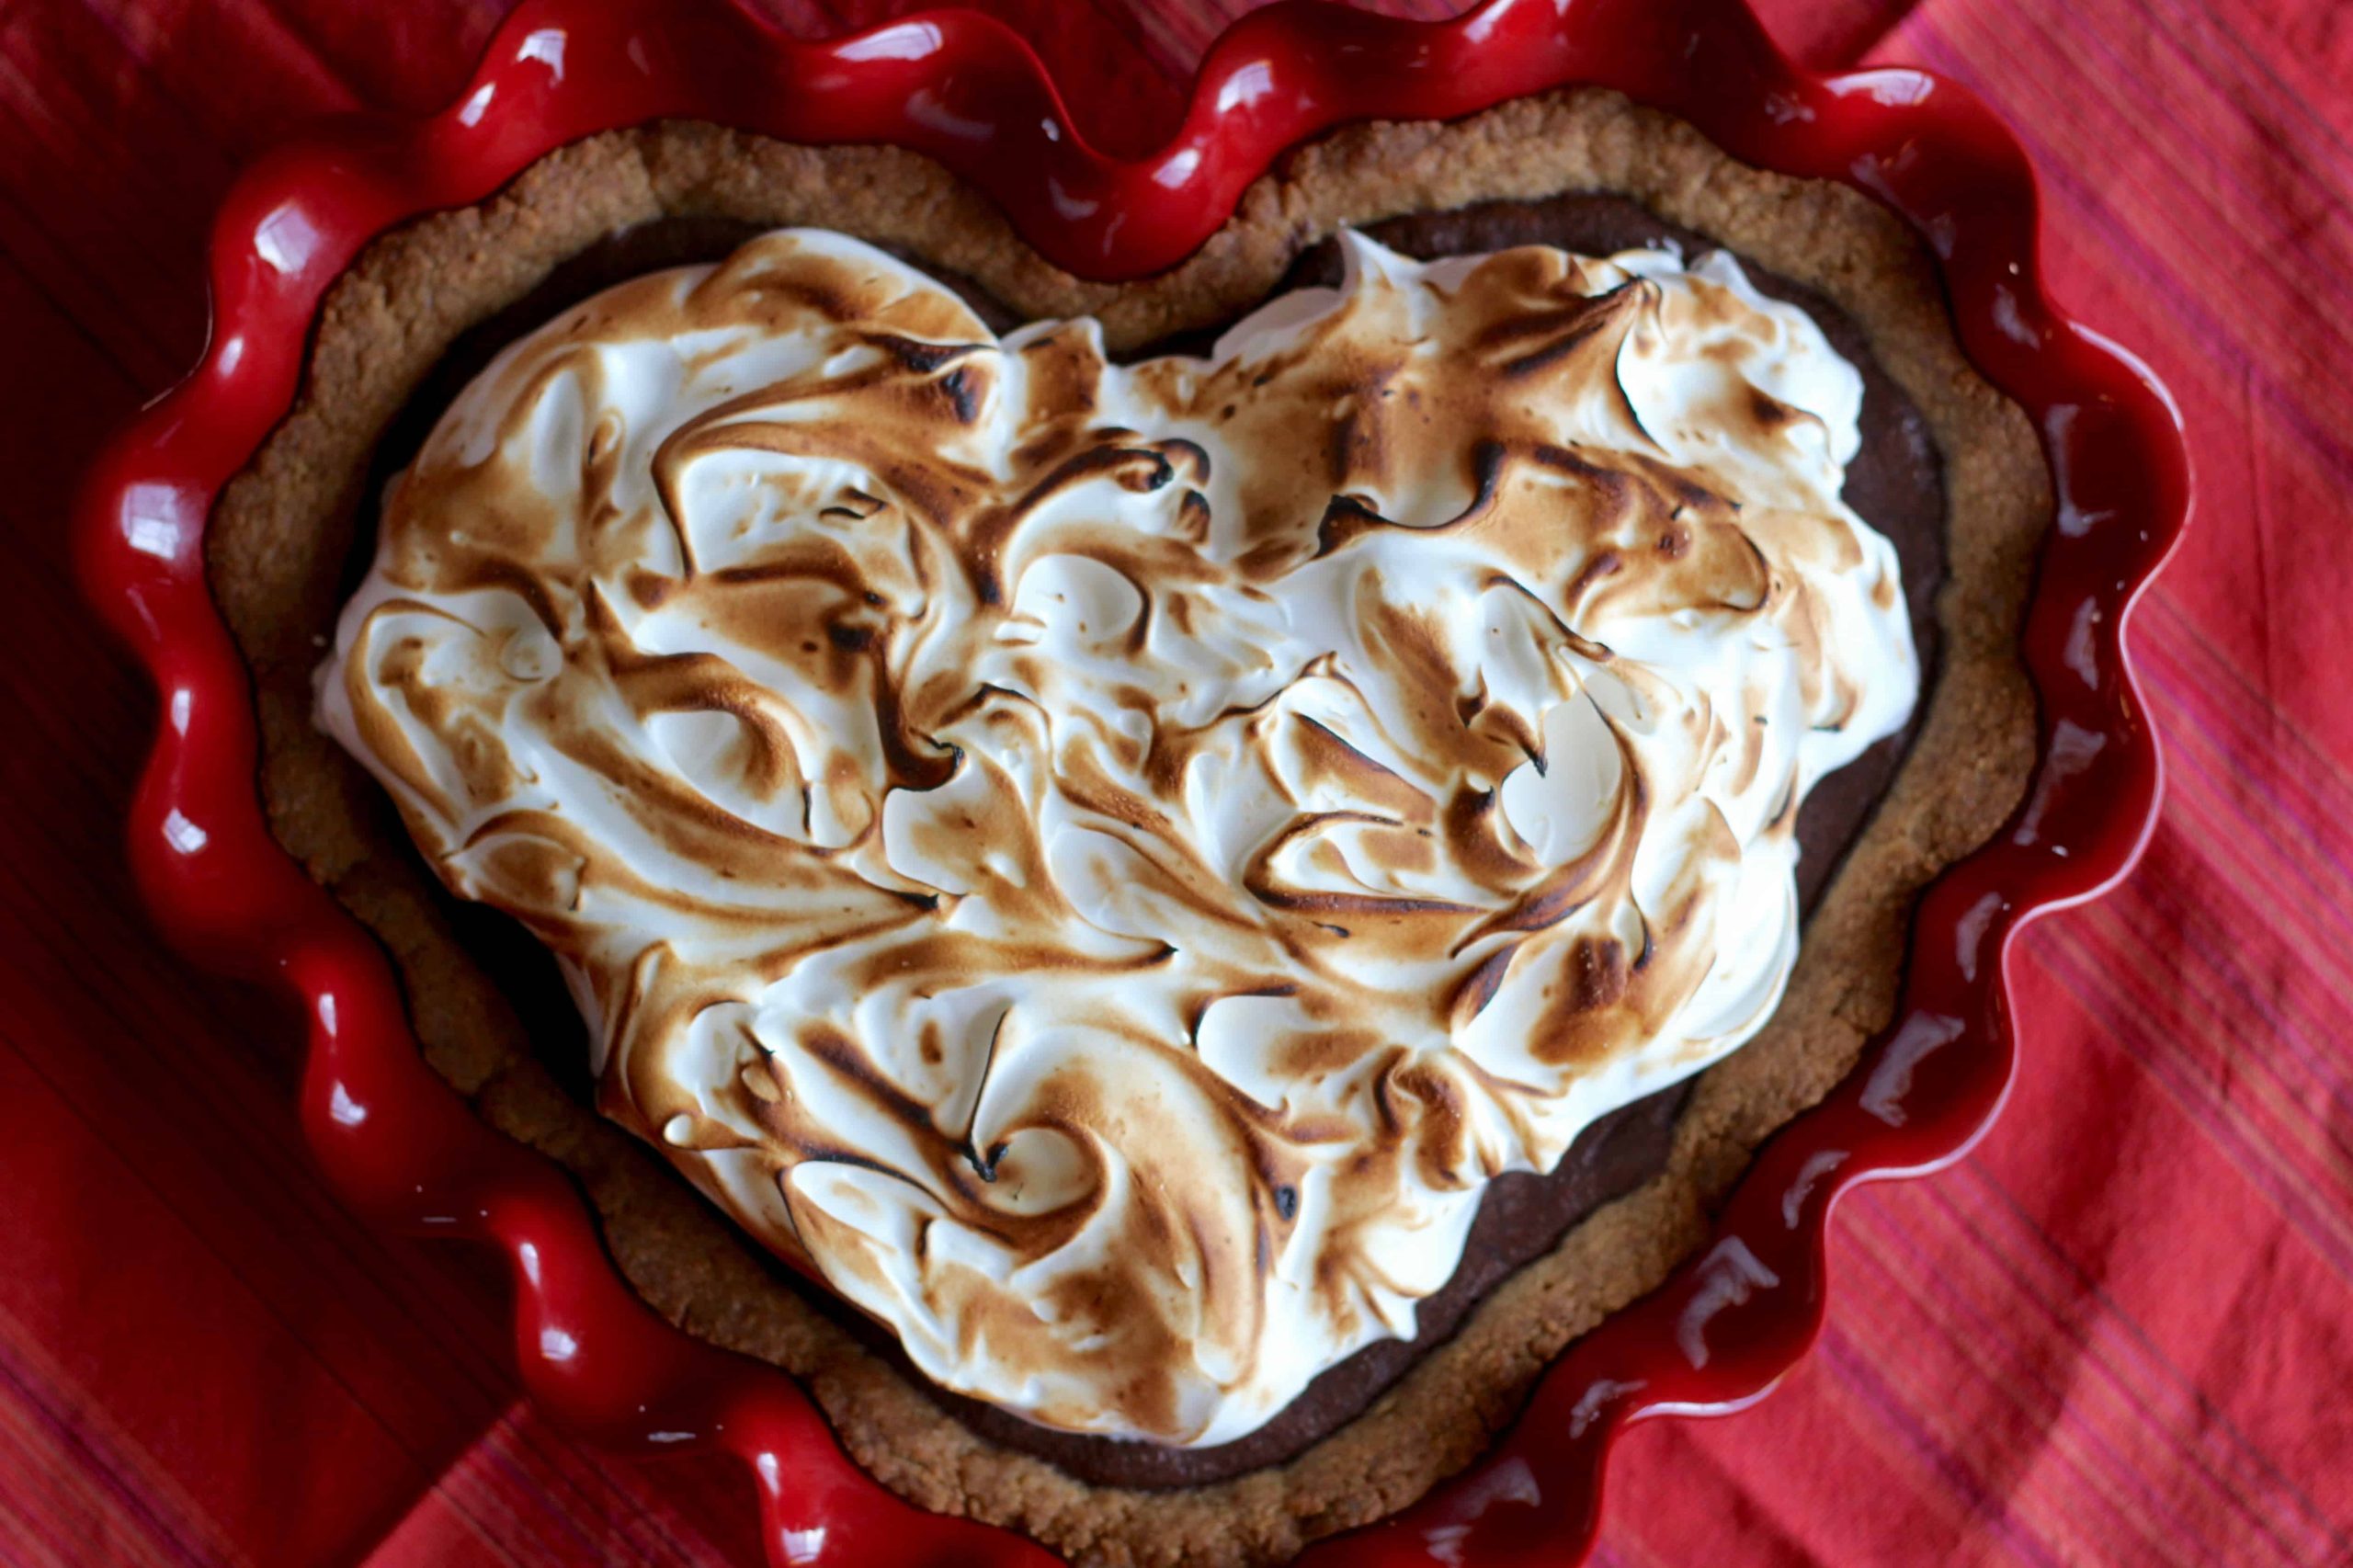
And so, I wanted to make something rich and sweet and decadent to celebrate the summer. Something swimming in chocolate, something magnificent in its texture, something that I would want to eat a whole tray of, something easy enough to make while stumbling out of the end-of-year haze. Something that would make me want to weep tears of joy and moan with reckless abandon. And luckily I came upon a recipe for Halfway Cookie Bars, which fit the bill on all accounts, and which made me wonder where these have been all my life?? I didn’t know about them previously, but apparently it’s kind of a revived old-timey recipe, though I couldn’t find anything on its origin. Mindy Segal has a similar recipe in Cookie Love that she calls “Dream Bars”, but as much as I love her, anything in her book is just a little too much work right now. 😉 This version involves making a crumbly cookie crust similar to chocolate chip cookie dough (minus the chips), topped with a thick layer of melty chocolate, all covered in a soft, crackly brown sugar meringue. I knew they would be good because of all those words I just wrote, but I didn’t necessarily expect them to launch me into *full* dessert ecstasy mode. While I wanted all the aforementioned features, I was pretty sure that something so intense would require a lot more time and effort, but I was squarely wrong, friends. These little bars boast a satisfying effort-to-deliciousness ratio. It’s time-consuming only in that you are making two components, the dough and the meringue, but each is quite easy on its own, and you’ll be shoving them in your pie hole in no time, melting away the stress of the school year with every bite… *sigh*

A couple of recipe notes:
- While you can use chocolate chips, I highly recommend using chocolate couverture wafers/discs. Chocolate chips are formulated to hold their shape when baked; couverture chocolate is meant to melt, resulting in gooey, melty, messy bars. If you’ve never tried using chocolate wafers, I implore you, this is the time. I used Guittard 61% Lever du Soleil, which is my go-to bittersweet chocolate, though you can certainly use a nice milk or dark chocolate depending on your preference. The quality of your chocolate will definitely affect the ecstasy level of your bars. I’m just sayin’.
- I would make a couple of minor changes next time:
- I would prefer a thicker crust, so I’ll probably increase the cookie dough by 50%, and therefore bake a few minutes longer.
- I would increase the vanilla in the dough to 2 teaspoons, reflected in the recipe below.
- Make sure to grease the parchment paper that you place on top, otherwise the meringue will stick to it, as I found out. However, in the end it didn’t really matter that much because when I cut the bars, the meringue shattered all over the place anyway (in the best possible way).

Halfway Cookie Bars
Adapted from The Kitchn
Yields 24 bars
If you want a thicker cookie layer, increase the cookie dough by 50% and increase the baking time by a few minutes.
You can customize the bars by using other ingredients in addition to or instead of the chocolate. I didn’t do this, but you could use toffee bits, butterscotch or peanut butter chips, chopped and toasted nuts, etc.
- 2 cups all-purpose flour
- 2 teaspoons kosher salt or 1 teaspoon fine sea salt
- ¼ teaspoon baking soda
- 1 teaspoon baking powder
- ½ cup unsalted butter, softened
- ½ cup granulated sugar
- 1½ cups brown sugar, divided
- 2 large eggs, separated, at room temperature
- 1 tablespoon water
- 2 teaspoons vanilla bean paste or pure vanilla extract
- 12 ounces good-quality semisweet chocolate couverture wafers/discs, roughly chopped (or chocolate chips or chocolate chunks)
- 1 large egg white, at room temperature
Preheat an oven to 350°F and place a rack in the middle of the oven. Line a 9×13” metal baking pan with aluminum foil so that it hangs over the long sides of the pan. (This makes it easier to remove the giant slab of bars from the pan later.) Grease the foil with nonstick cooking spray and set it aside.
To make the cookie dough, start by whisking together the flour, salt, baking soda, and baking powder in a mixing bowl. Place the butter, granulated sugar, and ½ cup of brown sugar in the bowl of a stand mixer and cream them together on medium-high speed until the mixture resembles smooth frosting, about 4-5 minutes, stopping as needed to scrape down the sides and bottom of the bowl. (The dough can also be made with a hand mixer and mixing bowl.)

Add the egg yolks to the creamed mixture one at a time and mix each one until completely absorbed, then add the water and vanilla, and mix again until blended. Scrape down the sides and bottom of the bowl and mix again for 10 seconds.
Add the flour mixture all at once and mix on the lowest speed just until all the flour has been absorbed. The dough should look crumbly; do not overmix.

Press the cookie dough into the pan gently with your hands in an even layer, making sure to get into the edges and corners. Scatter the chopped chocolate on top of the cookie dough evenly, again making sure to get into every edge. Lightly press the pieces into the dough to help them adhere, in order to prevent them from moving around too much when you add the meringue.

To make the meringue, place the 3 egg whites (2 whose yolks were used above, plus the additional one) in the bowl of a stand mixer or in a large non-reactive bowl. (I did the latter and used a hand mixer.) Fit your mixer with the whisk attachment and whip the egg whites, gradually increasing the speed to medium-high. When they are very frothy and resemble loose foam, add the remaining 1 cup of brown sugar a little at a time. Once the sugar has been added, continue mixing and gradually bump the speed up to high. Whip the meringue until it has thickened considerably, lightened in color to a pale beige, and falls off the whisk in very thick ribbons, approximately 5 minutes, similar to the consistency of a soft marshmallow meringue.

Scrape the meringue onto the center of the chopped chocolate and carefully spread it to the corners and edges of the pan with a small offset spatula. It is very sticky— a great technique is to “skim” meringue from the top and gradually coax it outward.
Place a lightly greased piece of parchment paper directly on the surface of the meringue (greased side down) to protect it from scorching. Bake the bars for 25-30 minutes, rotating the pan once halfway through, and carefully removing the parchment after 20 minutes. (If bits of meringue rip off, it’s okay.) The meringue will start to look crackly, a little puffed, and slightly browned, and the bars will start to pull away from the sides of the pan.

Remove the pan from the oven and allow the bars to cool completely in the pan set over a wire cooling rack. Lift the entire cooled slab out of the pan by grasping the parchment paper overhang, and cut it into squares or rectangles. The bars are best eaten the day they are made, but can be stored in an airtight container at room temperature for a couple of days.


© Dafna Adler & Stellina Sweets, 2016.