


Let me introduce you to PB&J living its best life. I ate my first peanut butter and jelly sandwich at age… 27. Seriously. For reals. I didn’t grow up eating it because my family immigrated to the U.S. when I was four years old from Israel, and it was not (still not so much) something they eat there. But don’t feel too sorry for me– I got to bring glorious slices of white bread sandwiching Israeli chocolate spread for my school lunches, so I wasn’t lacking in cool sandwich offerings. Delicious as these were, I had no idea what I was missing in everyone else’s all-American lunchbox duo. I ate peanut butter happily and jelly less enthusiastically but nonetheless, yet never together– just didn’t seem appetizing. But when I was introduced at the ripe old age of 27 to a proper PB&J sandwich, I realized that I’d missed a crucial culinary piece of American childhood. So now I like to make up for that by baking PB&J into some very adult baked goods. These Peanut Butter & Jelly Bars from Baked Explorations are childhood magic nestled between a buttery crust and oat crumble topping and I am here for it.
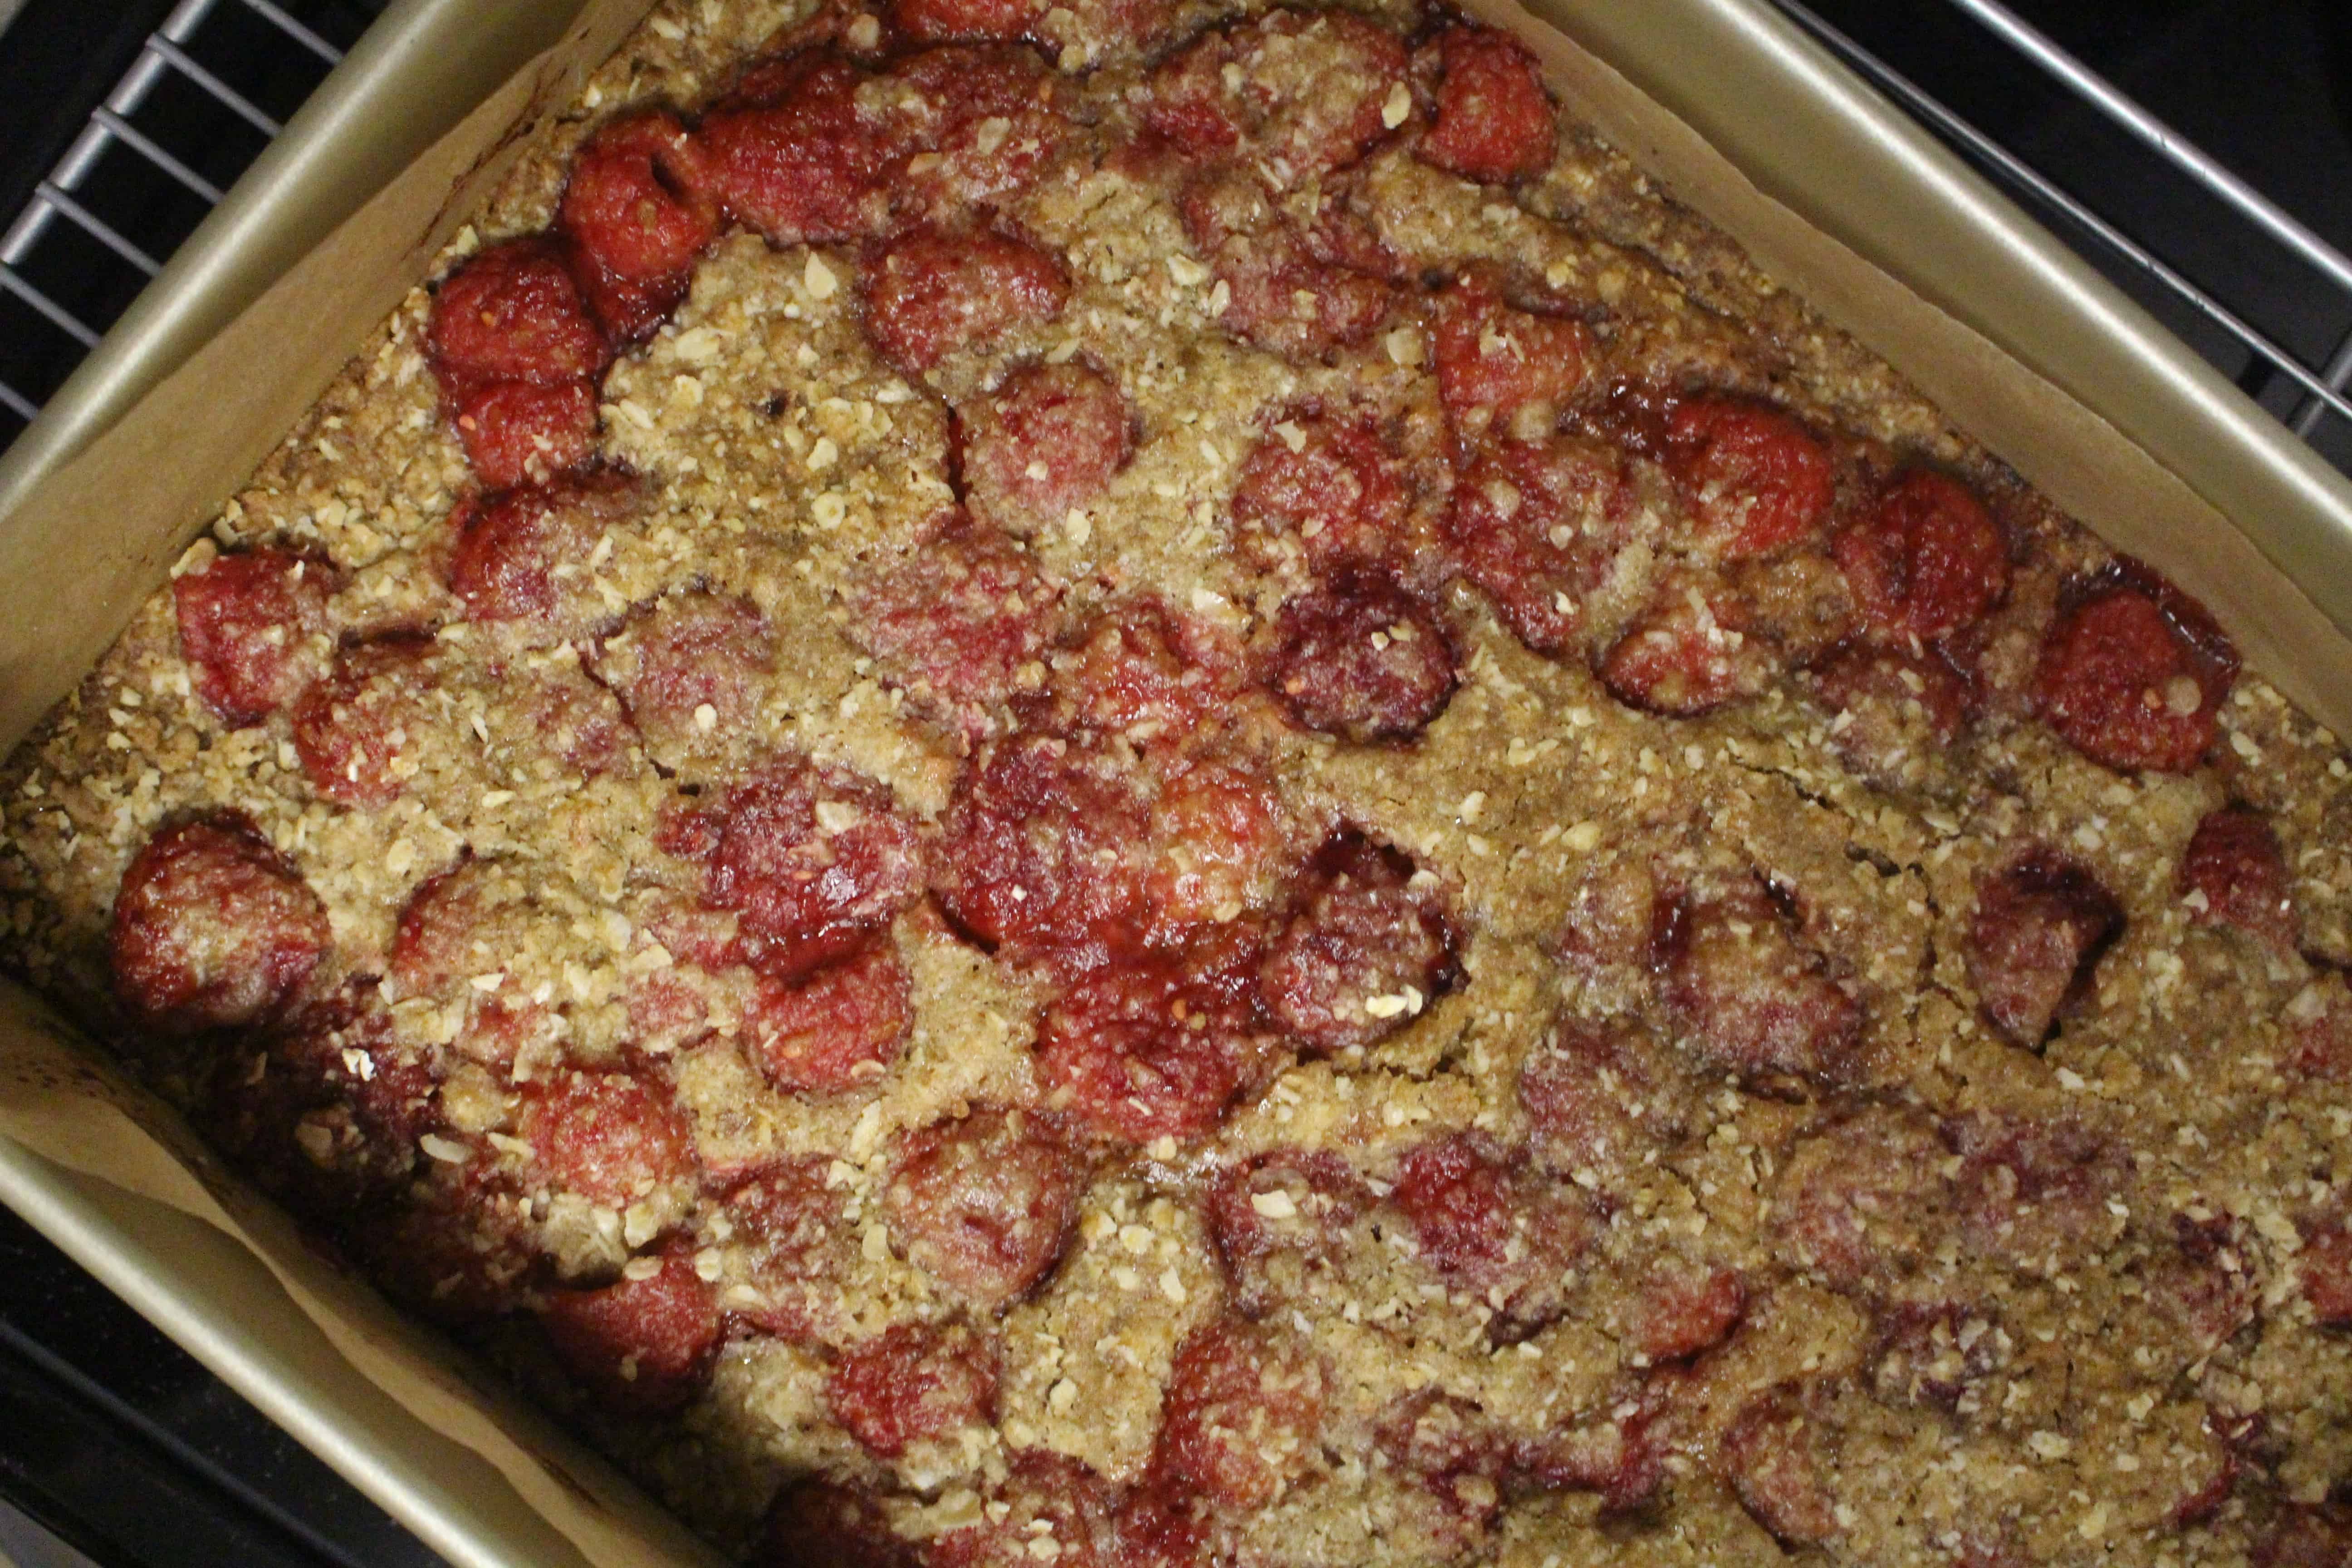
This week Baked Sunday Mornings is baking Raspberry Crumb Breakfast Bars from BAKED: New Frontiers in Baking. I try to stick to the assigned recipe schedule as much as possible, and I did try these. While the flavor was quite nice, the texture baked up soft and soggy in some spots due to the fresh fruit filling, and I was not happy with this. I thought that maybe it would work better if I puréed the fruit, in which case I could’ve just used a nice raspberry jam, which made me think of the recipe for the PB&J Bars, which I’d made a few months ago for the first time. Those needed some improvements, so I decided to make those for this week instead of dropping another $14 on raspberries to remake the raspberry bars.
I’ve had the PB&J Bars a number of times at BAKED in New York, and they are one of my all-time favorite BAKED treats. When I tried the recipe for the first time in April, I was in Israel and staying with friends, so I didn’t have my own kitchen tools and cake pans. I wanted to bake these for a friend’s birthday, and I did my best with what I had. However, a number of issues led to short, messy, squishy bars that tasted good, but looked nothing like the gorgeous bars I idolized at the bakery. I knew I wanted to rework these in my own kitchen once I got settled back in California, and this week was the perfect opportunity. I also wanted to make these now as an homage to school lunches for back-to-school for my coworkers now that I’m back working at the high school where I’ve been for 12 years, after a taking a full year off. 🙂
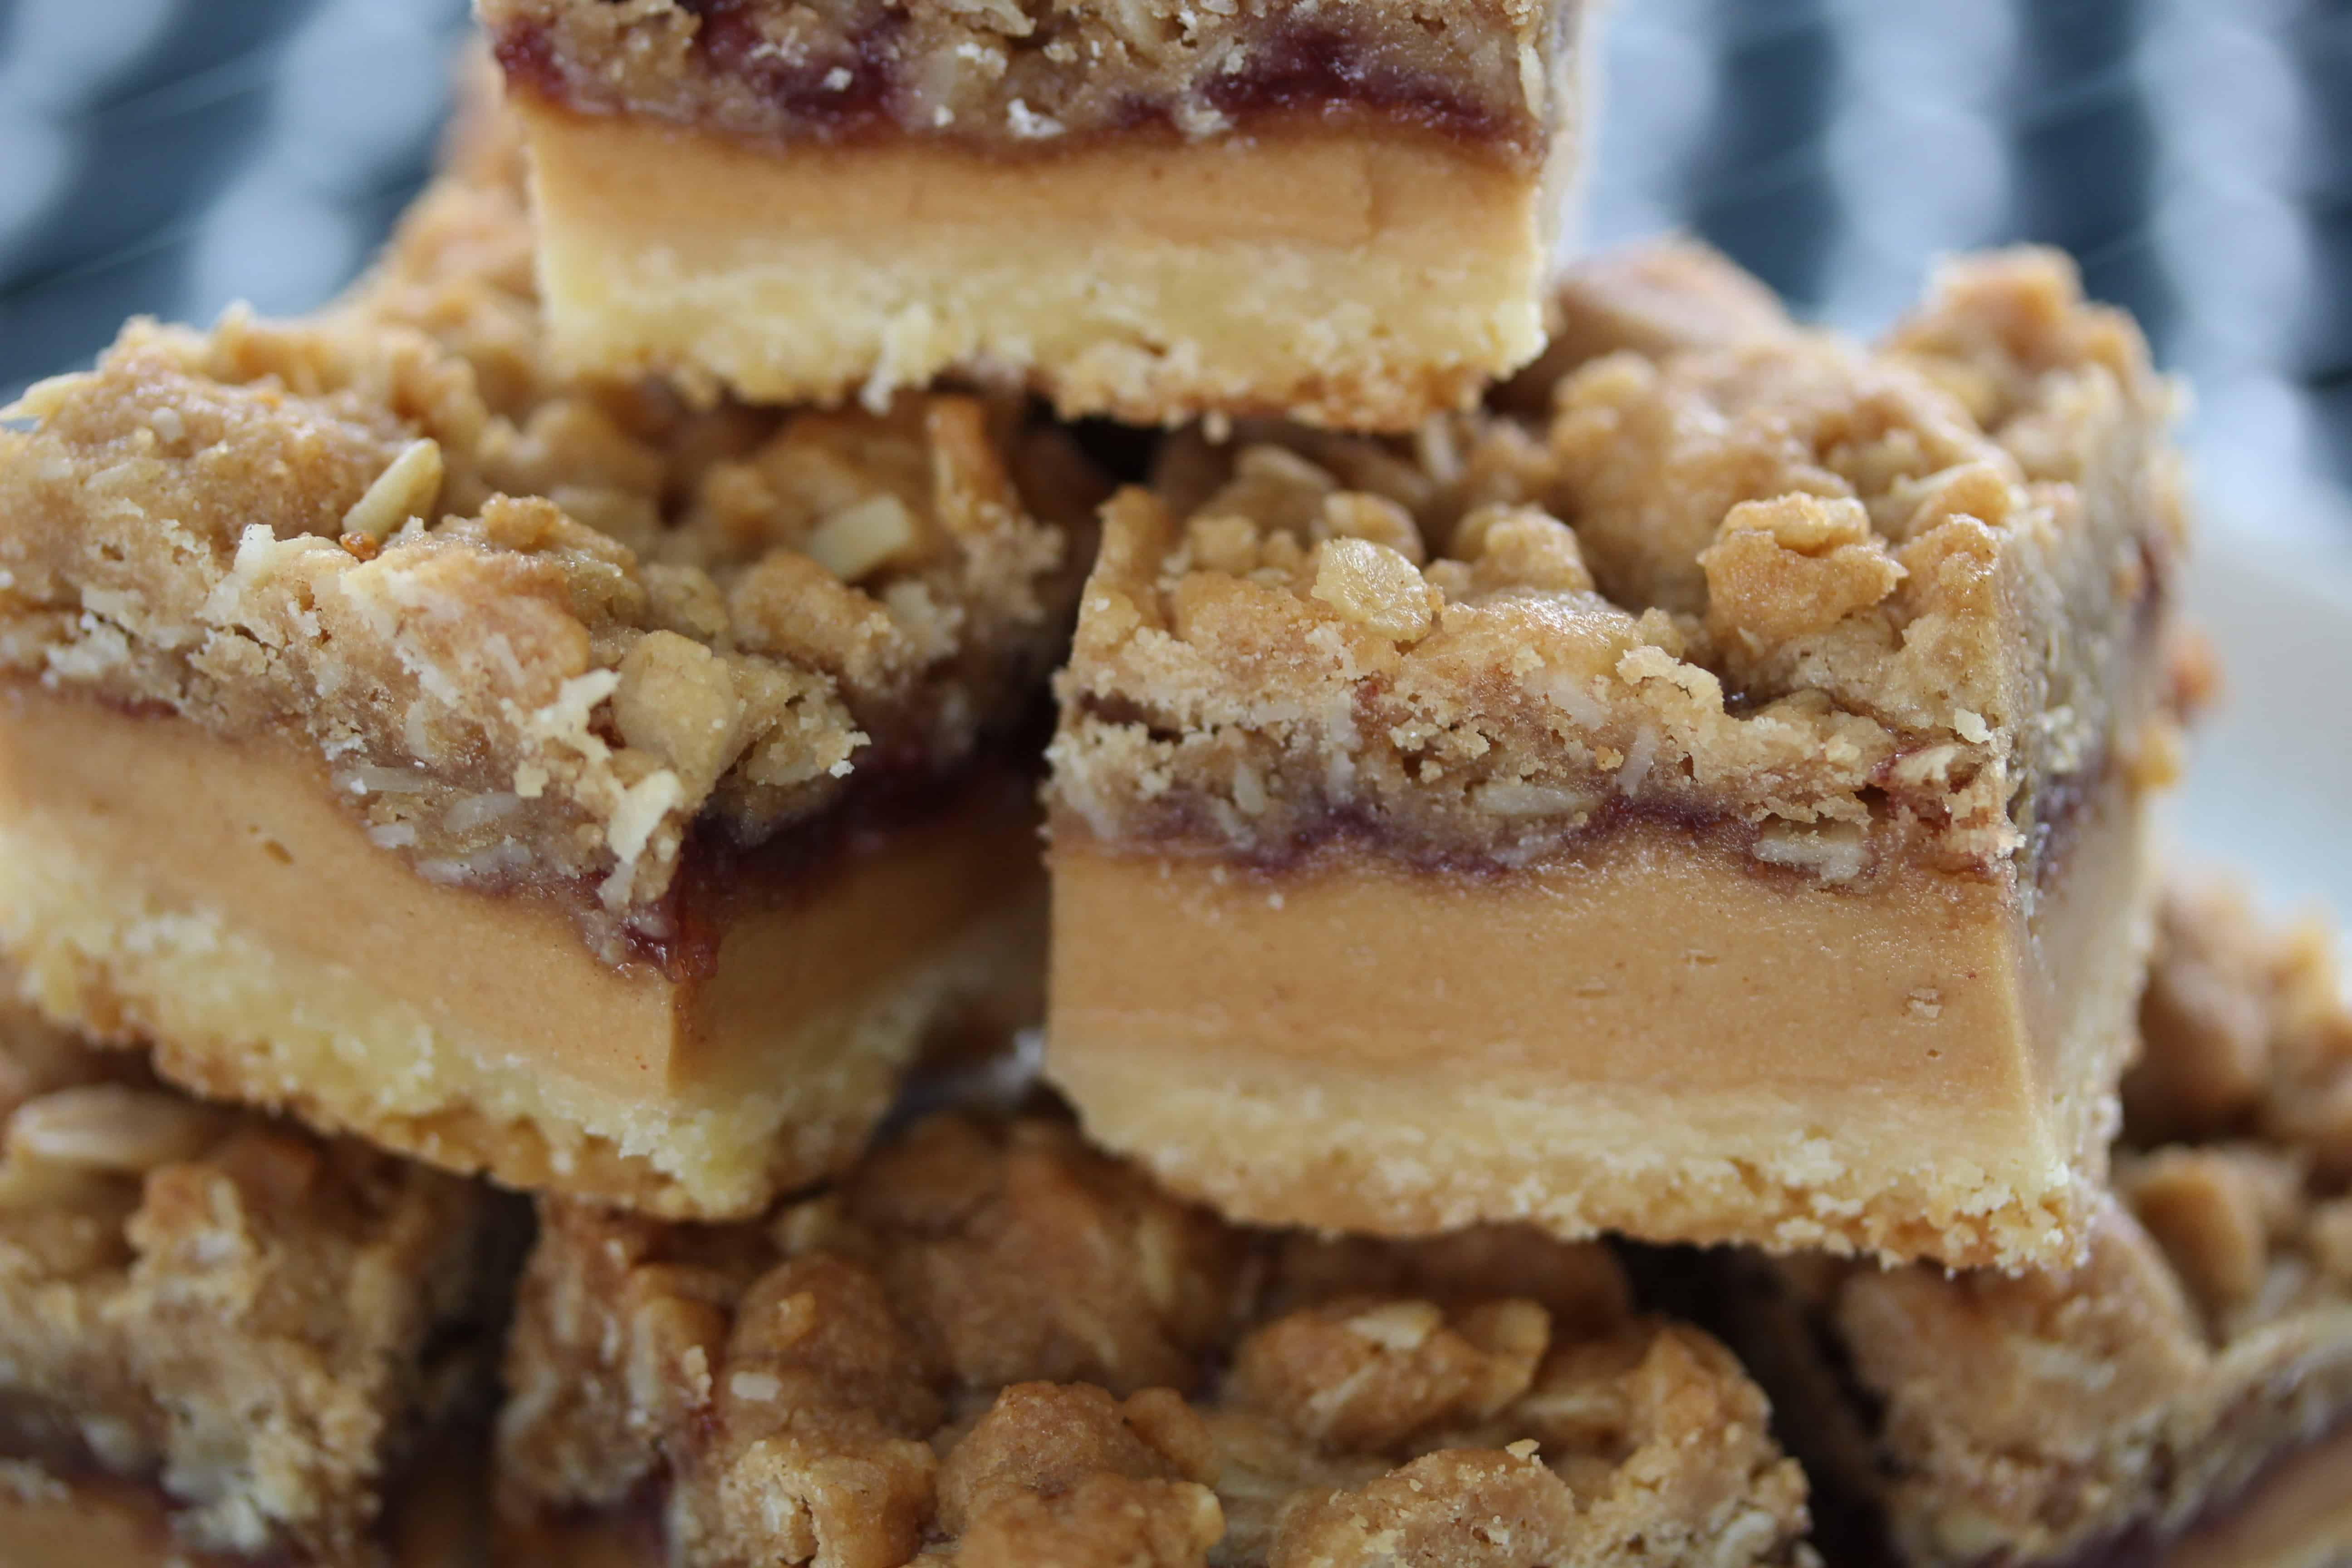
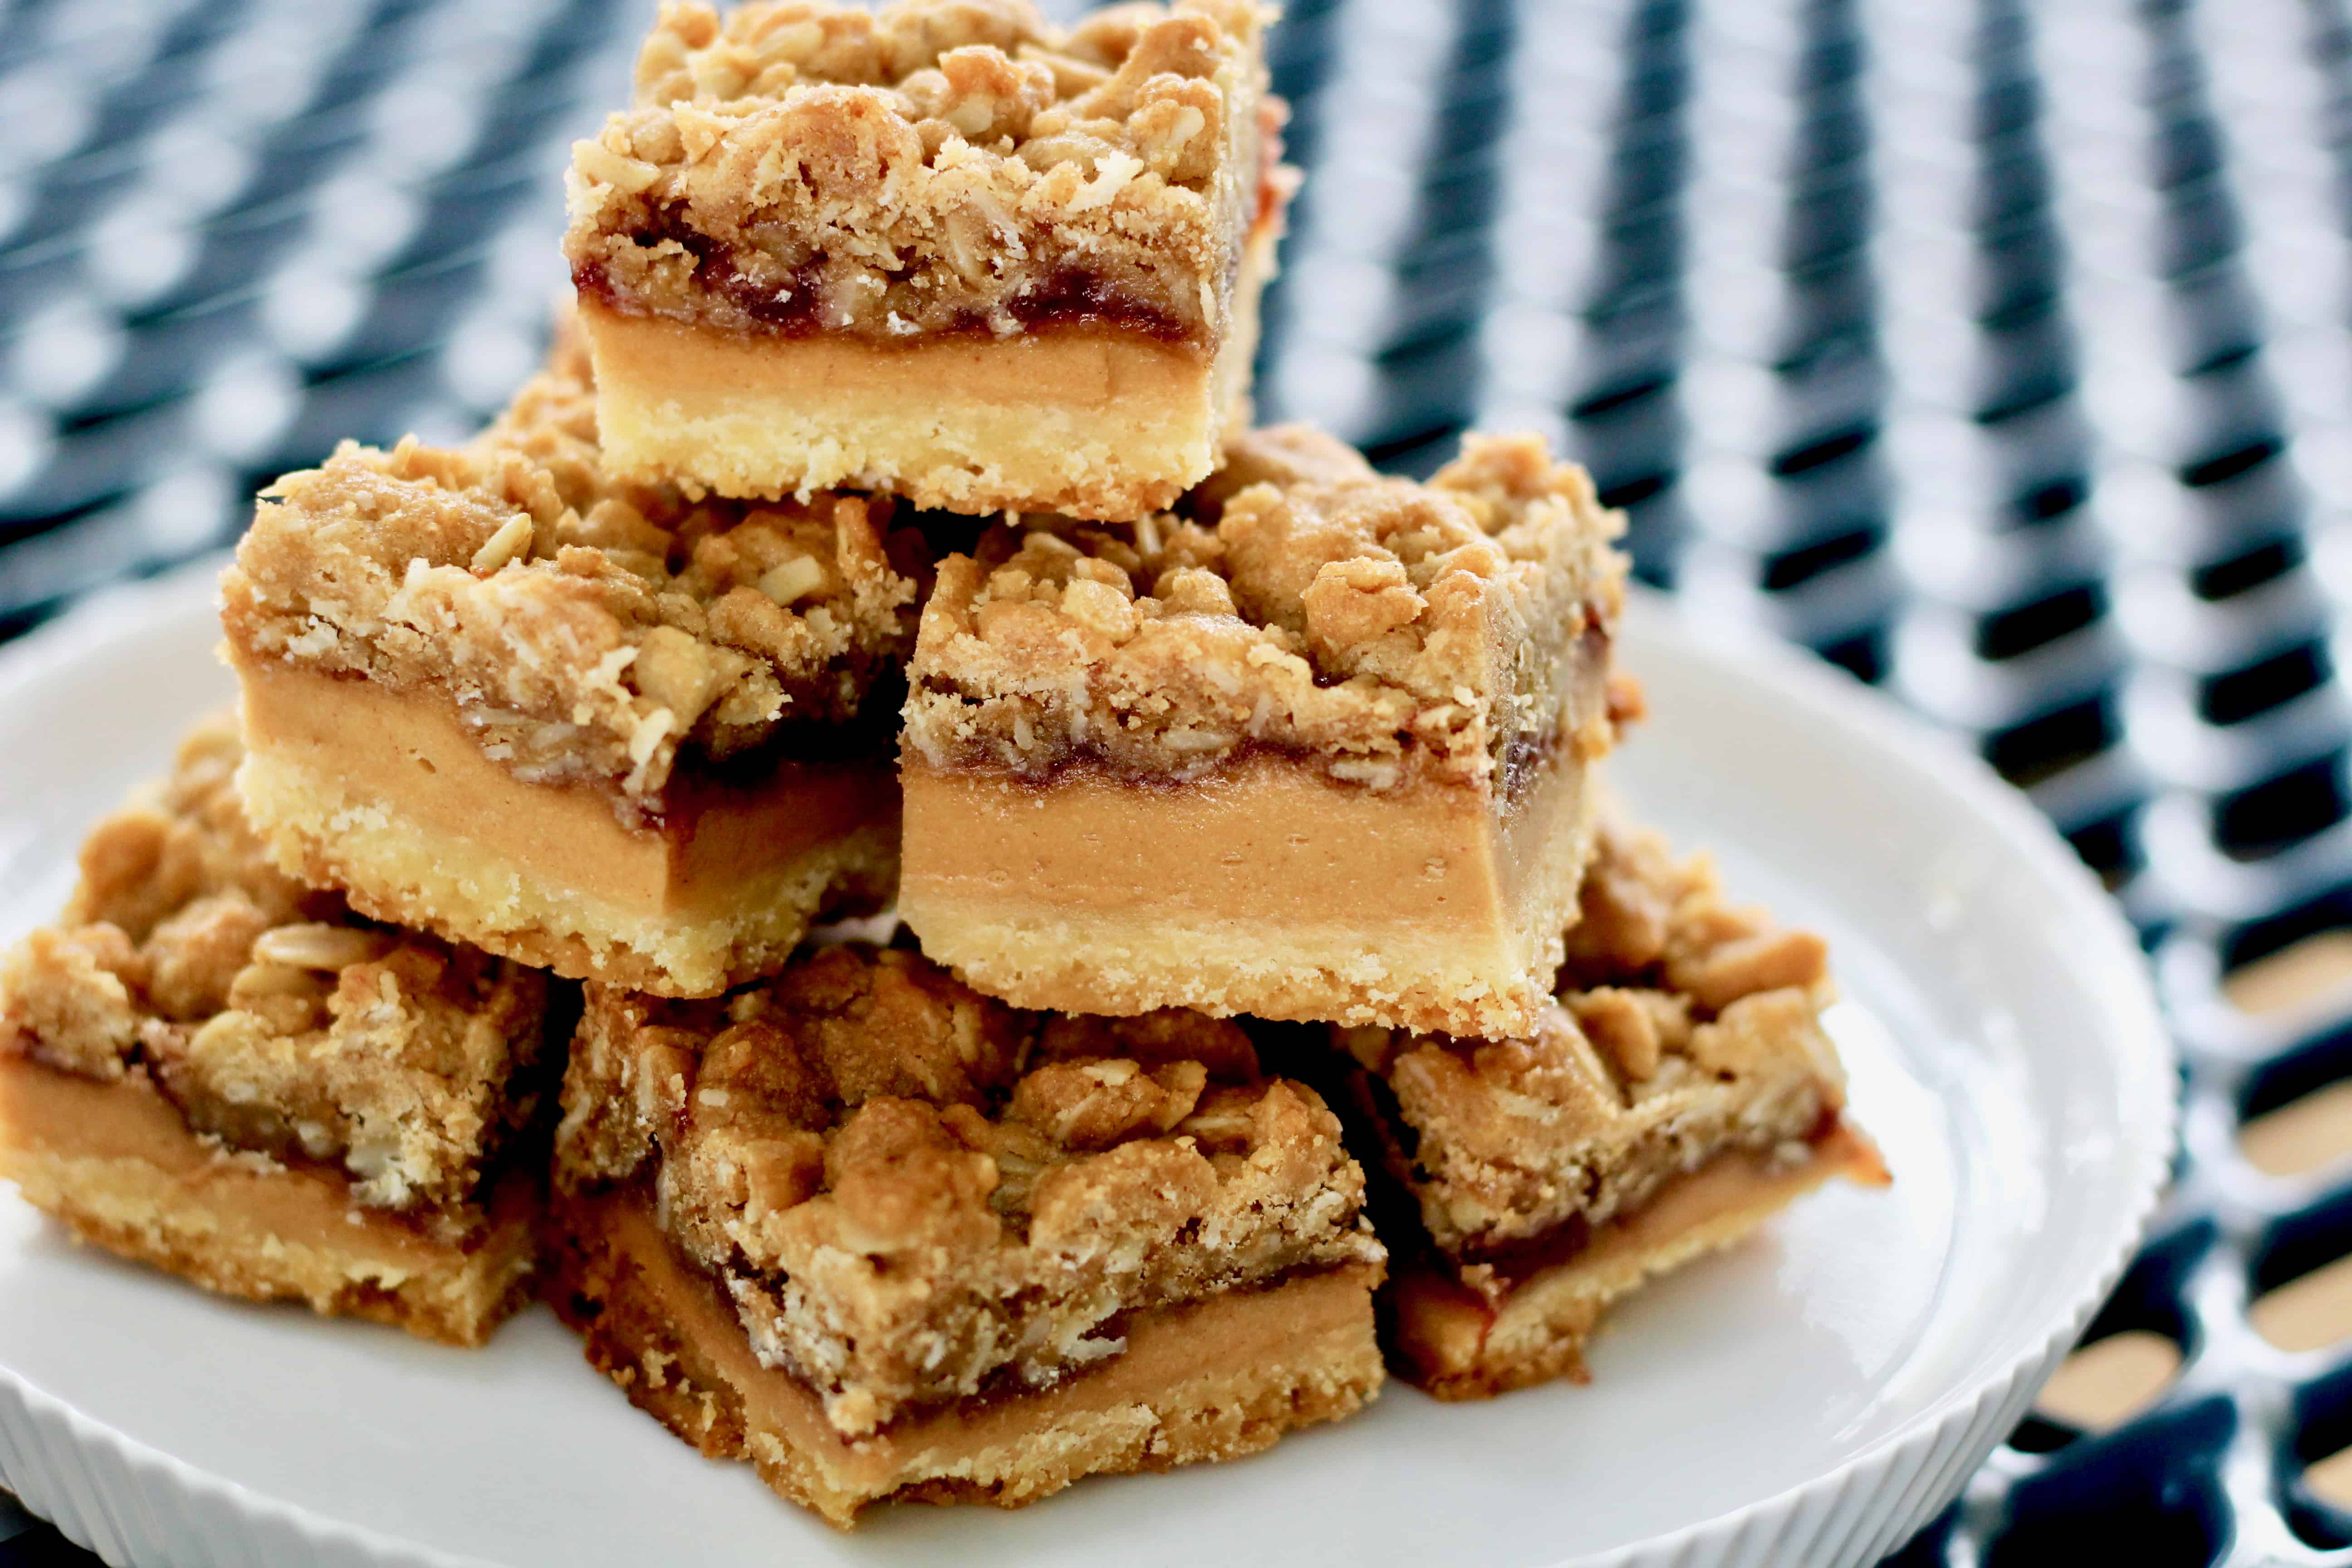
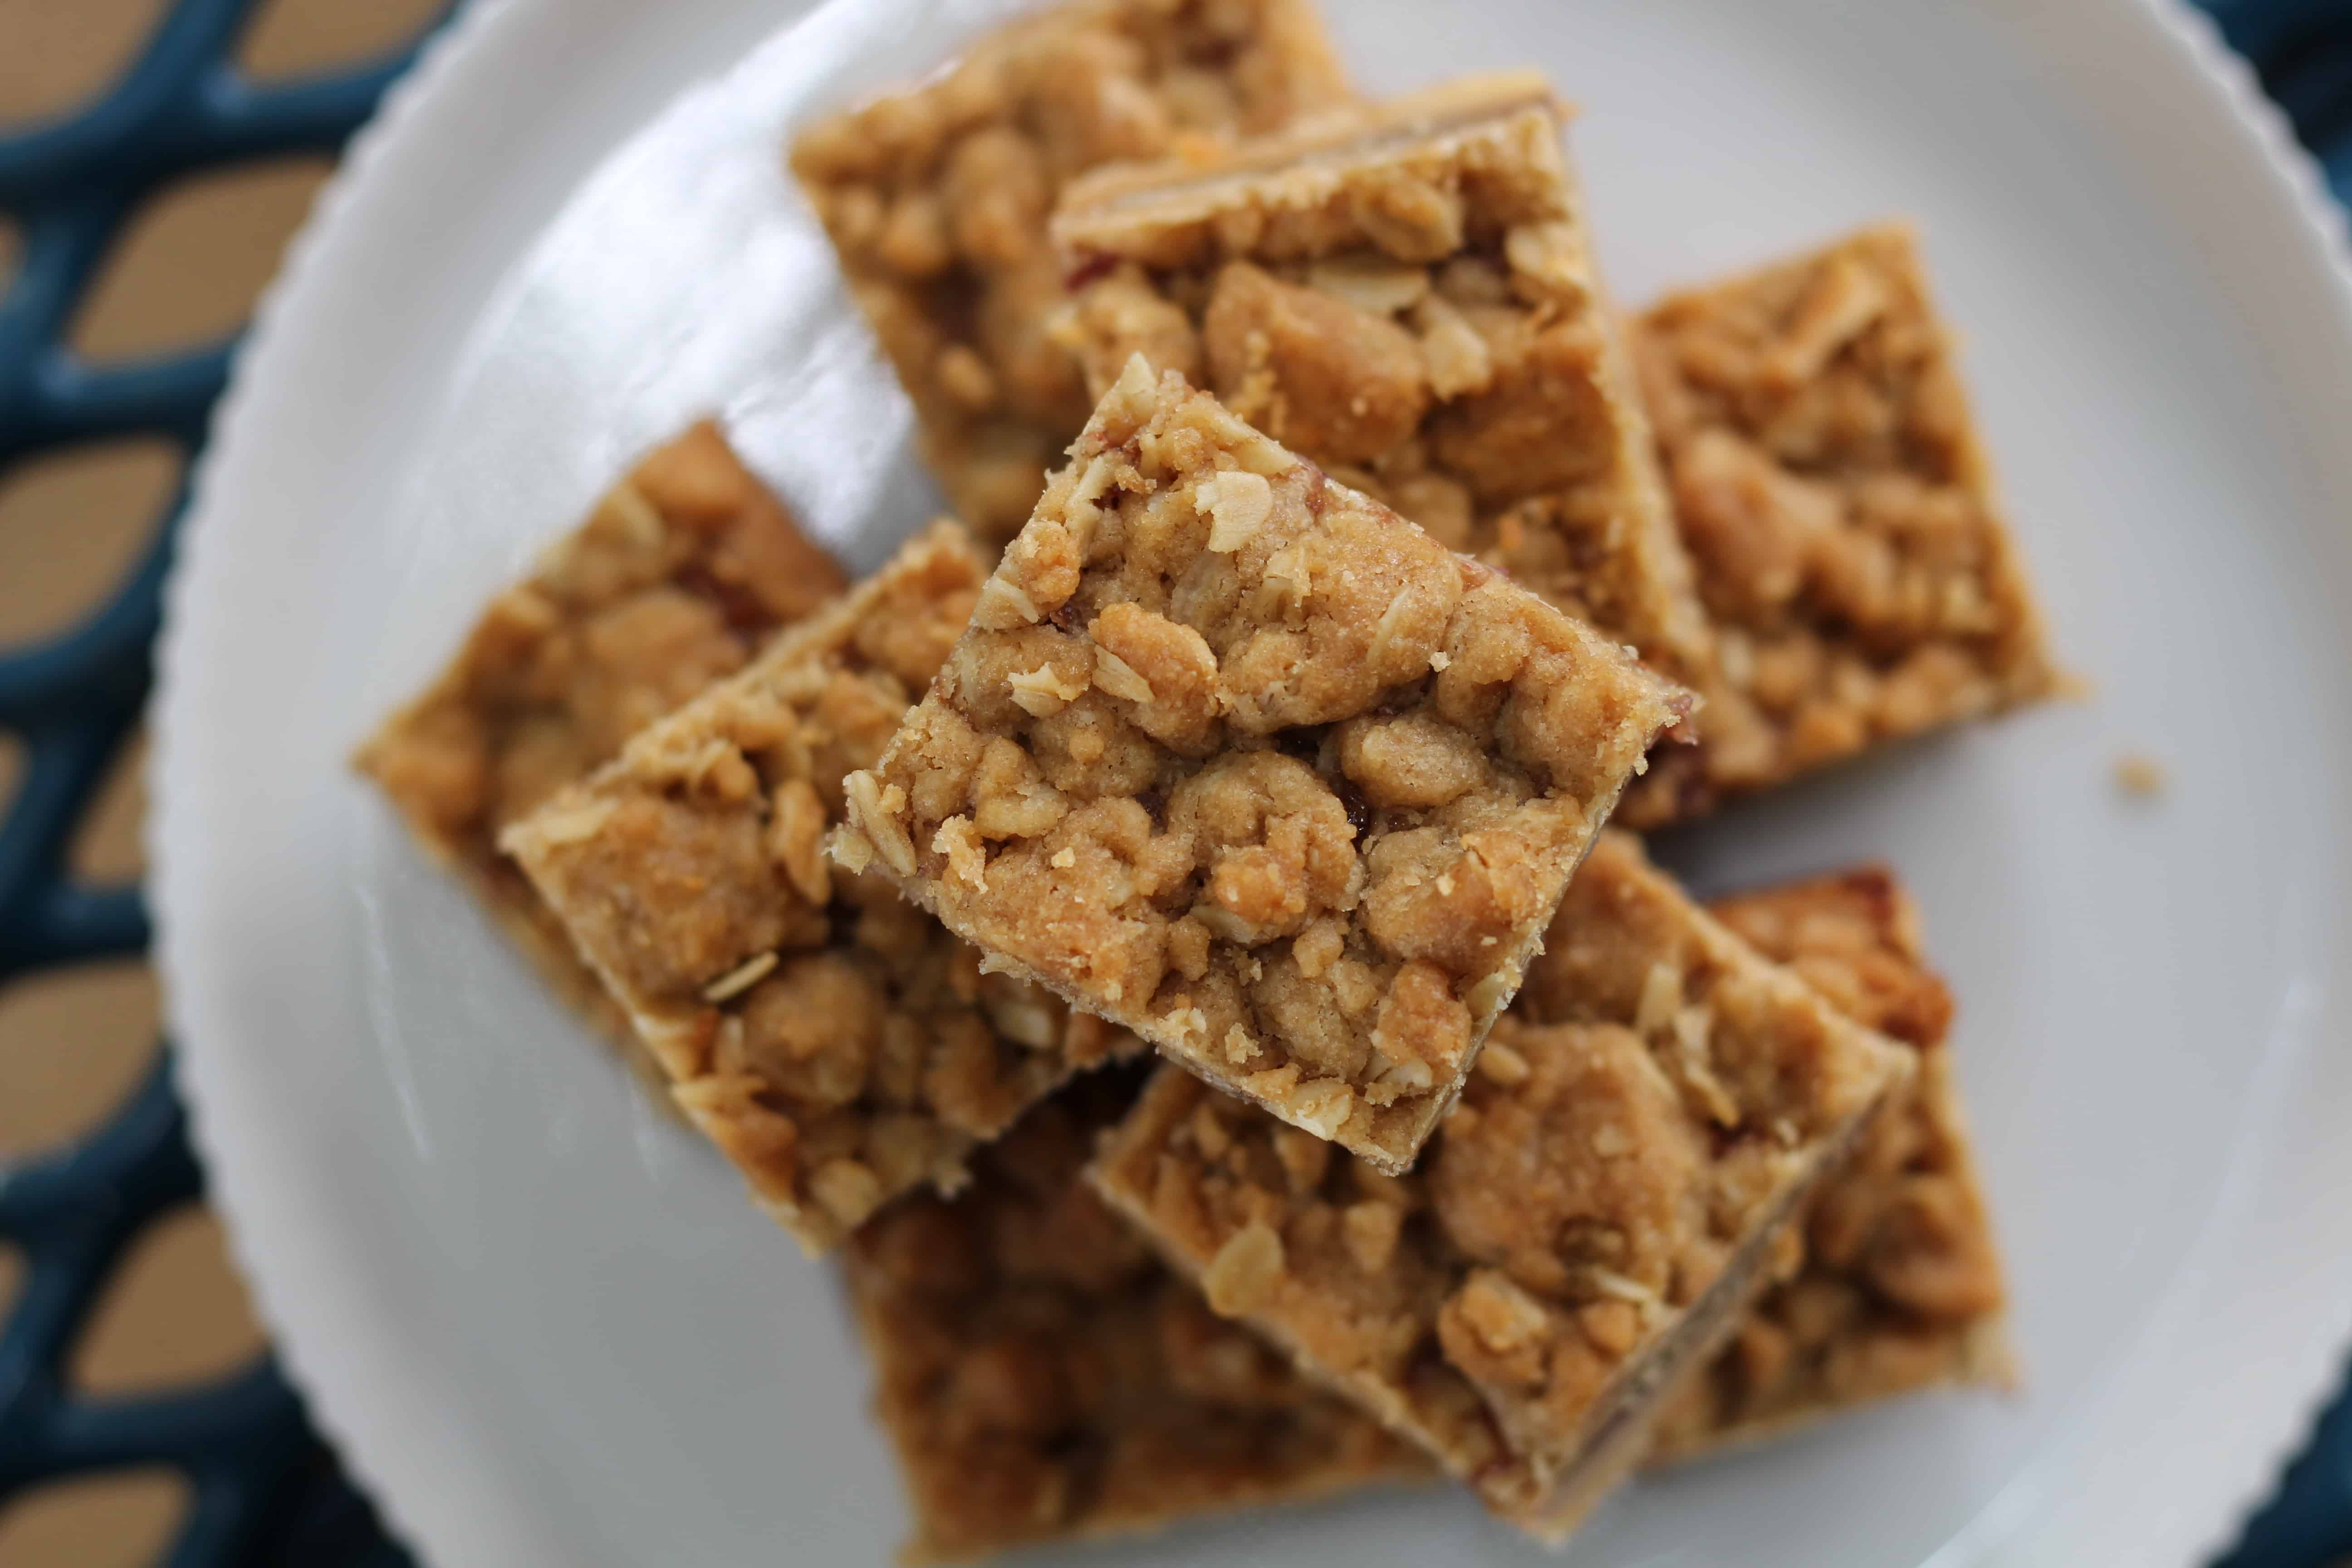
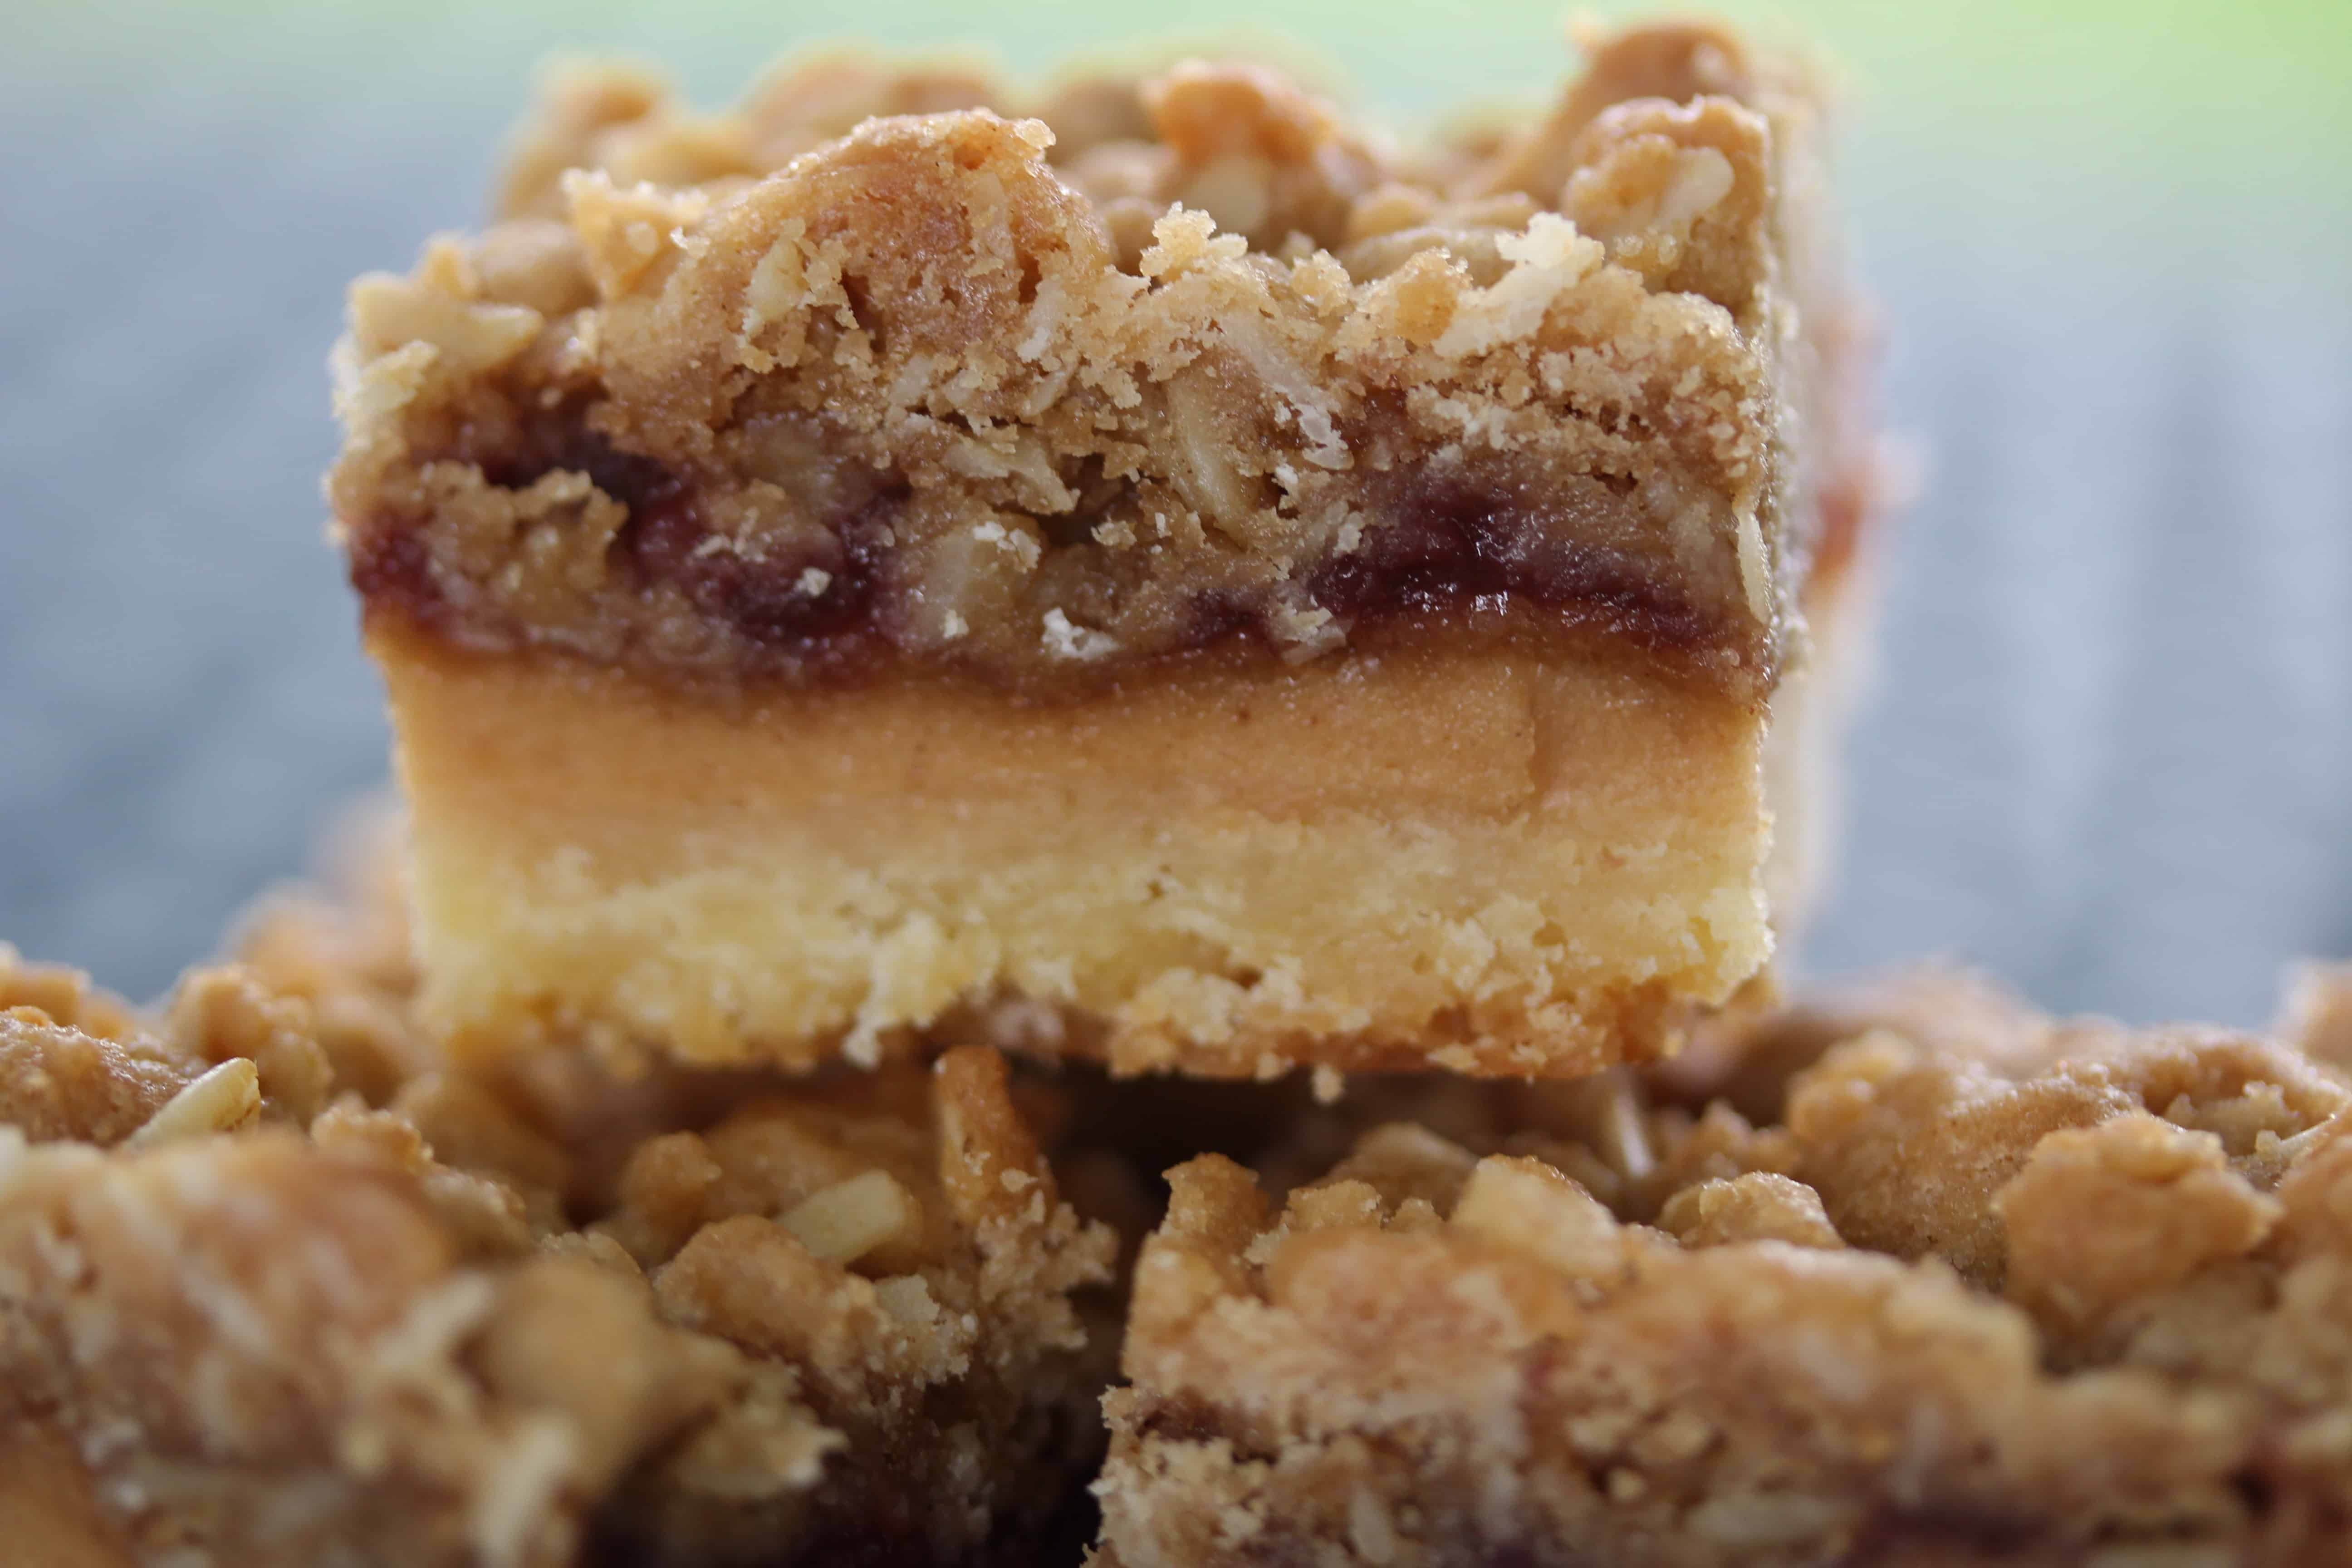
The bars consist of a buttery, sweet dough base similar to shortbread, topped with a thick peanut butter filling, fruit jam, and oat crumb topping. The first time I made them, the dough, which comes together in less than five minutes, came out strange. (I honestly don’t remember how it was strange– all I wrote down was ‘strange’. I know, super helpful.) There was a massive amount of peanut butter filling, and even though I only used about half of the jelly called for, that was way too much as well. If I remember correctly, the crumb topping was a bit meager. Basically, it was a jiggly mess coming out of the oven, and even right out of the fridge they were difficult to cut cleanly, let alone eat without jelly all over the place. (Although the jelly was so bright and pretty!)
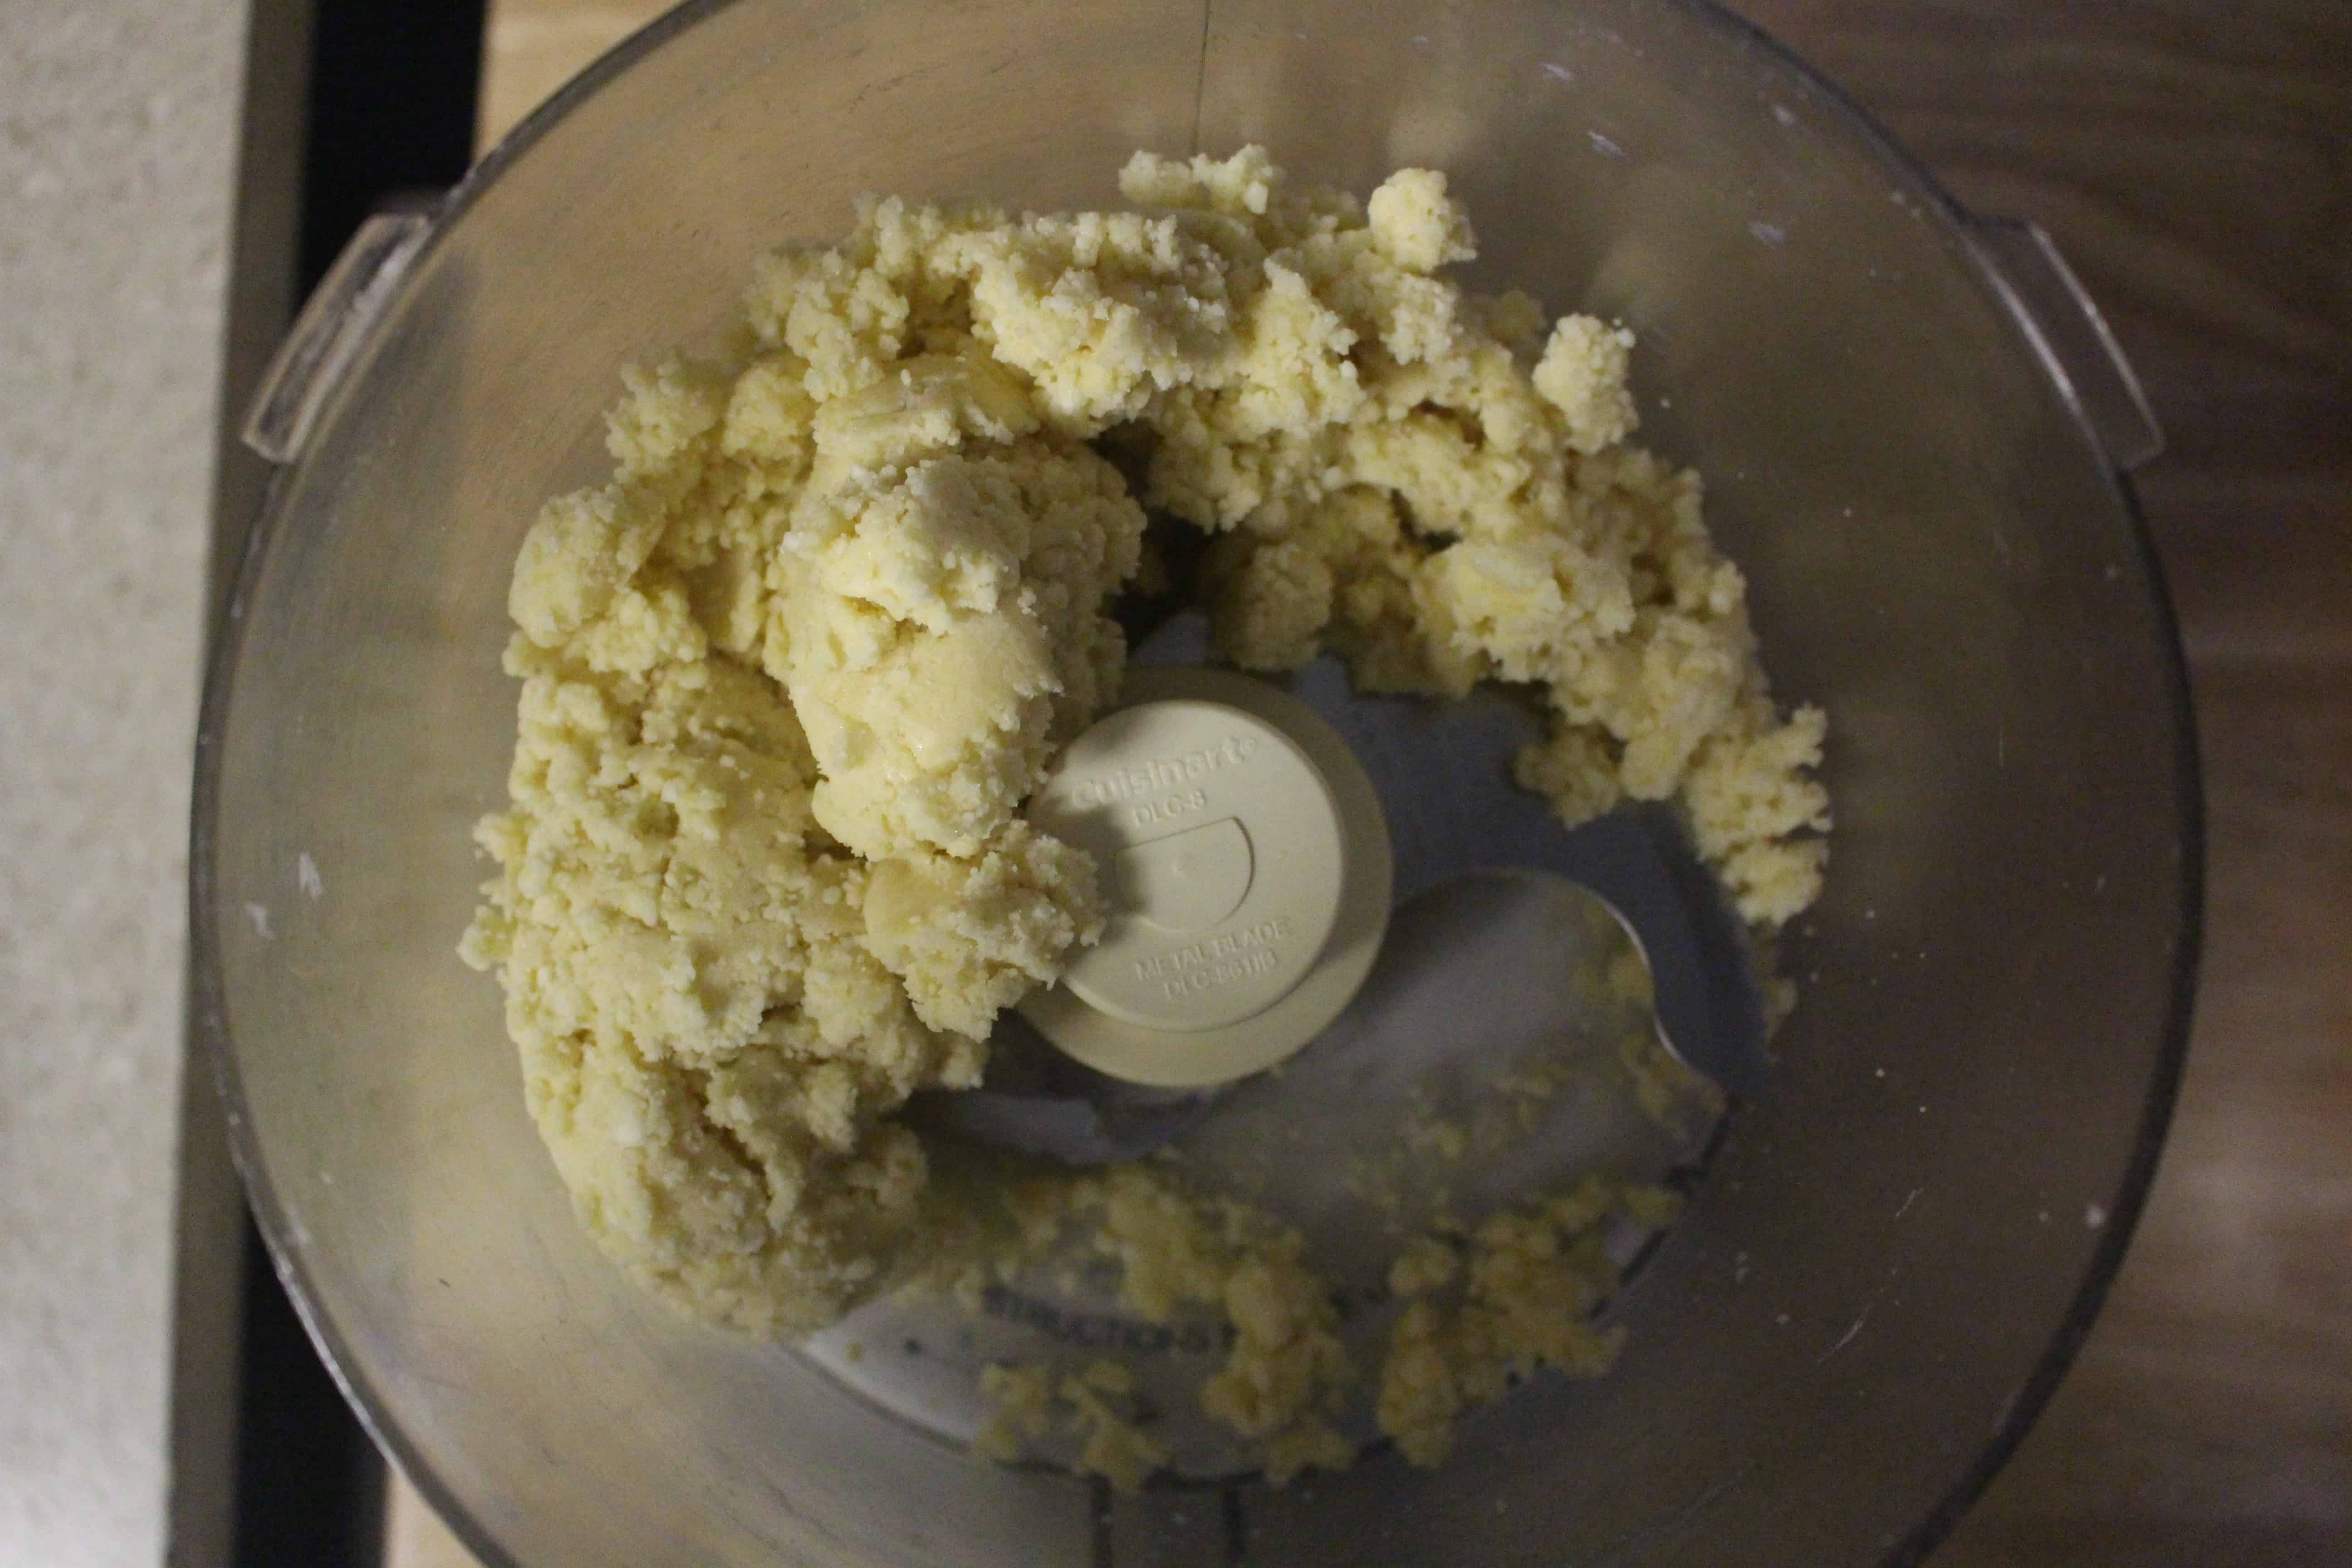
Cut to this week: My second attempt was better, but I knew that the bars had still not reached peak awesomeness. The bakery version is tall and hearty, and that’s what I was determined to recreate, but I found that the proportions were way off in order to achieve that. The crust dough is made by pulsing flour, sugar, and salt in a food processor, adding cold butter and processing to a sandy texture, and then pulsing in an egg until the dough comes together. Seriously the easiest dough. The tricky part is getting it into the baking pan; we are instructed to roll it out and ease it into the pan, but as it’s very sticky, it’s challenging to handle. It ended up being sort of a combination of rolling and patching, and then I spread it out to the best of my ability with a tiny rolling pin to the edges of the pan. However, I like a thick bottom crust on my bars, and I had to roll this dough sooo thin to get it even close to the sides of the pan. So I decided to use a 9″ x 9″ square pan instead of the 9″ x 13″ that we’re supposed to use. This worked much better for the thickness that I wanted (about ⅜”). After a stint in the freezer, I blind-baked the crust, then finish it off to a lightly golden brown. Each time I made it, the crust shrunk considerably, which was only an issue the first time when the filling layers were disproportionately thick.
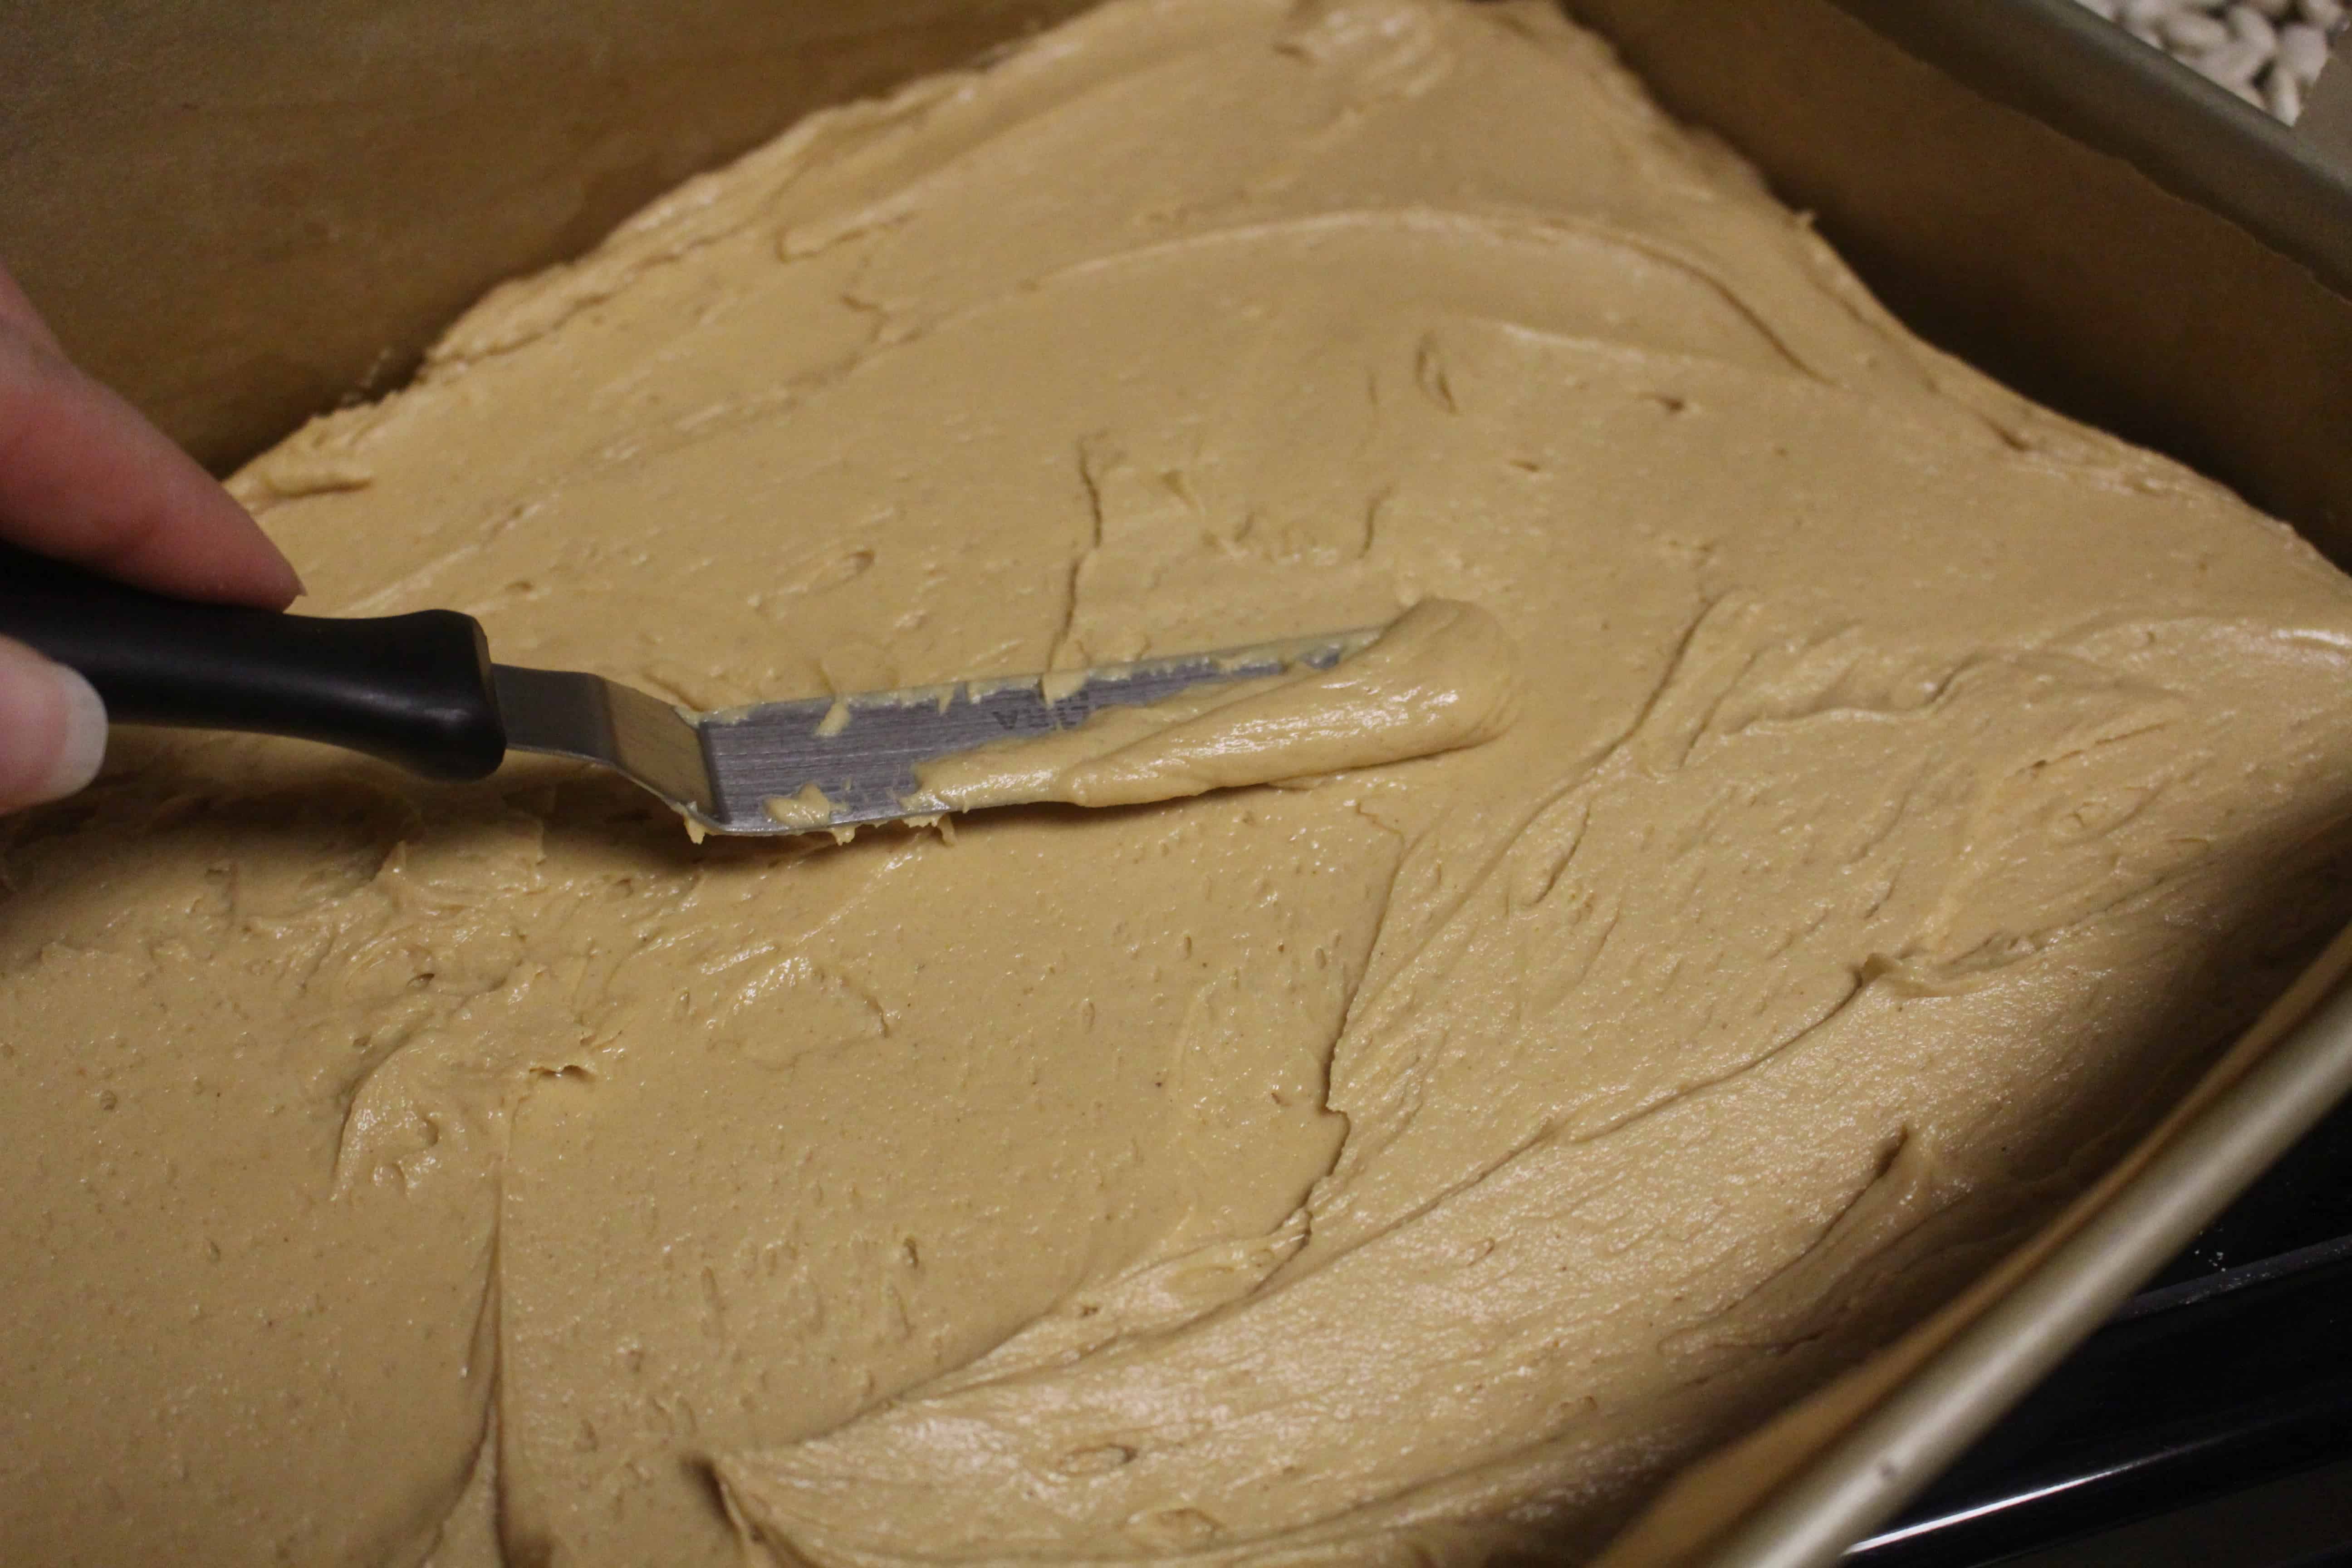
I already knew I wanted to reduce the amount of PB filling and jelly by a lot. I went with half of the filling, and I still didn’t use all of it. The filling is made by creaming butter, adding peanut butter, and then mixing in confectioners’ sugar and vanilla, yielding a mixture with the texture of a swoopy, fluffy frosting. Since I like my peanut butter-to-jelly ratio to be about 75% to 25%, I spread just a thin layer of jelly on top of that.
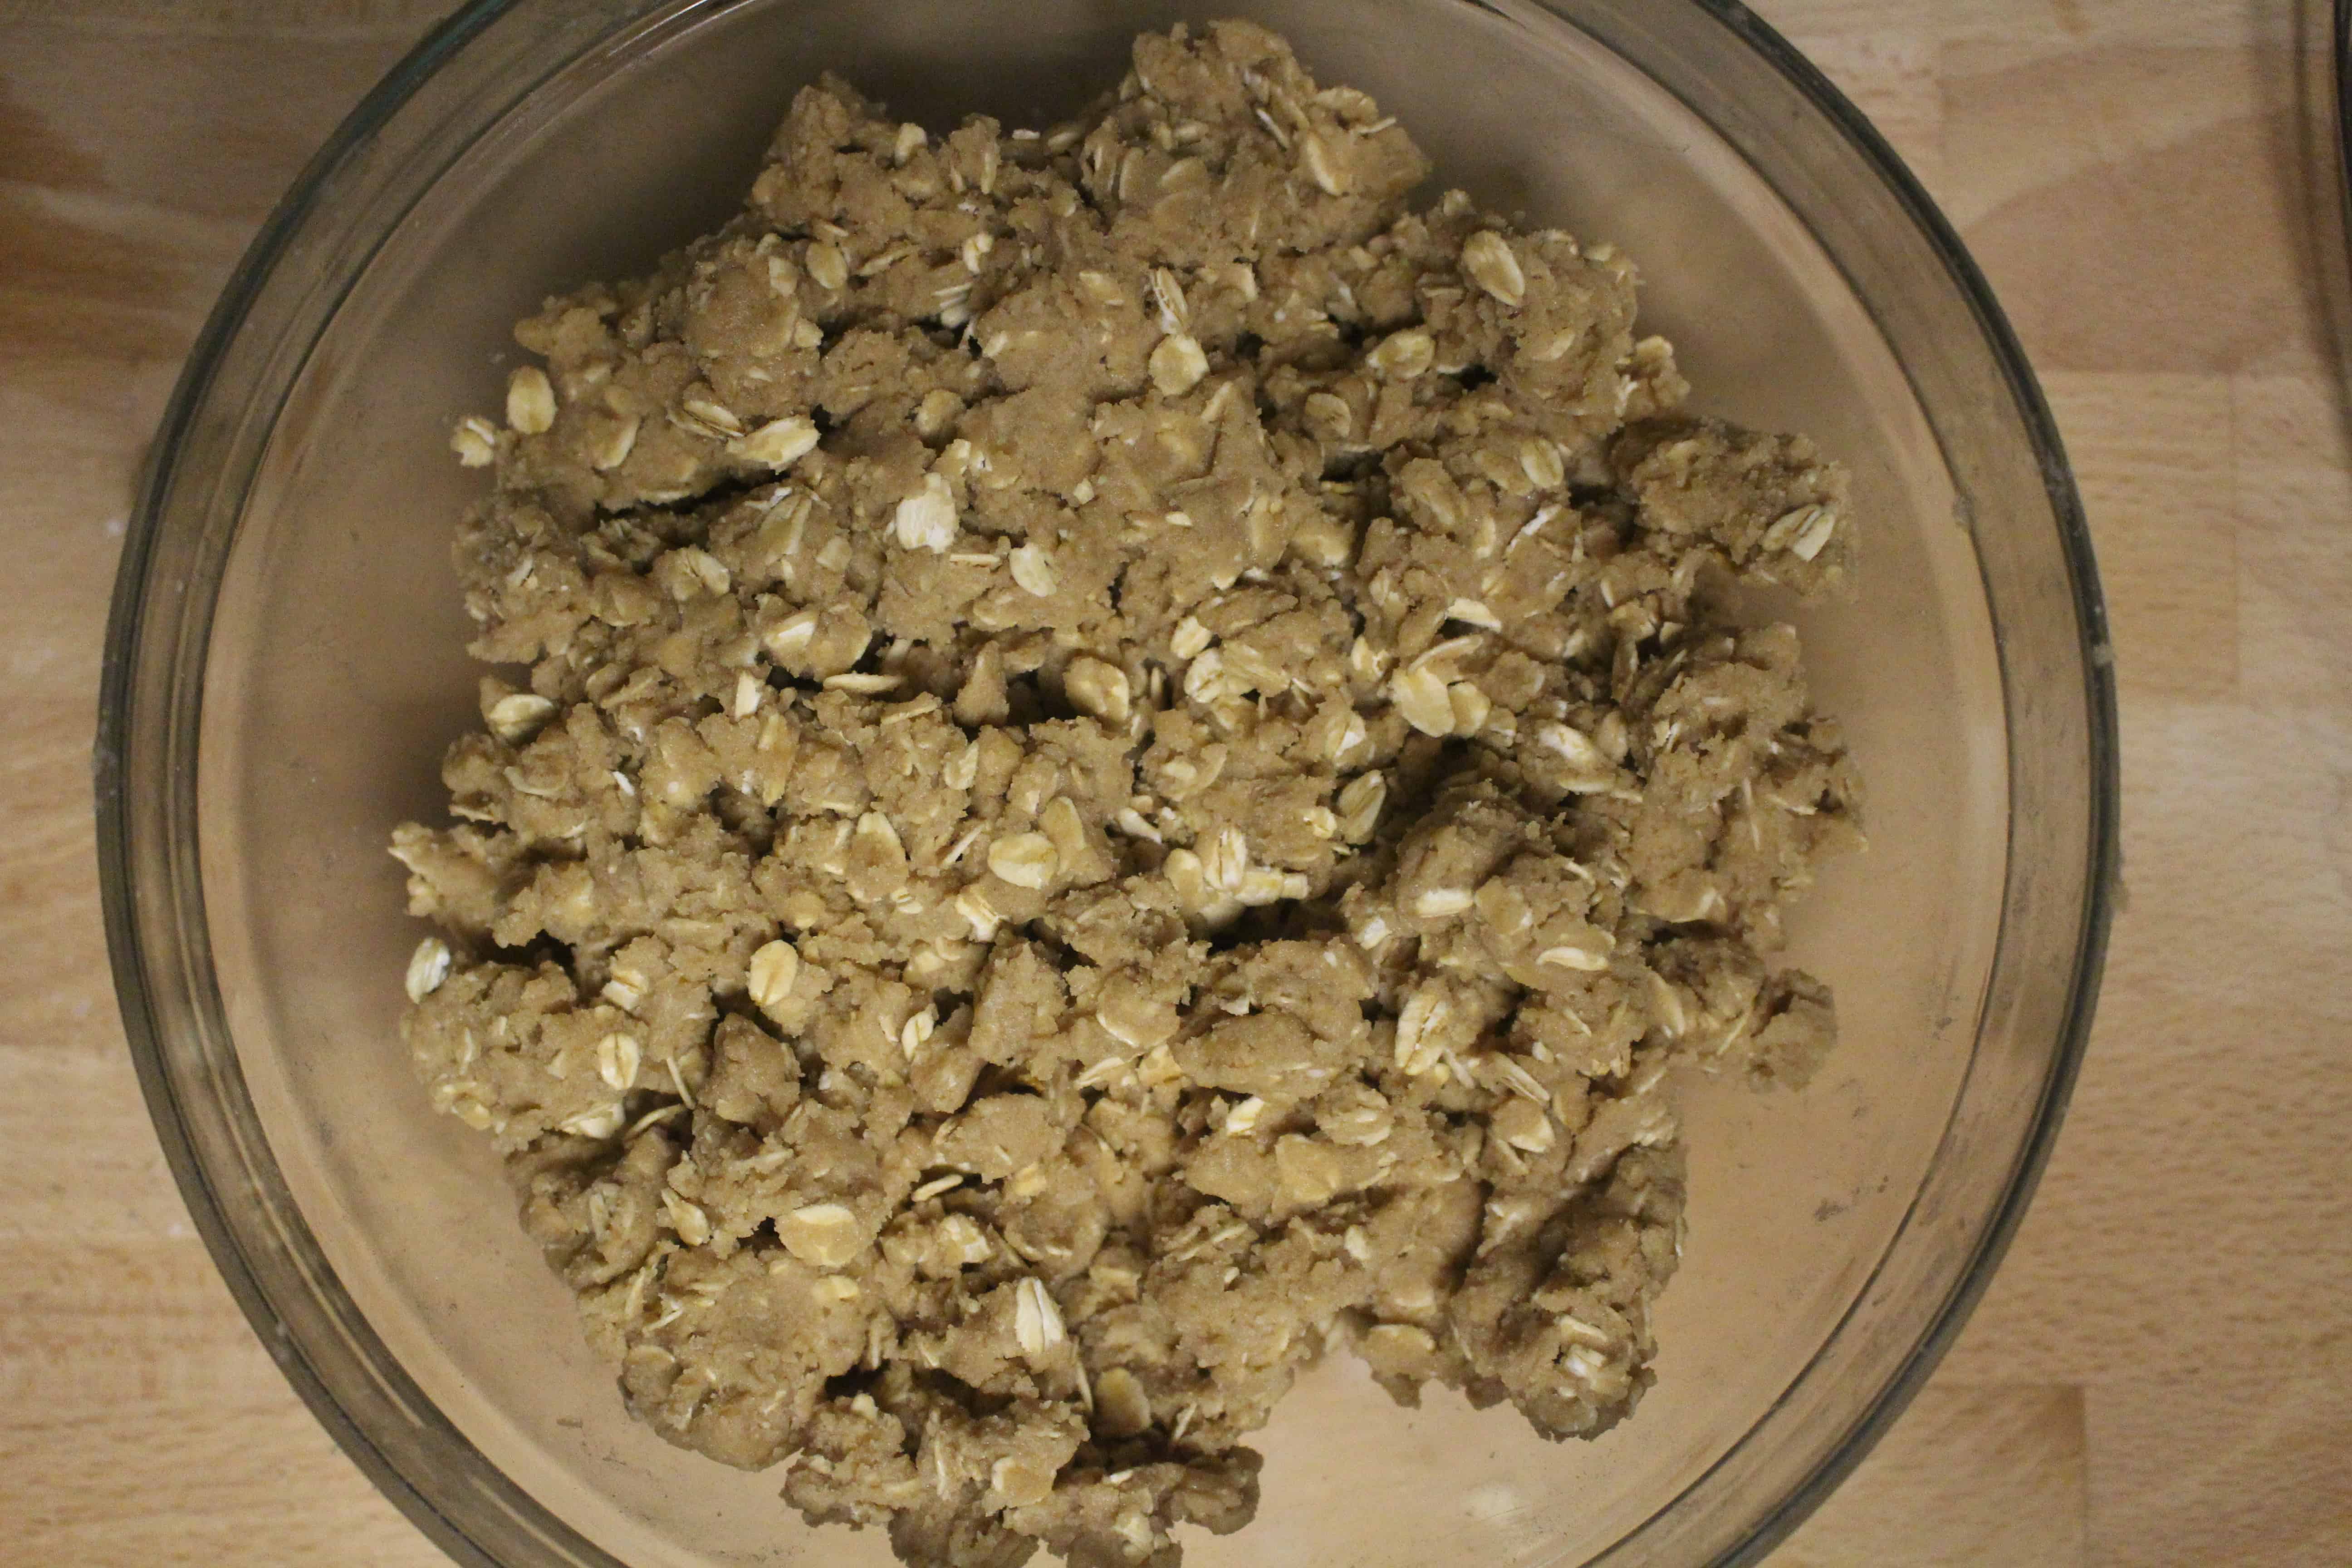
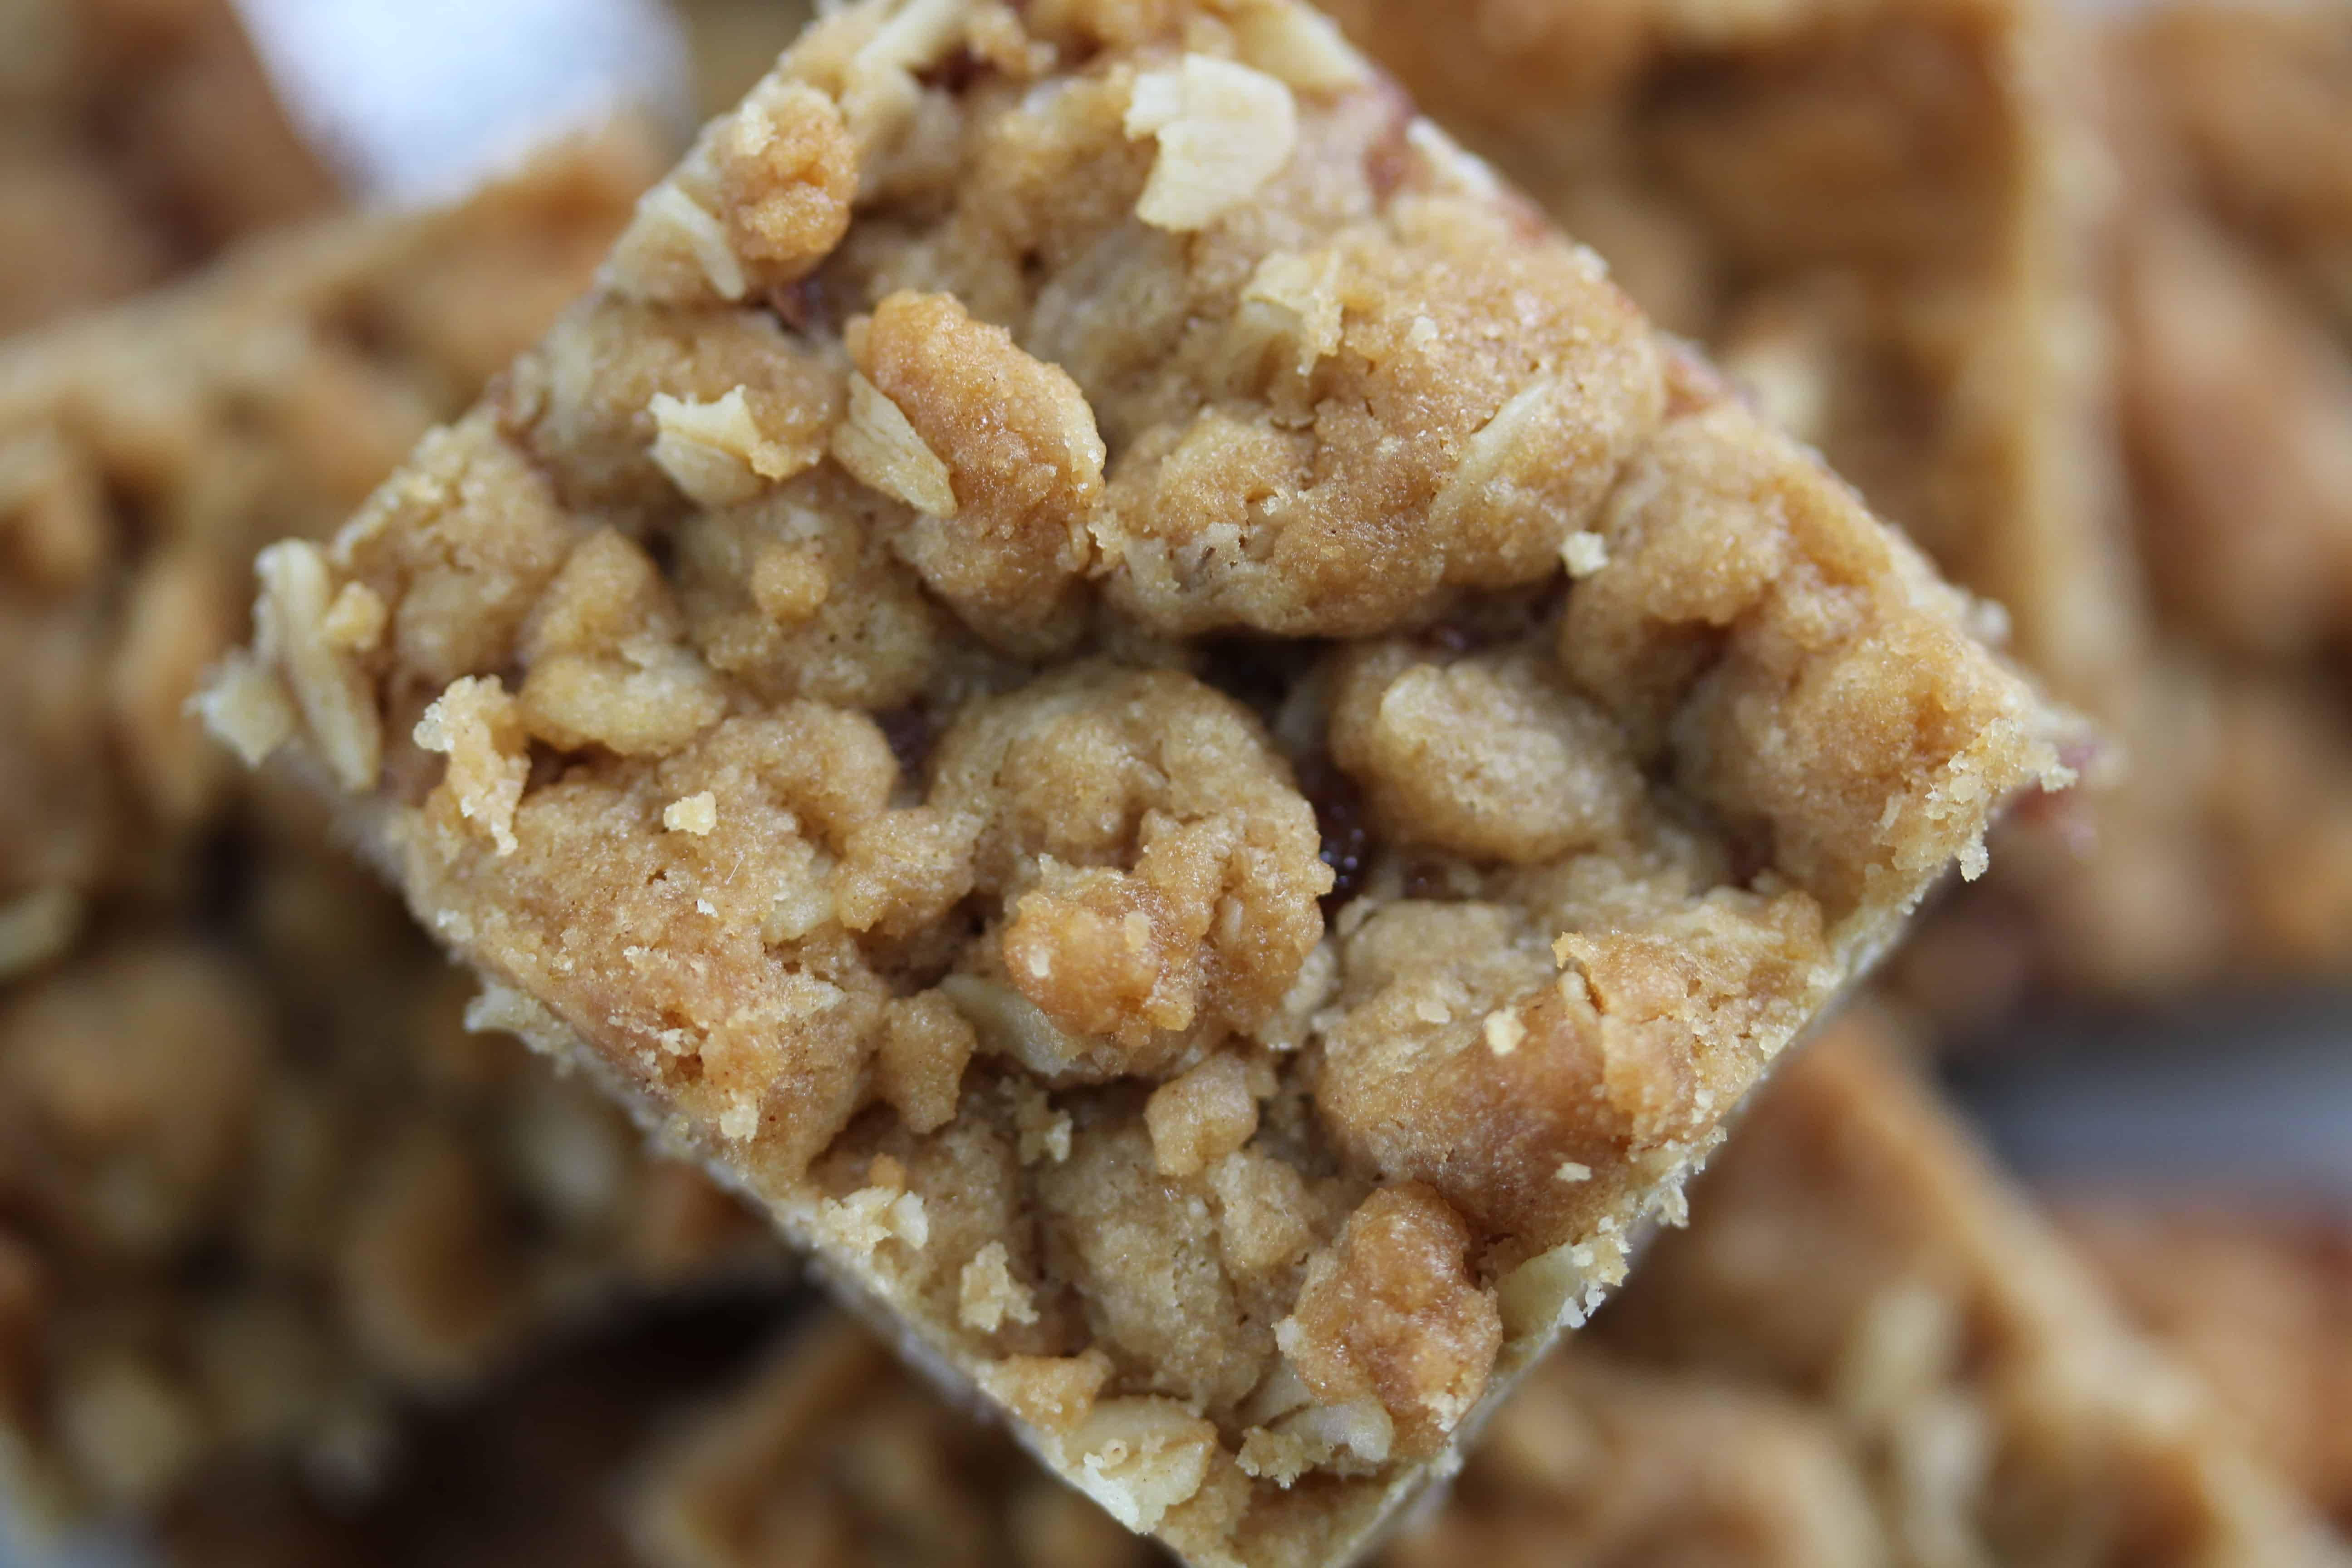
The crumble topping, which is my favorite part of this whole recipe, is easily mixed by hand, and it’s rather therapeutic to do so! The instructions say to mix it in a stand mixer “until loose crumbs form”, but what I remembered from the bakery was big, fat, buttery crumbs, and mixing by hand created doughy clusters after a few minutes of rubbing the butter into the flour, baking powder, baking soda, salt, cinnamon, dark brown sugar, and oats. I popped the crumbles in the freezer for 30 minutes or so to firm up further. The amount produced by the recipe as written was just right for the 9″ x 9″ pan. I baked the bars for 40 minutes (15 minutes longer than what’s written) because that’s how long it took for the crumbs to firm up and turn golden brown. I was worried that the bottom would be overdone, but it was perfect. The bars were not jiggly at all, so I knew I had nailed the texture that I wanted.
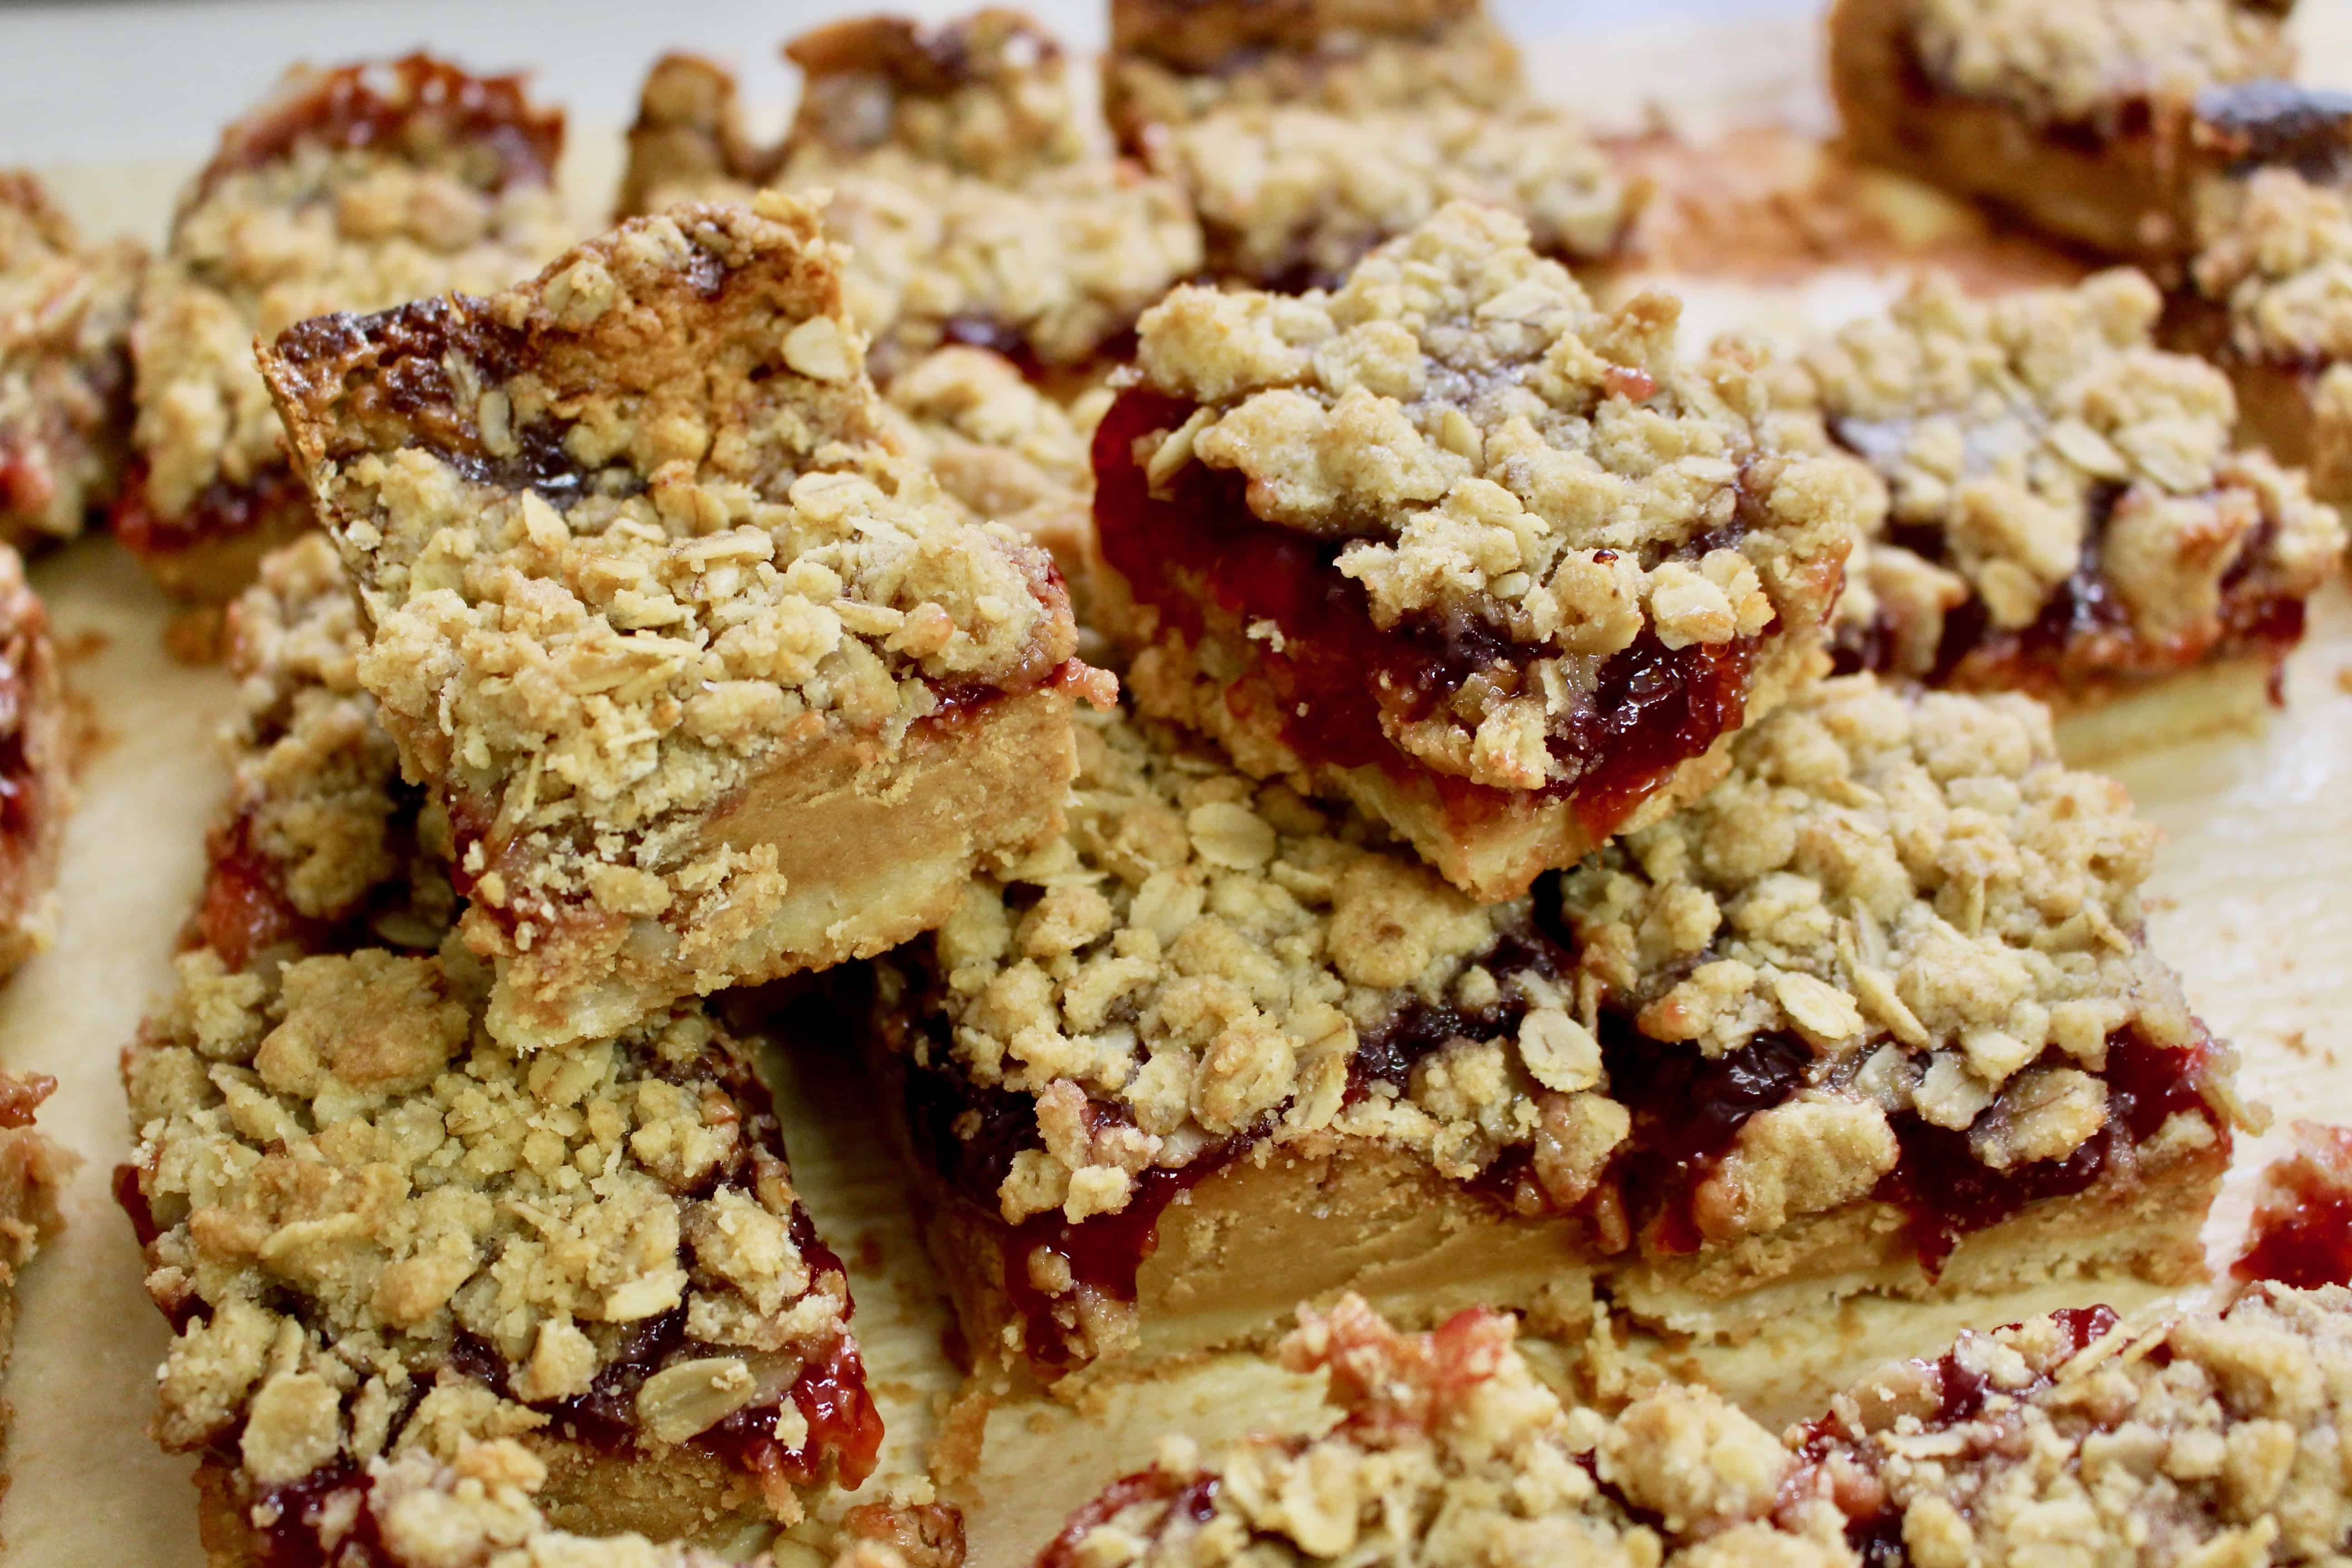
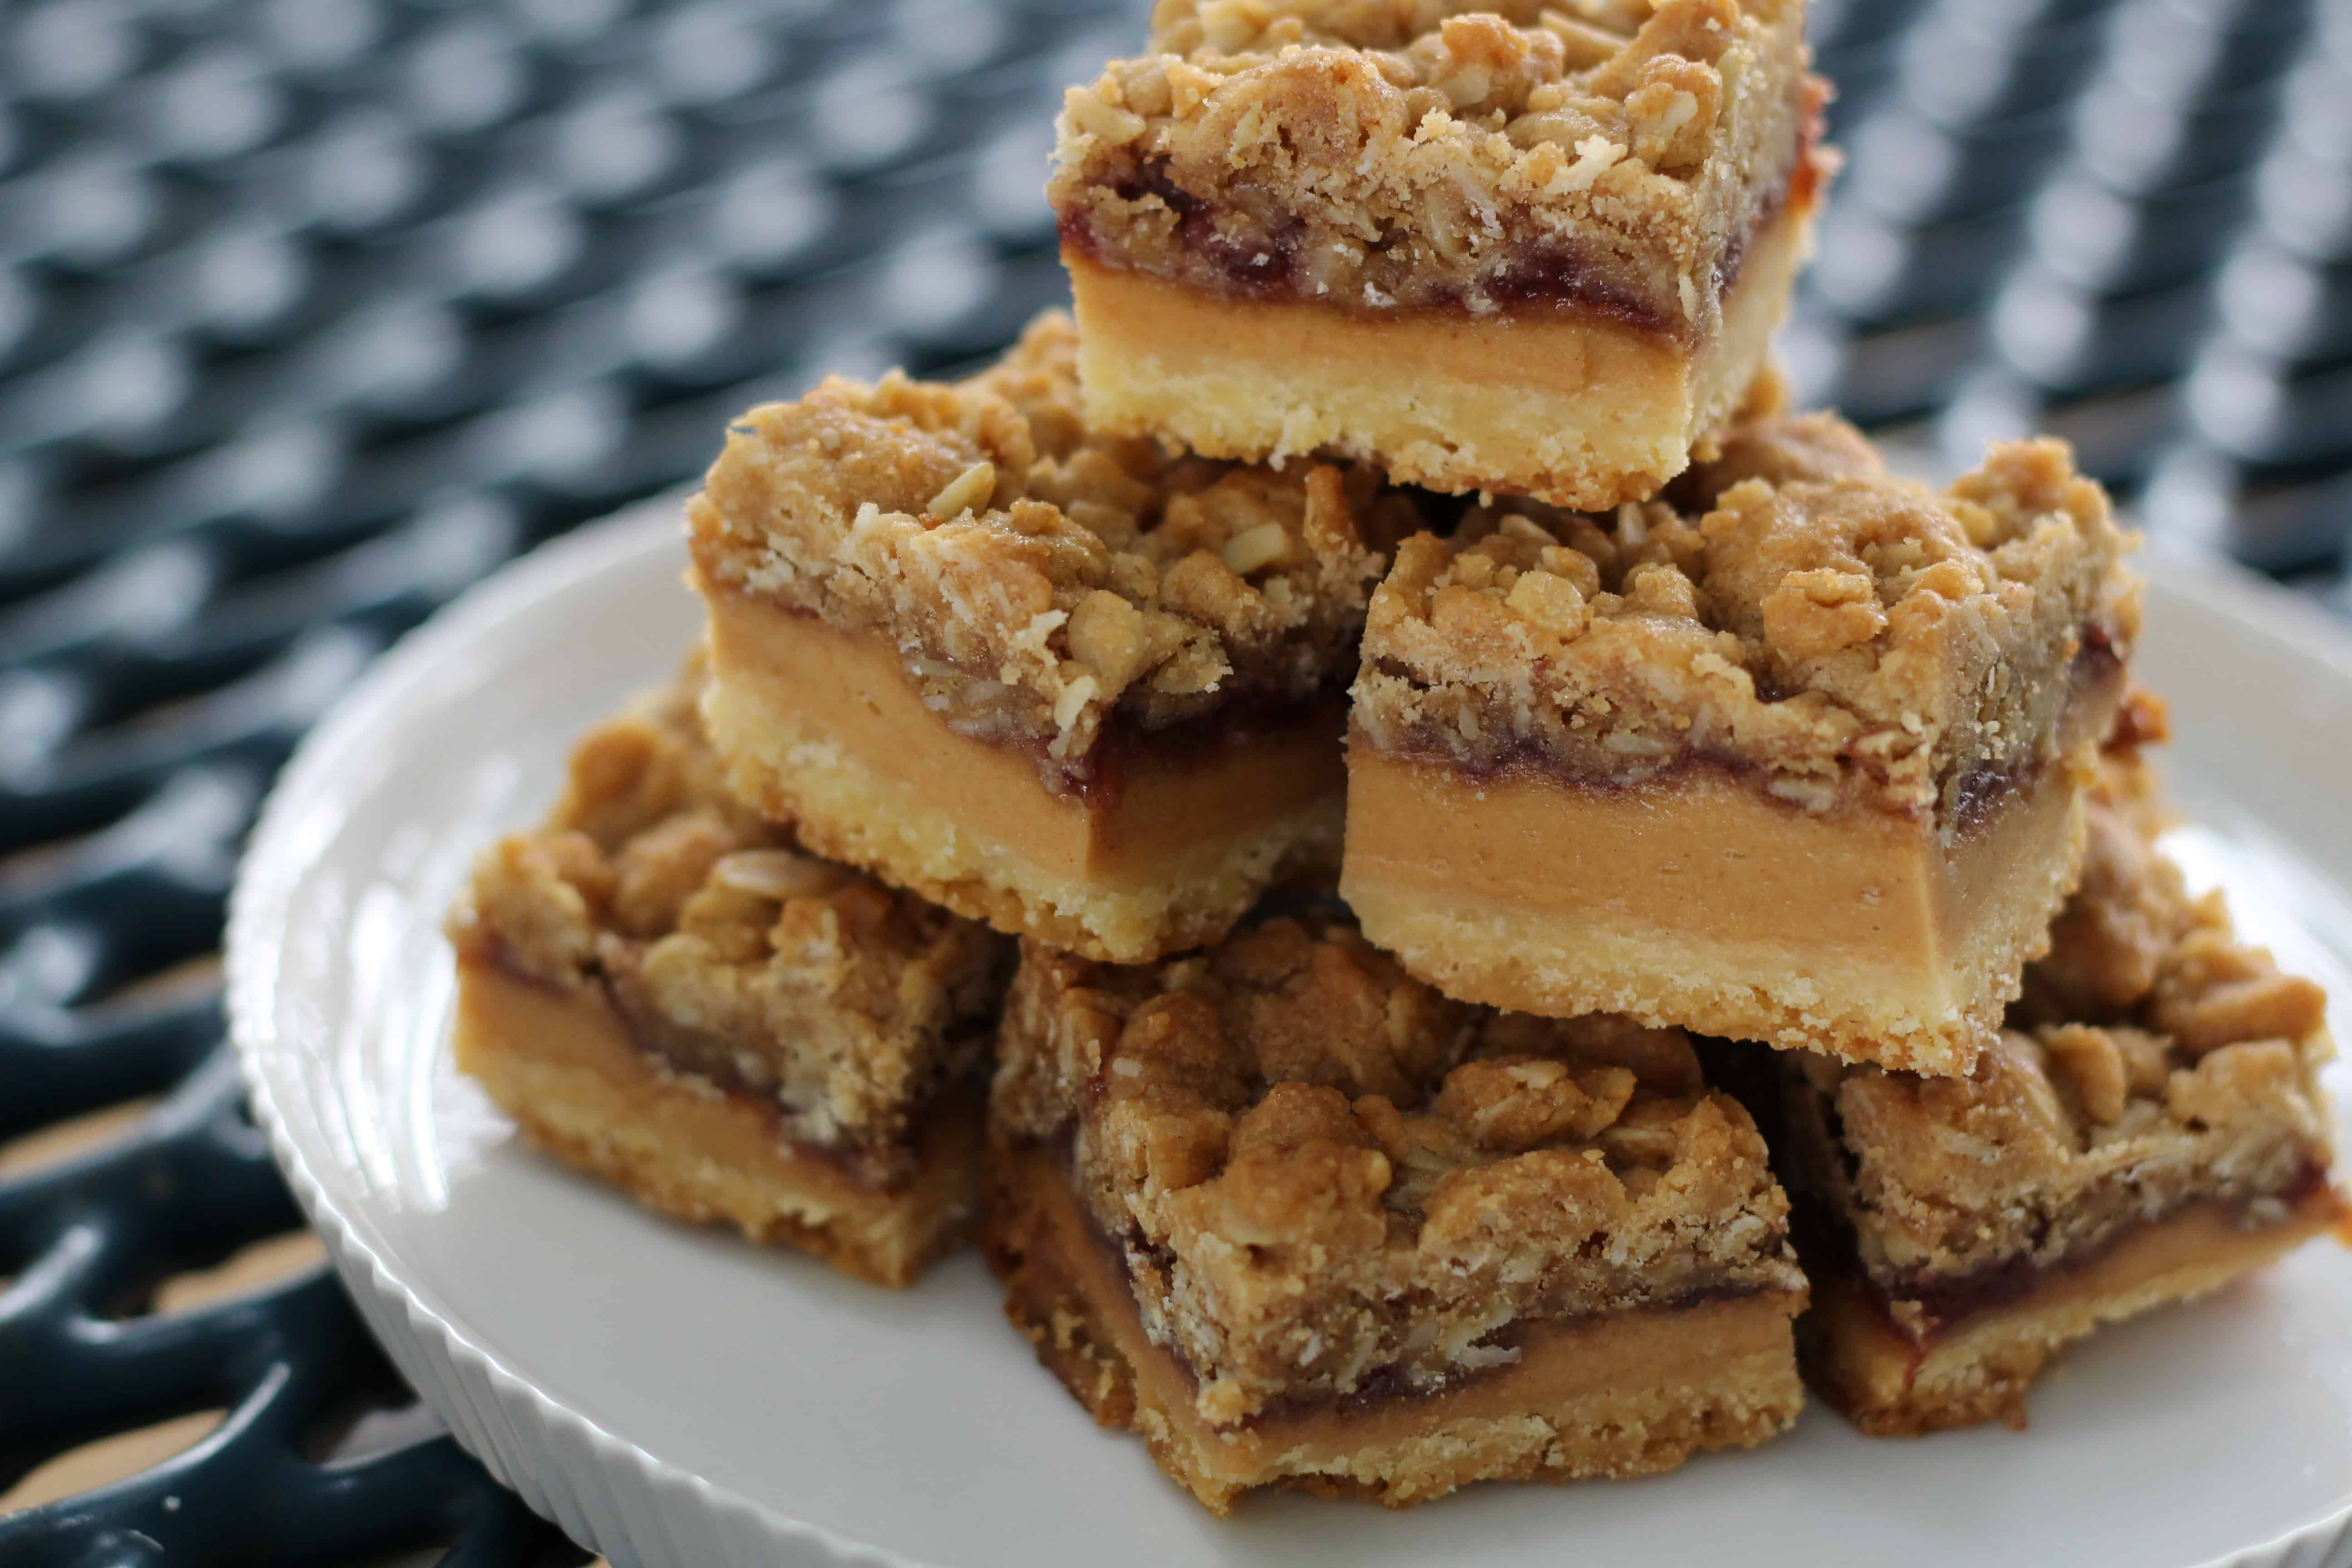
Still, I wanted to make a full pan, and I also wanted to use a different jelly than the raspberry that I tried. I decided to scale up the dough and crumb topping, 1.5x and 2x, respectively. The larger dough (added one egg yolk) still barely filled up the pan, but worked great in the end, and the double batch of crumbles allowed the entire top to be generously covered in crisp, oat-laced deliciousness. I made ⅔ of the PB filling, but next time I would simply make a ½ batch, as I didn’t use all of it (again). Finally, I used a slightly thicker slick of jelly, strawberry-rhubarb this time, though still quite meager, about 8 ounces. I baked this batch also for 40 minutes, and I was thrilled that the third time was the charm! I liked them best about 30 minutes out of the fridge after chilling. I would not have changed a thing, except that I’ll use a bright strawberry-only jam in the future, and add a little more of it than I did here.

This is one of my favorite recipes from Baked Explorations, and from all of the BAKED repertoire. I initially chose this recipe for my friend’s birthday because I made her a picnic lunch which we took to the beach in Tel Aviv– they were absolutely the perfect treat for that occasion, flaws and all. My coworkers at school heaped rave reviews on the improved batches this week, and I will happily make these over and over again. Friends, I really, reeeeally cannot recommend these more highly– head over to Baked Sunday Mornings for the Peanut Butter & Jelly Bars recipe, and make these for allll the people you love best. This adaptation of the quintessential childhood lunch staple will put a huge smile on everyone’s face, and isn’t that why we bake, after all?? 🙂
P.S. Please also visit BSM to check out my fellow bakers’ Raspberry Crumb Breakfast Bars!
© Dafna Adler & Stellina Sweets, 2019.