


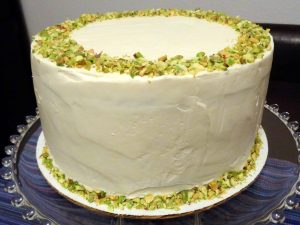
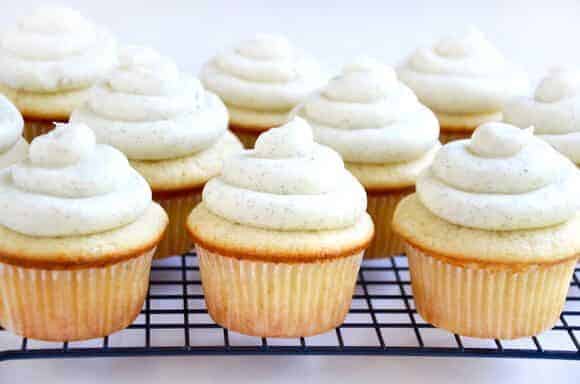
 Updated photo from Spring 2013 remake– update at the bottom!
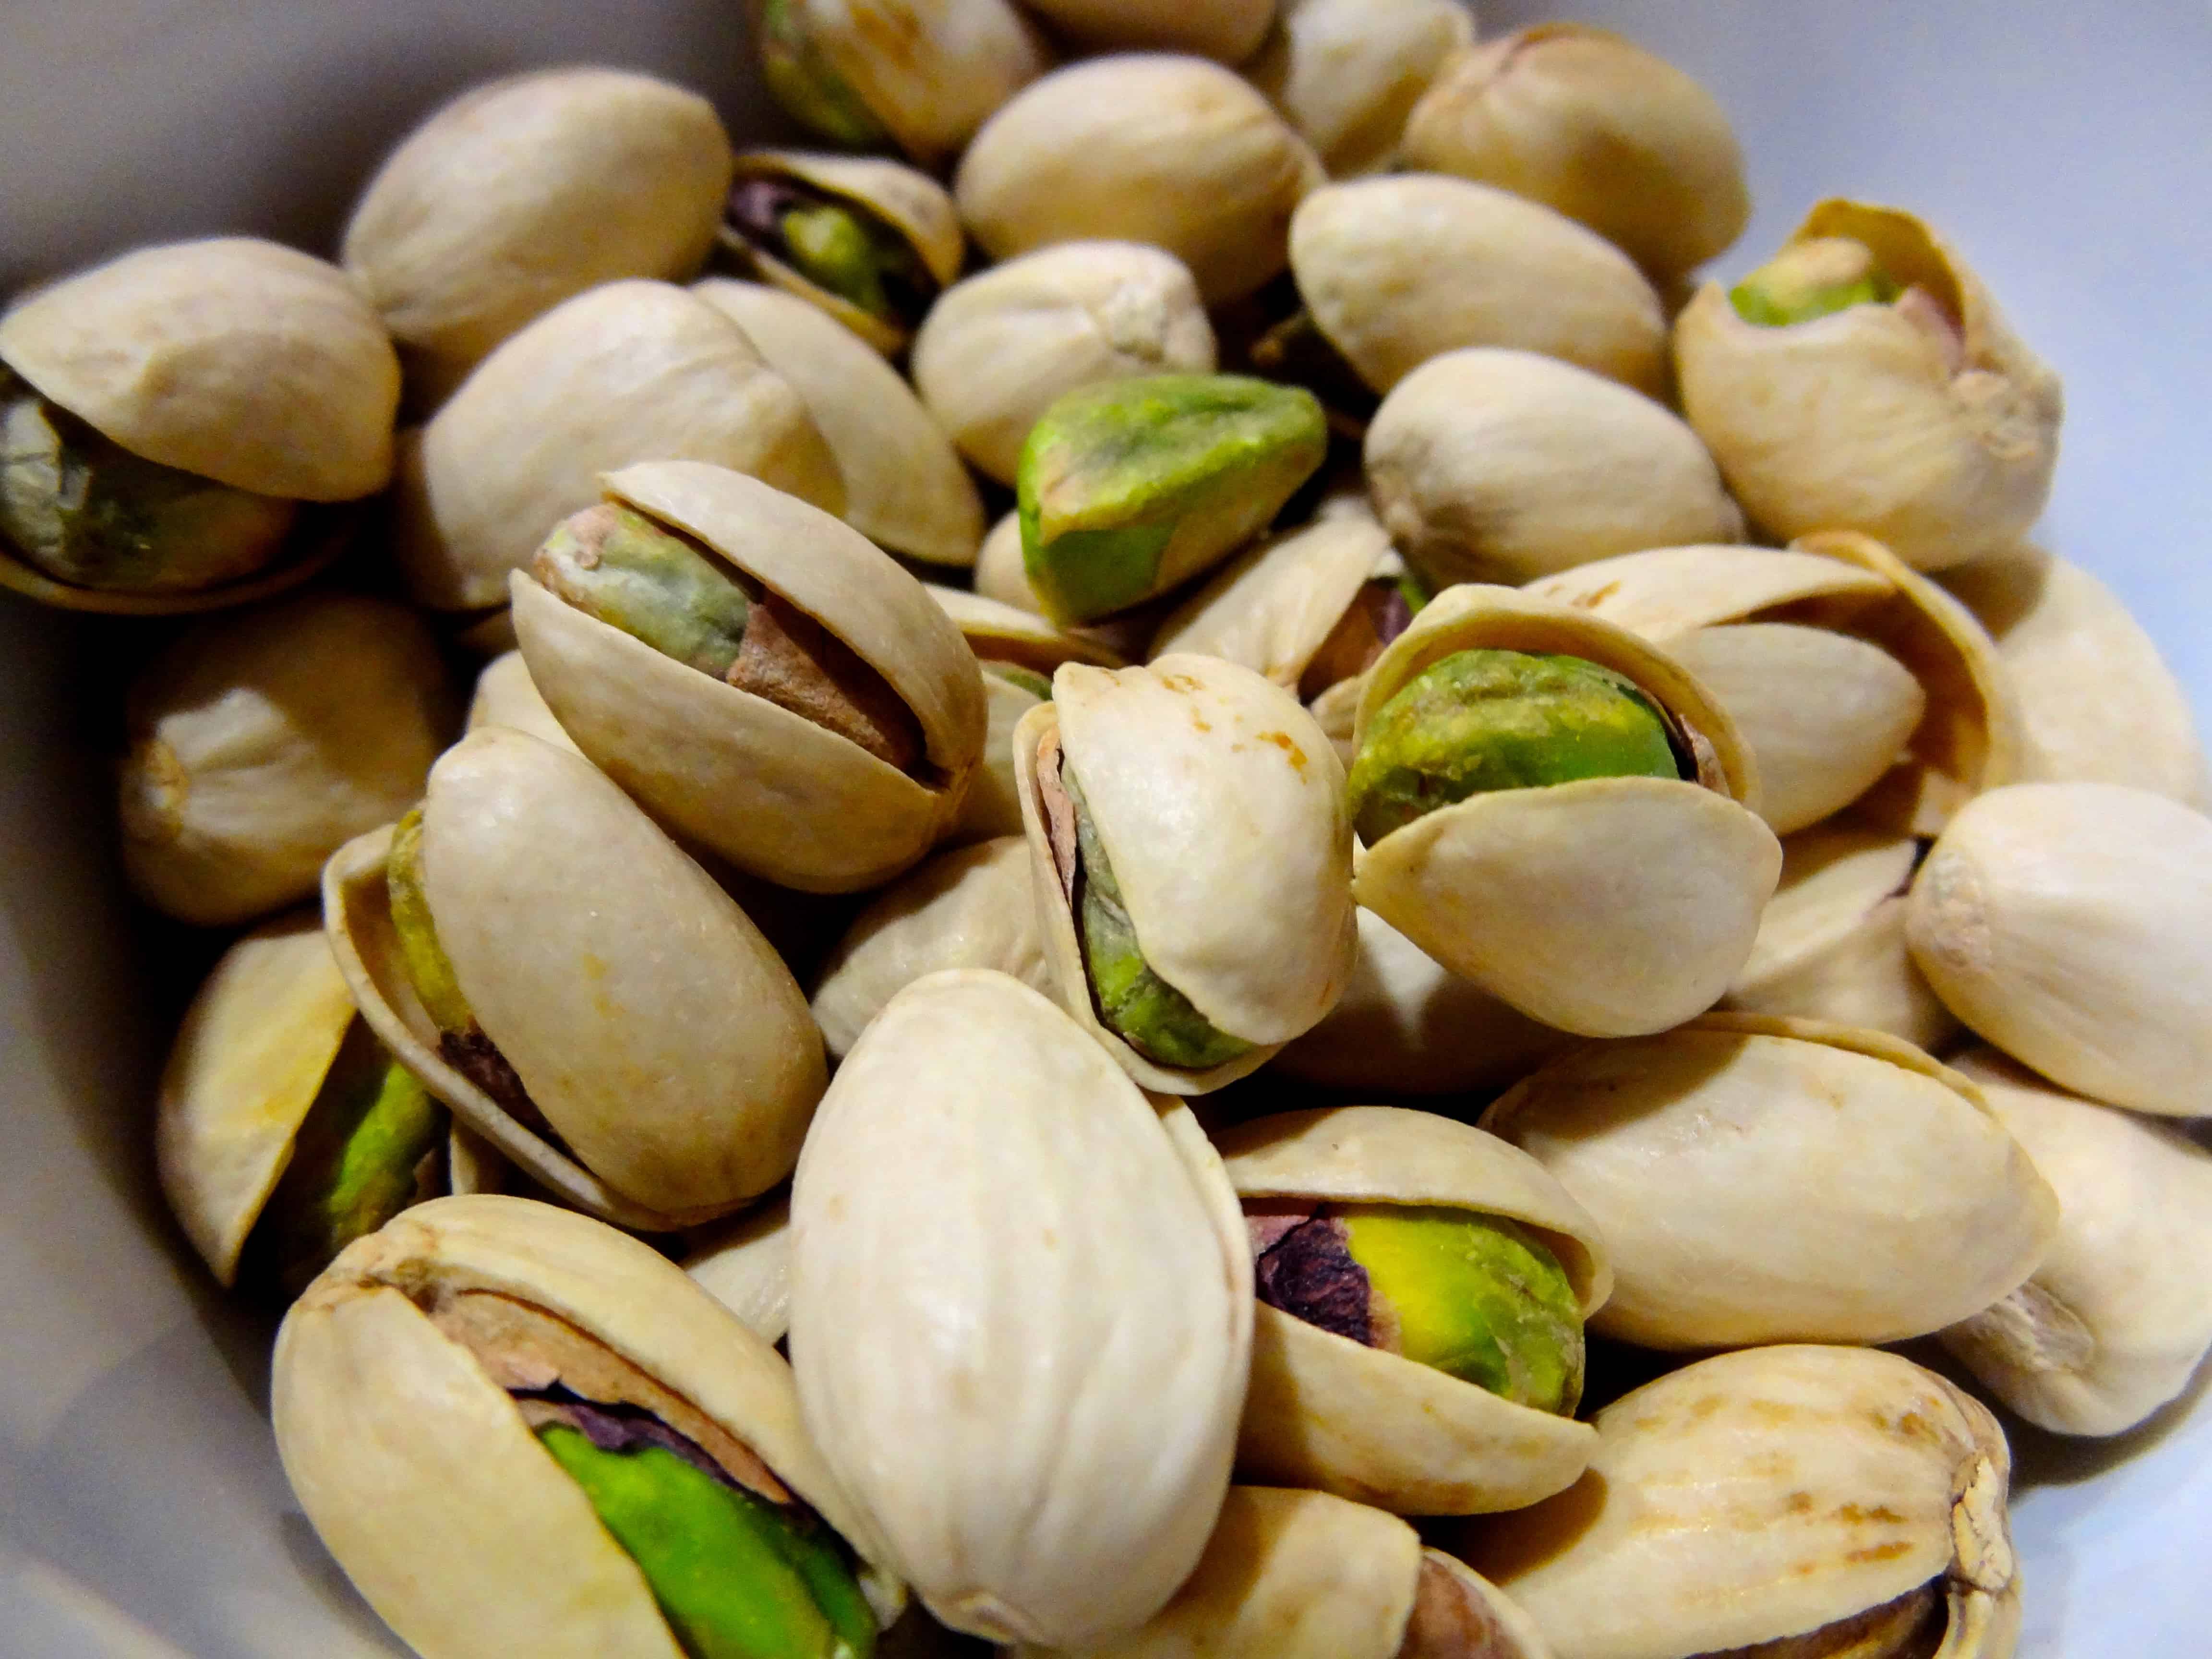
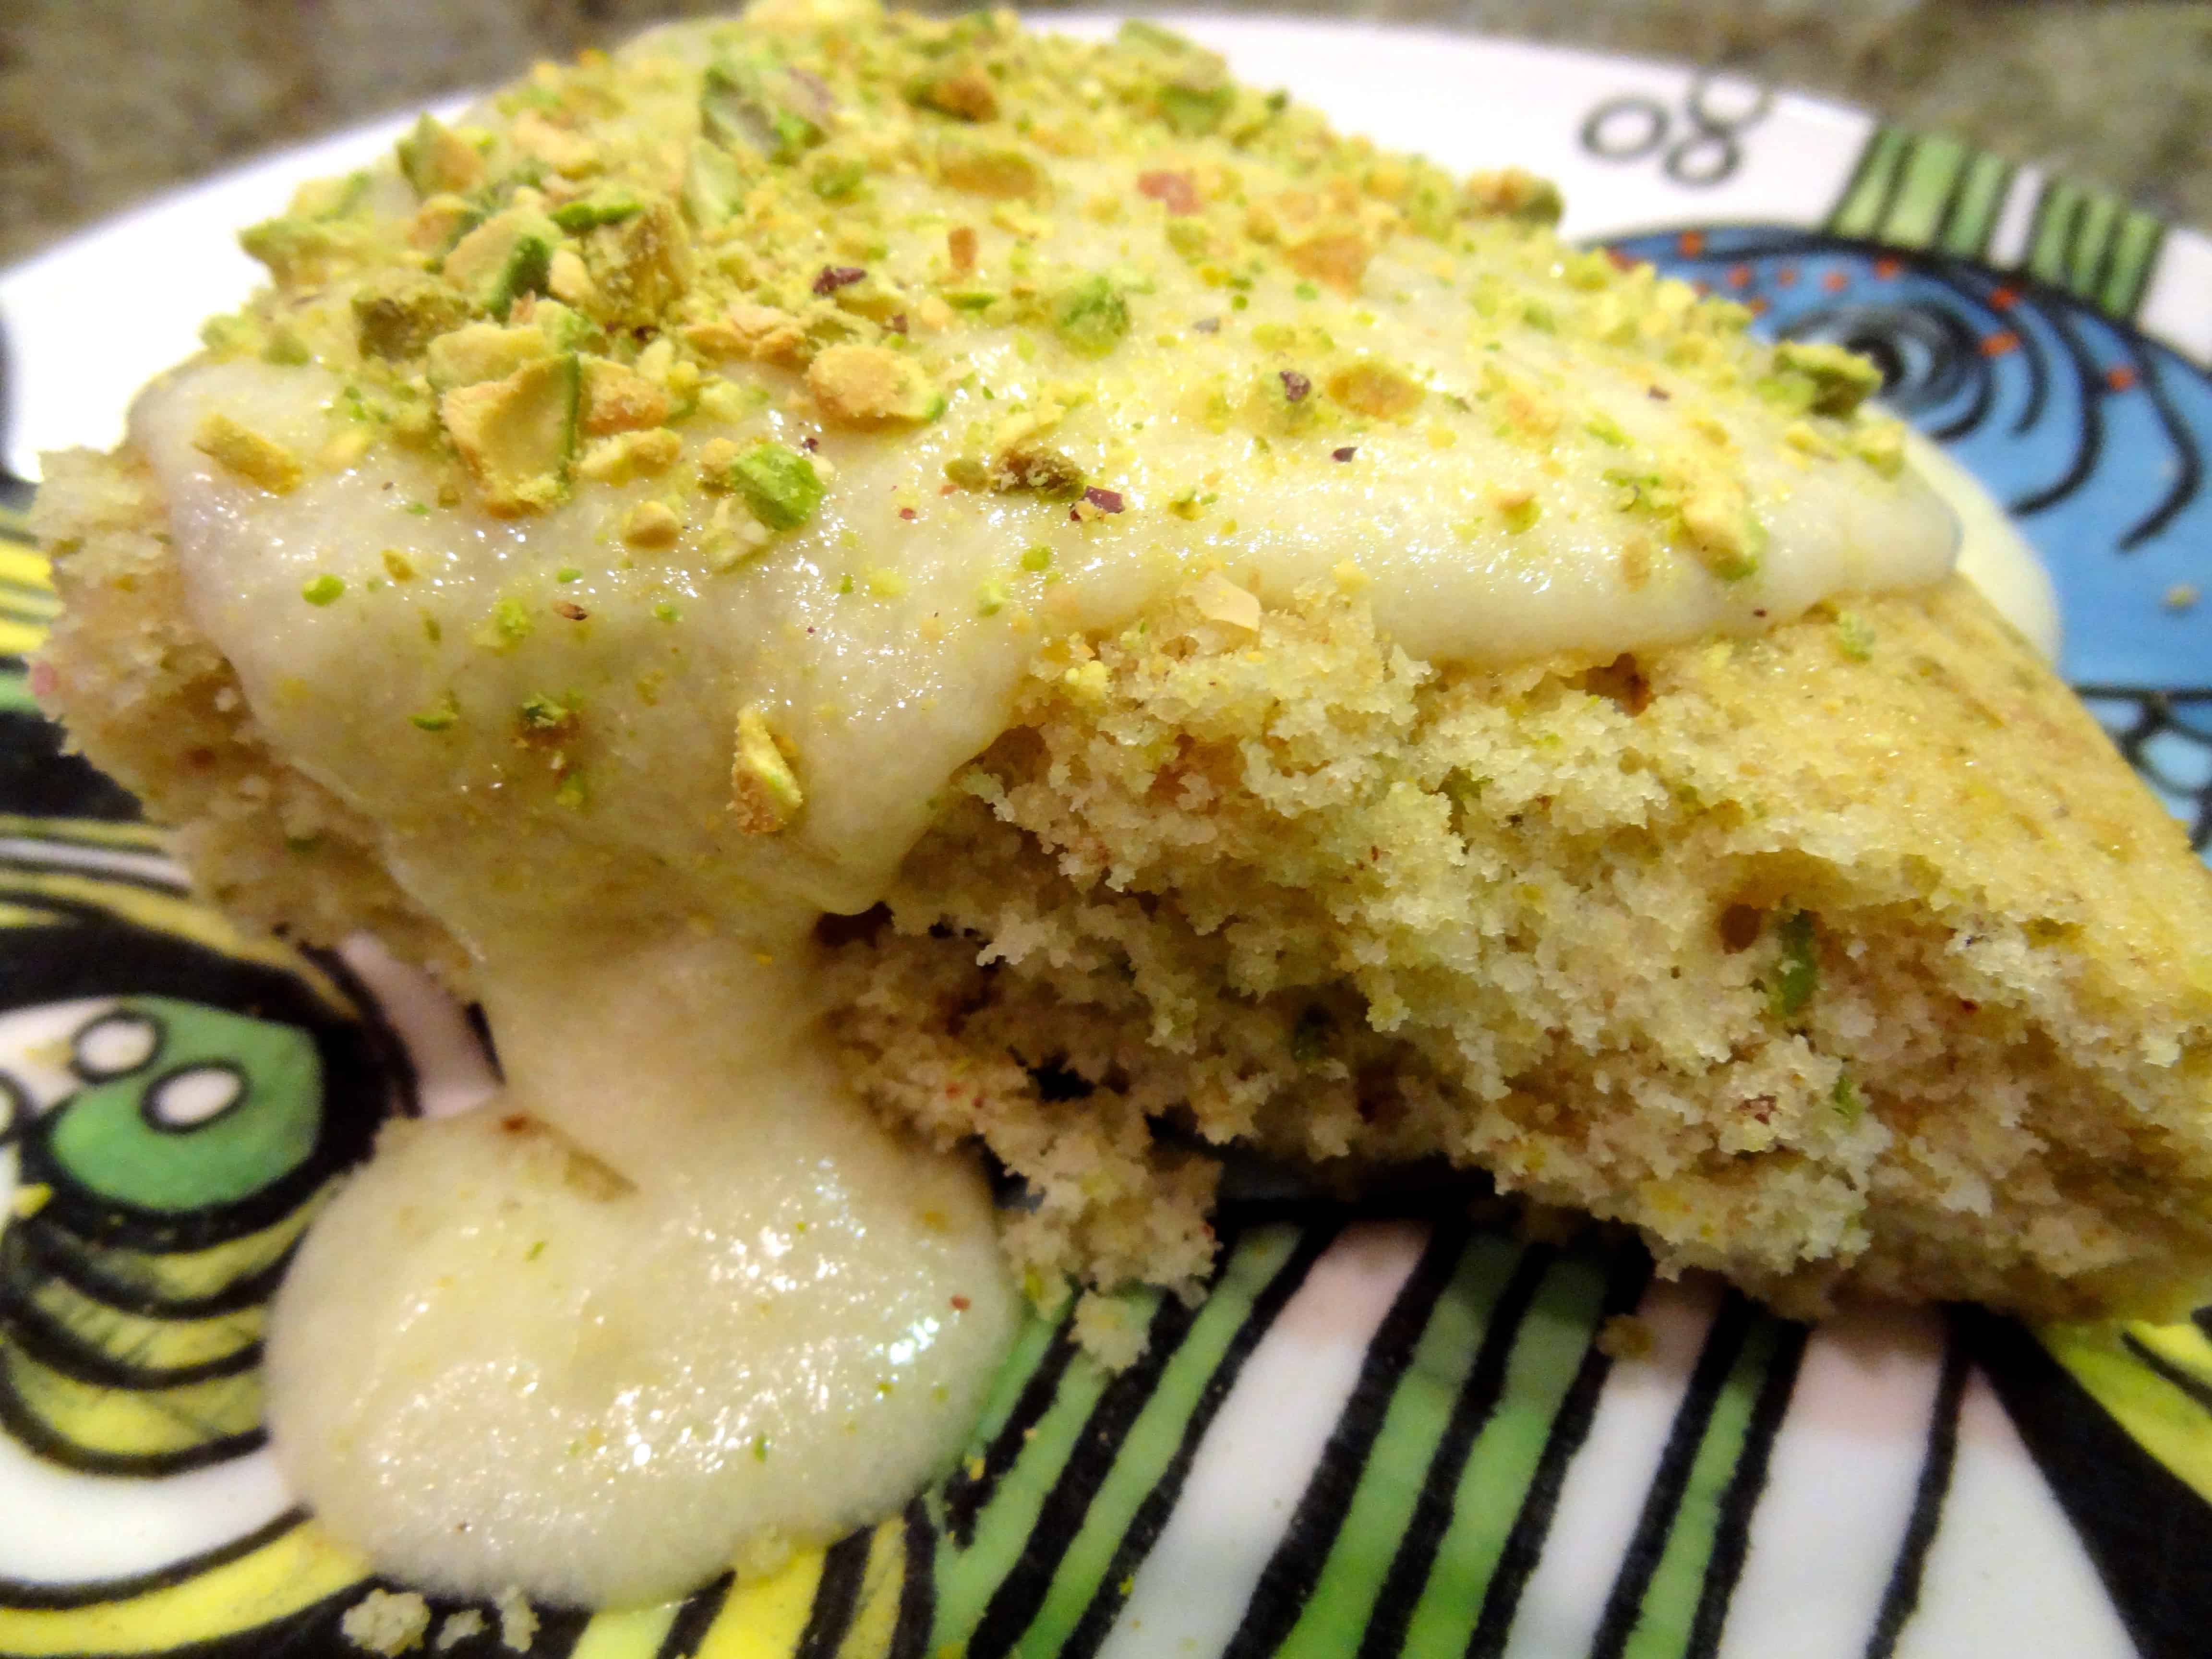
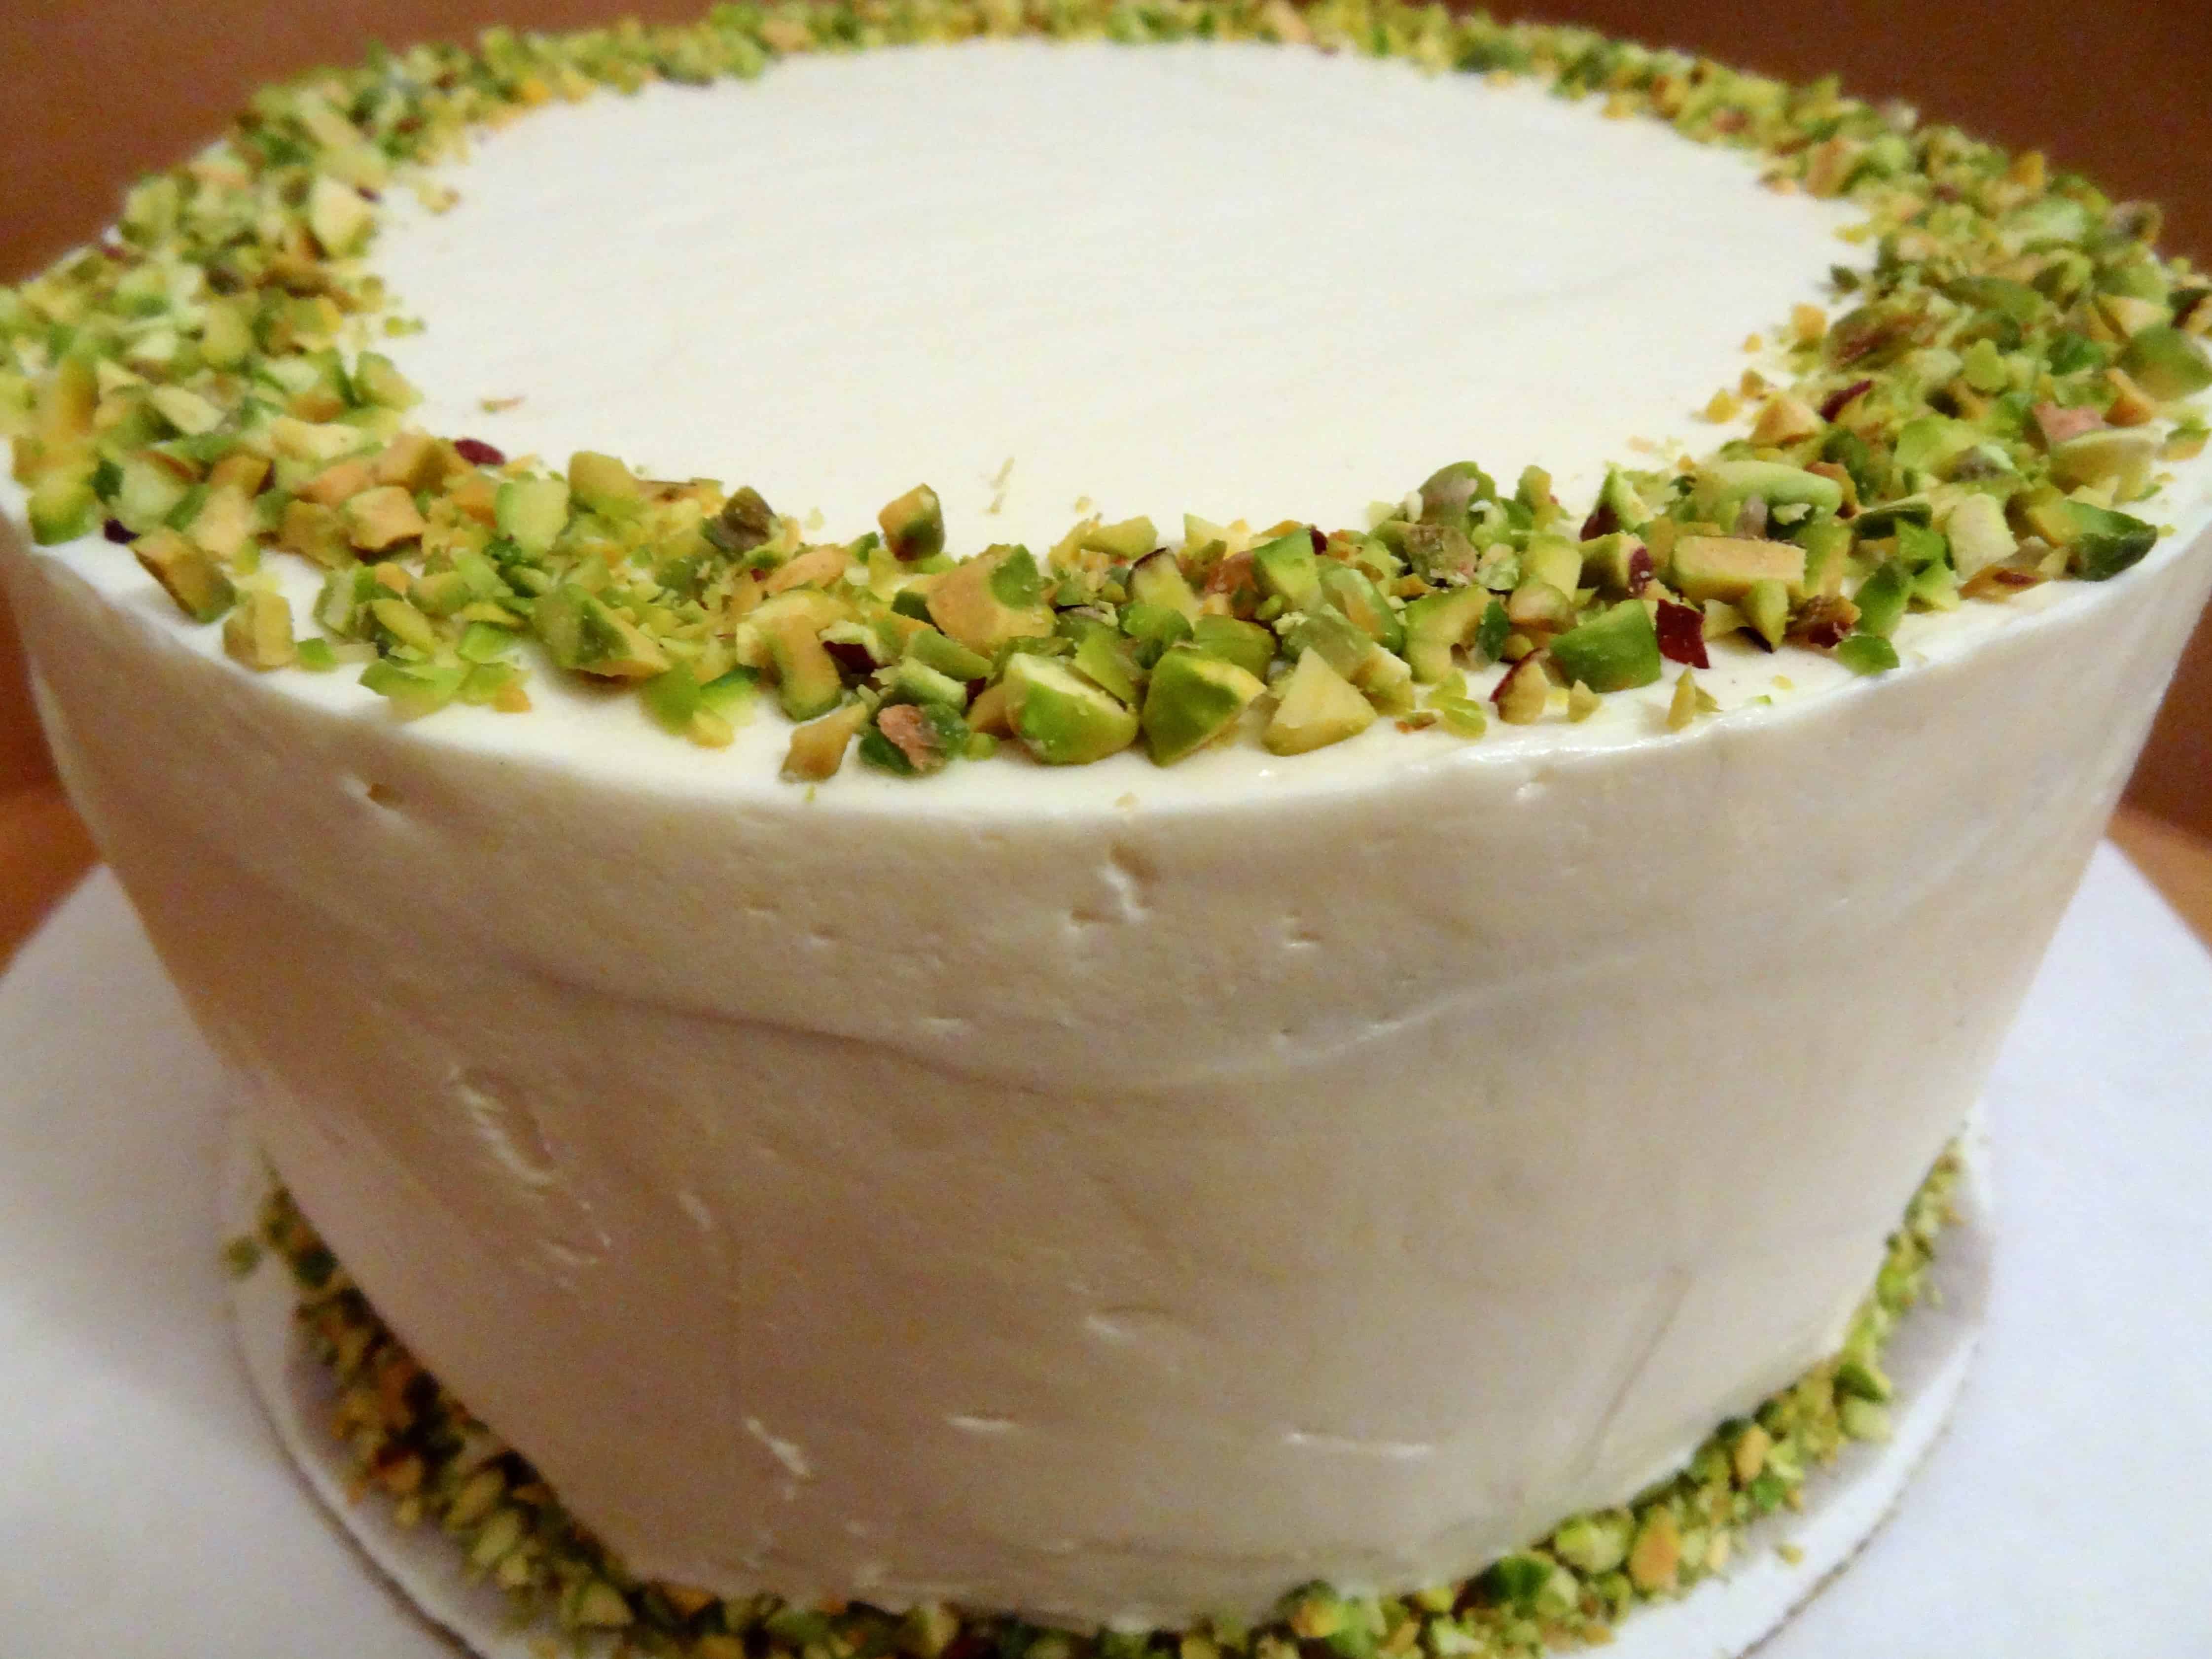
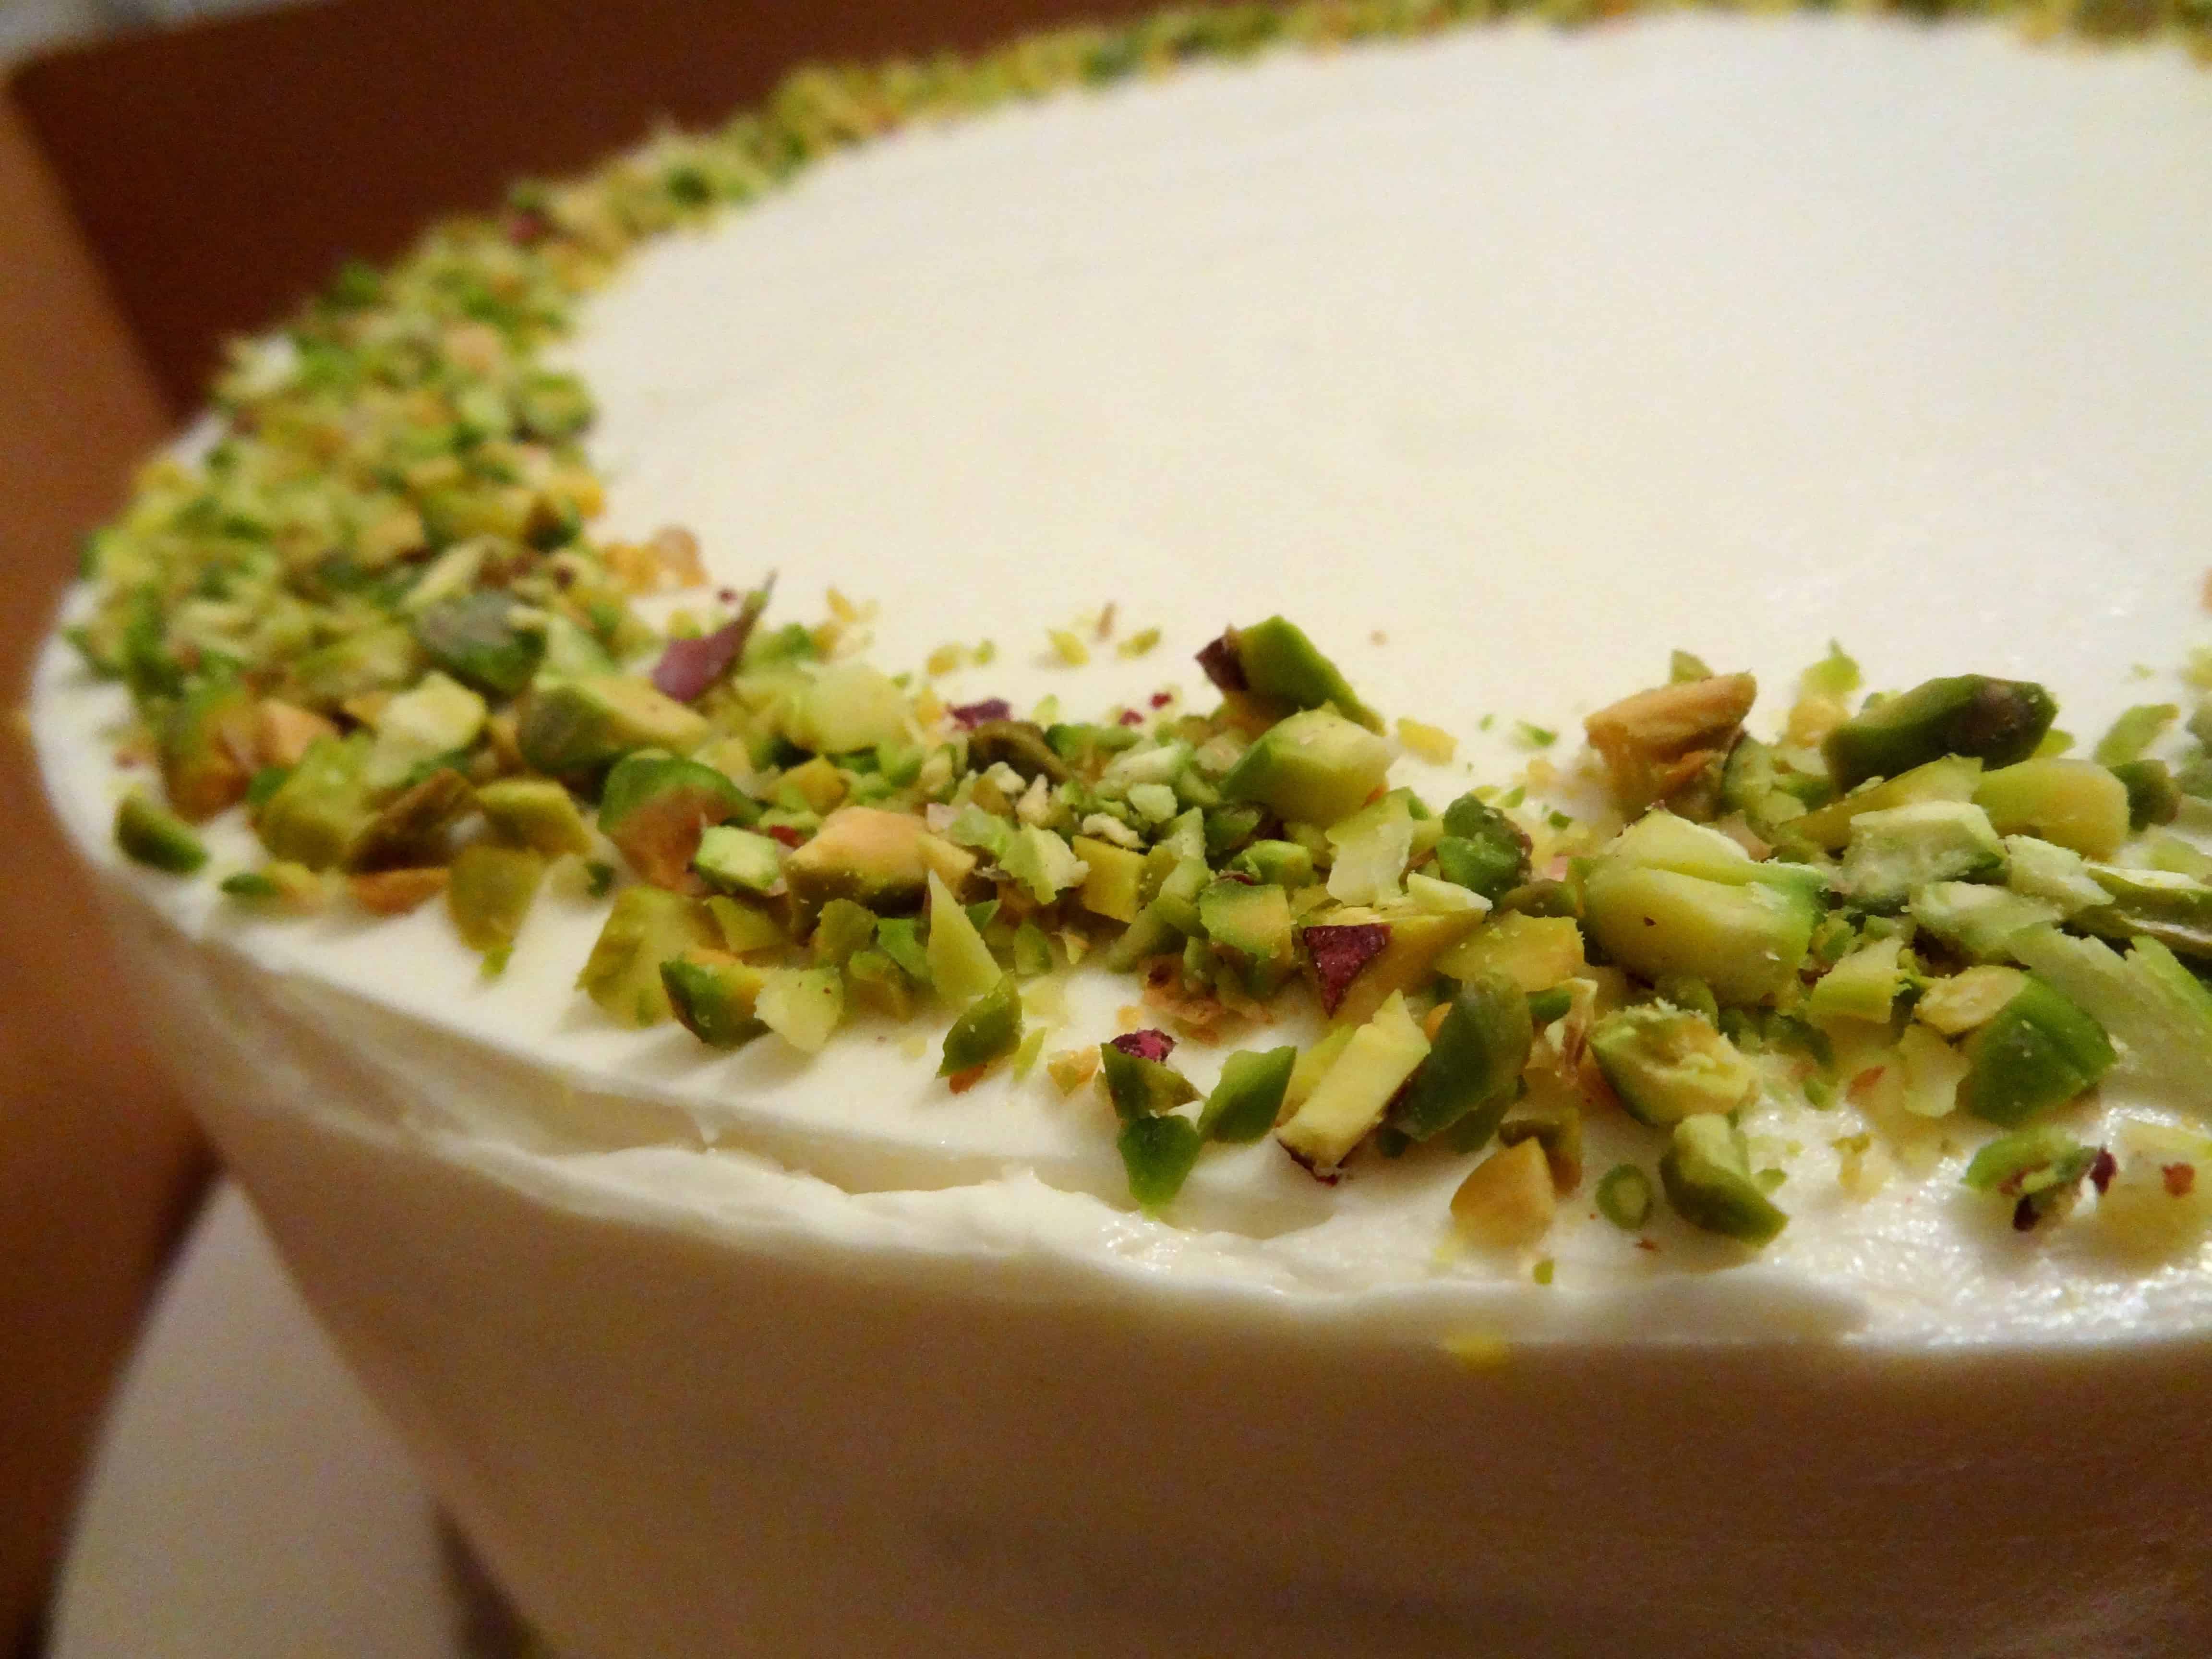
Pistachios are such curious little nuts. I don’t think I’ve ever really examined them before– I generally just crack them open and pop ’em in my mouth without a whole lot of thought. For this week’s Baked Sunday Mornings assignment, I got up close and personal with those irregular, bright green, purple-wrapped little guys. Aunt Sassy Cake, whose named is shrouded in mystery, is a white chiffon cake laced with crushed and chopped pistachios, which is (supposed to be) lovingly encased in velvety Honey Vanilla Buttercream, and it makes me cry just a little every time I think about it. I wouldn’t have thought that this cake would be that special based on the description alone (though the photo in Baked Explorations is pretty gorgeous), as I am usually more enamored by decadent, guilt-inducing chocolate desserts; I must confess that this lovely cake totally caught me off-guard… And I say this *even though* my frosting was a disaster! (More on that later…)
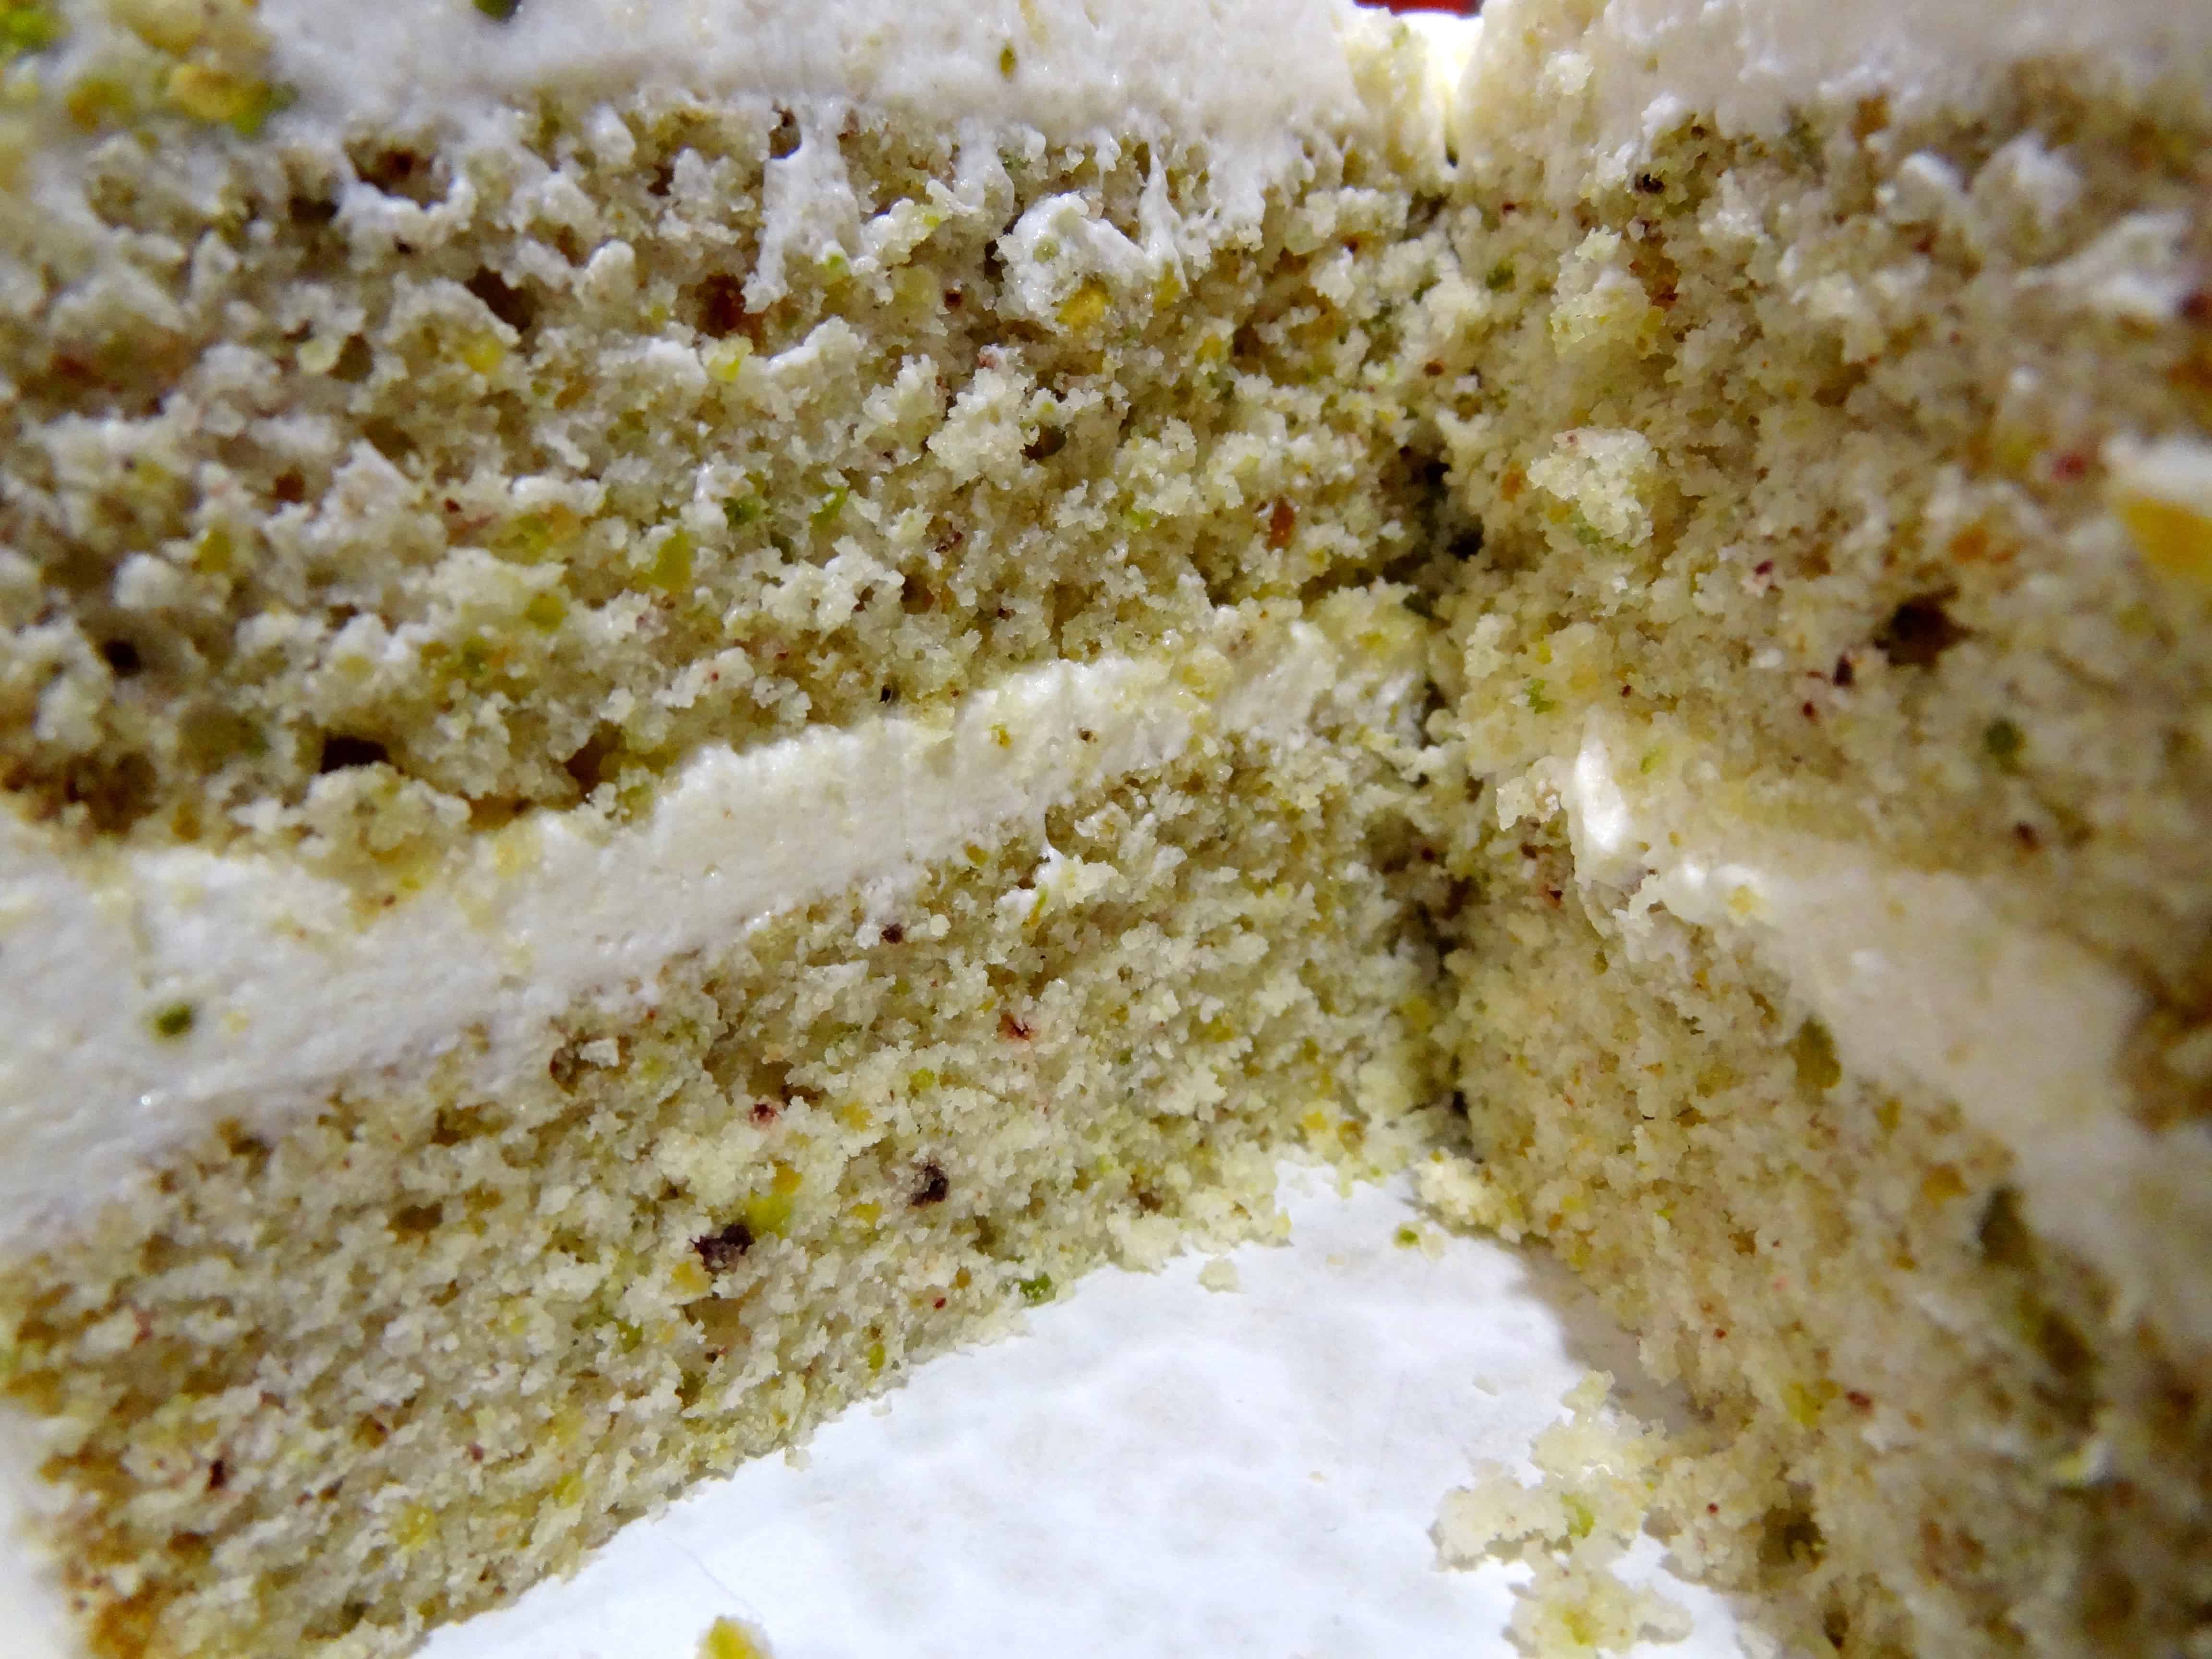
Now, let me tell you, it takes a long freaking time to shell 1 cup of pistachios. You wouldn’t really think so, right? However, yielding a cup of *shelled* nuts actually requires almost a pound of shell-on pistachios! It was during this process that I began to regard the peculiar, colorful nuts more mindfully. (Wait, is that why it took me so long?! Or maybe because I was eating every other one? Nah, I’m sure that’s irrelevant… 😉 ) Most other nuts are uniform in shape and quite neutral in color, whereas pistachios are misshapen and boast that vibrant, unapologetic shade of green! They add a spunky pop of color and a pleasing textural contrast to an otherwise unembellished (though no less delicious) cake canvas. I would never have thought to make a pistachio cake, honestly. I quite like eating them out of hand, but I don’t typically care for pistachio-flavored things, such as French macarons or ice cream. Apparently, folding actual pistachio bits into the cake batter is a completely different animal– you get that warm, nutty, distinctive flavor perfectly woven into the fluffy, buttery cake, and you can clearly tell that they are, in fact, real nuts, not some sort of impostor flavoring!
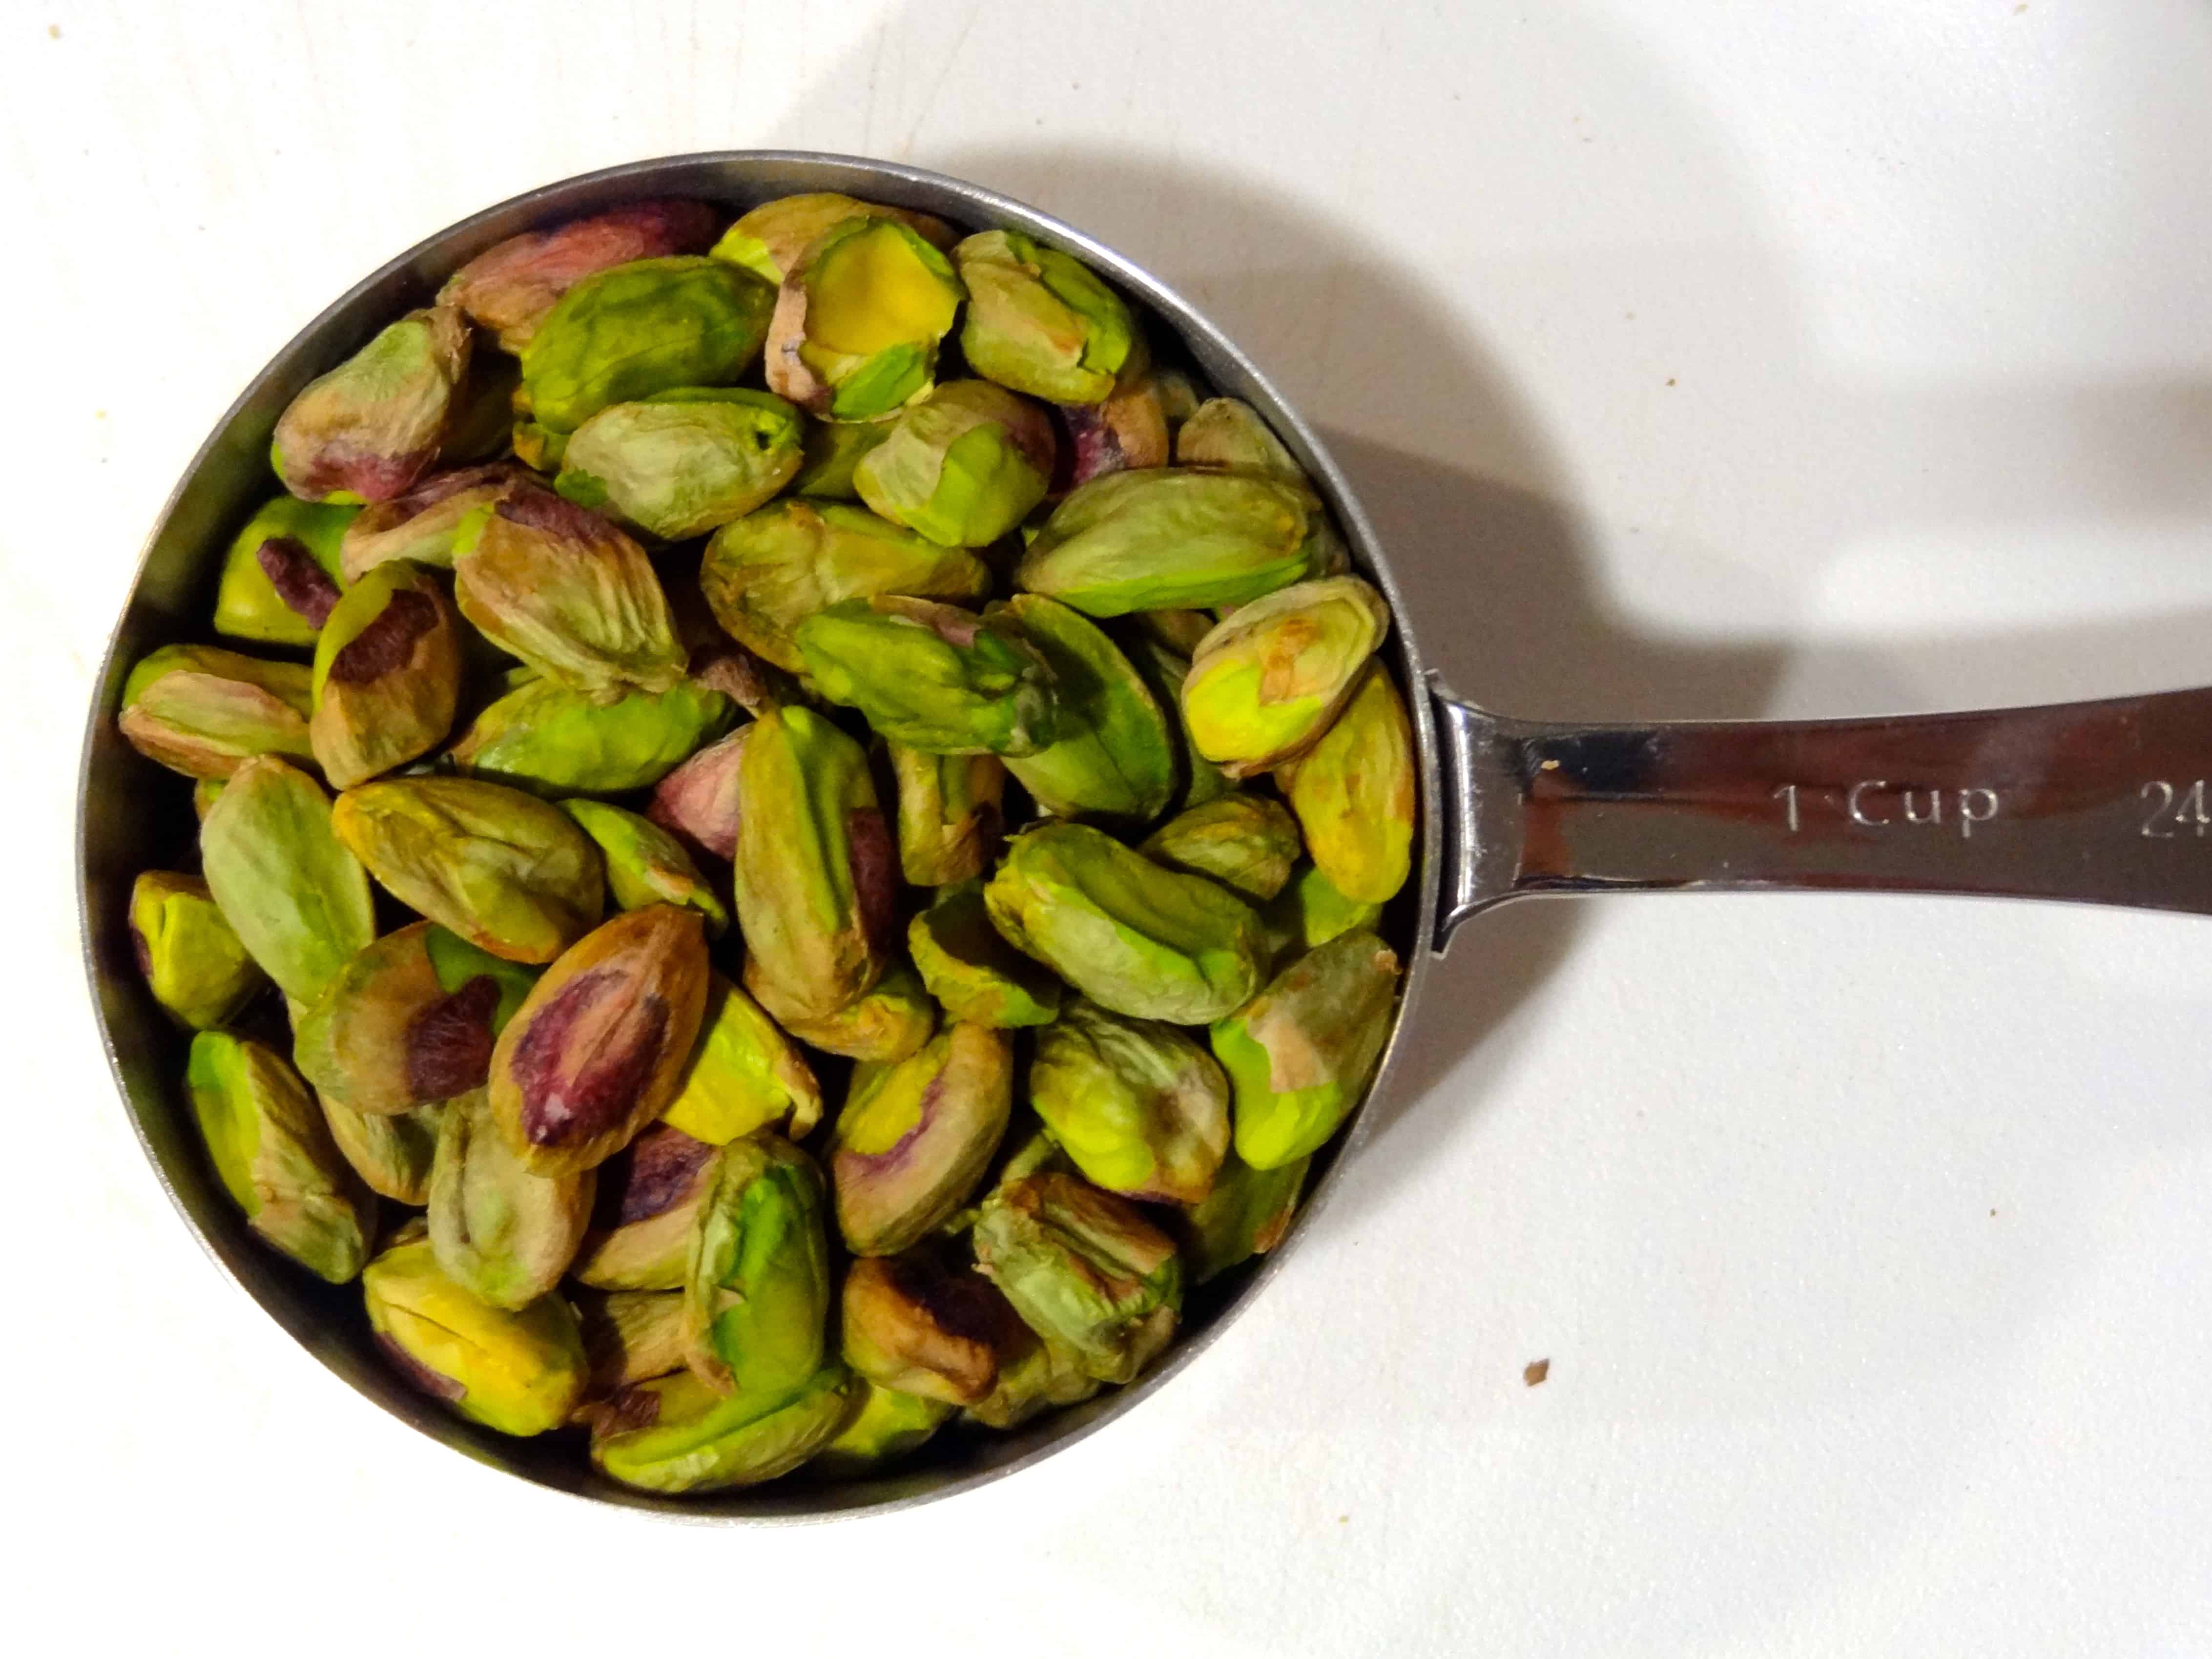
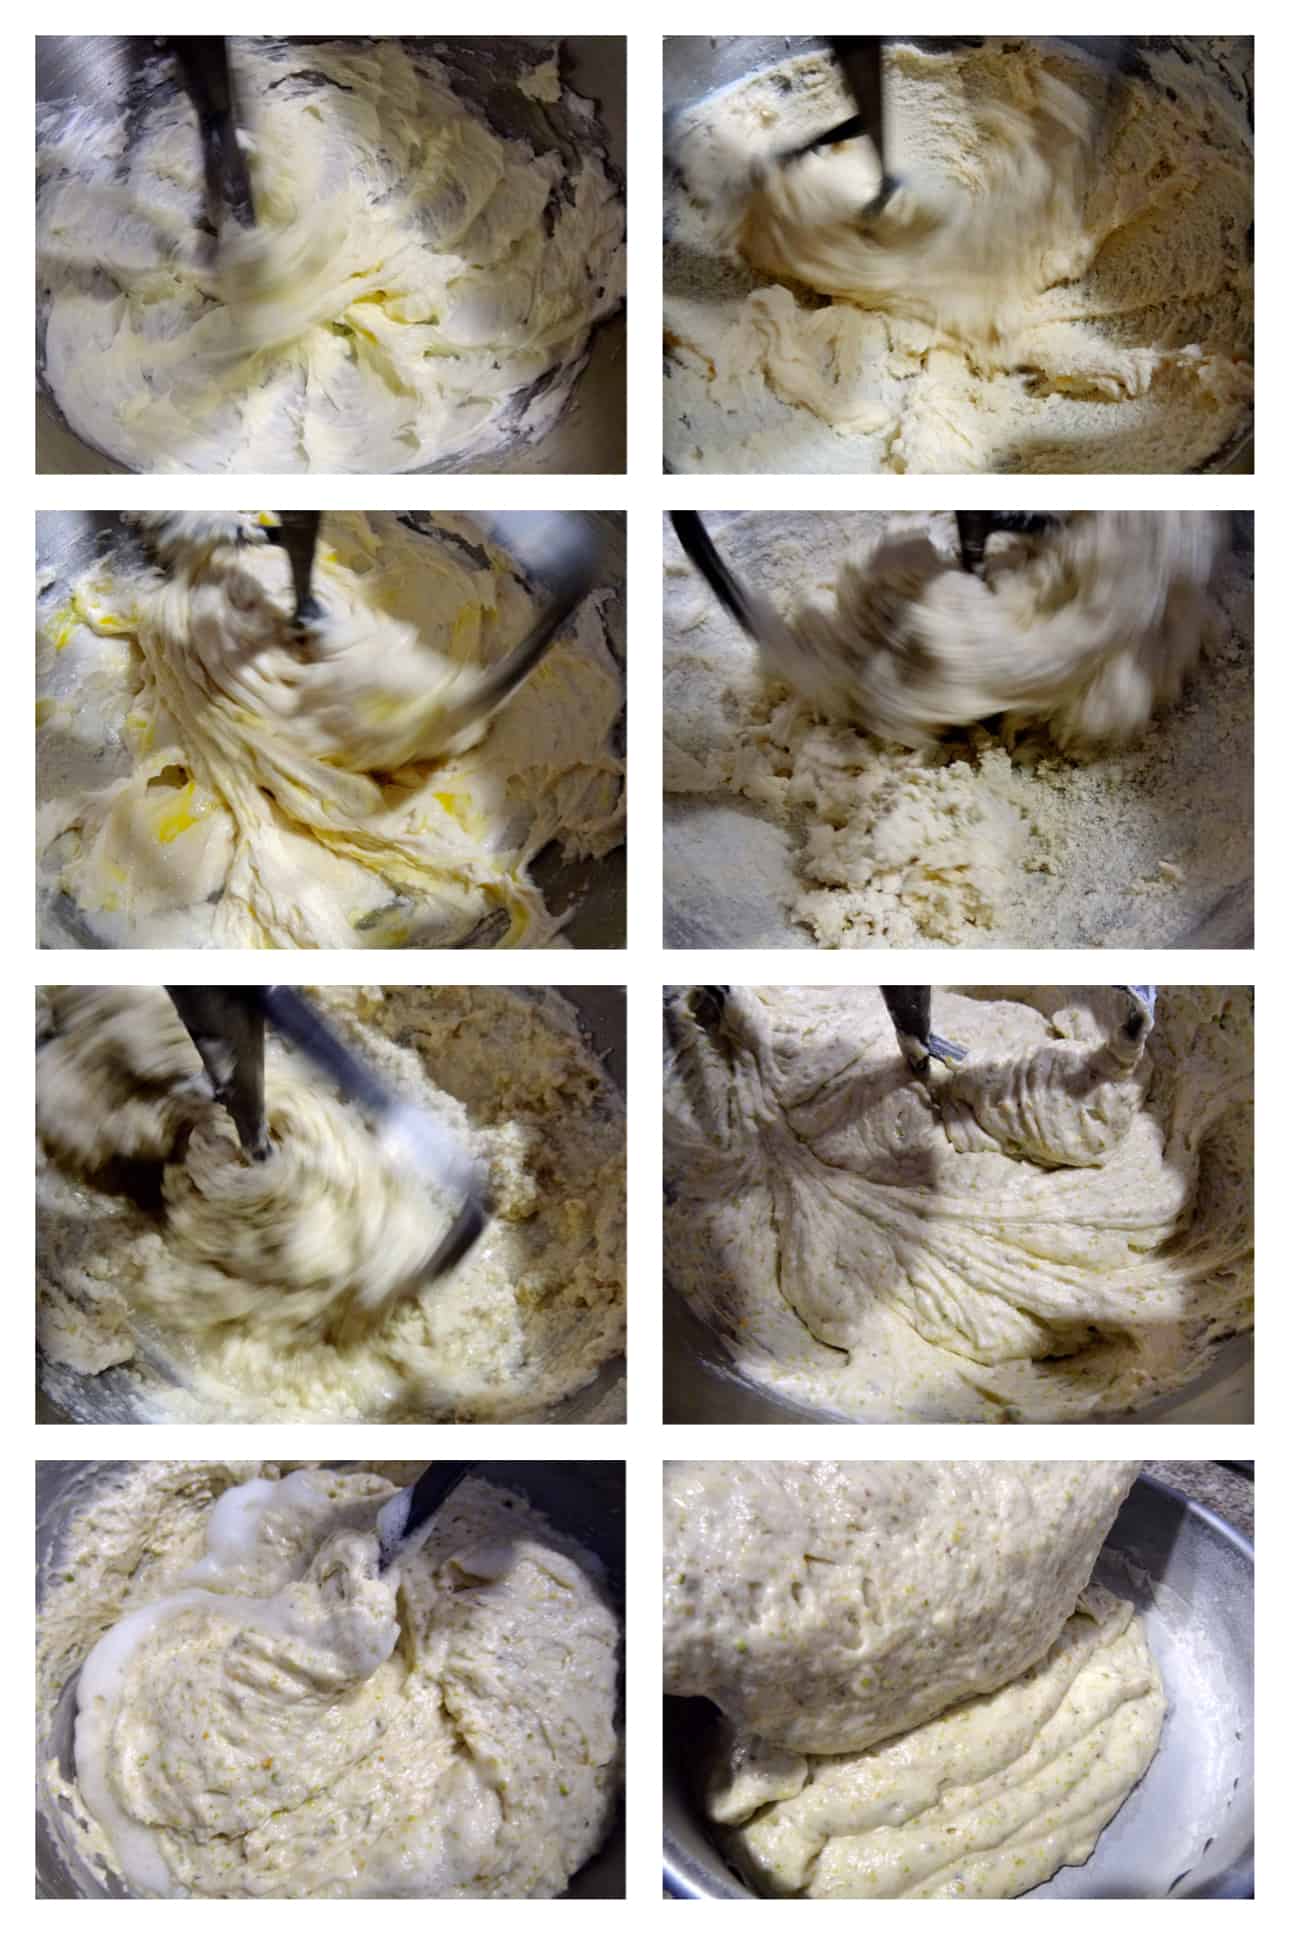
To say that I was “thrilled” with this cake would be a huge understatement– I am a little obsessed with the pistachio cake at the moment! Besides the time that it took to shell the nuts, the preparation and batter were reasonable, and I experienced no setbacks here. You’ll first sift flour and the rest of the dry ingredients over chopped pistachios and combine them.

The cake batter is made by creaming together the butter and shortening in a stand mixer, then adding sugar and vanilla extract, followed by a whole egg. You will then alternate additions of the flour-pistachio mixture and ice water. Lastly, whip egg whites with cream of tartar to soft peaks and gently fold this into the batter to lighten it up.
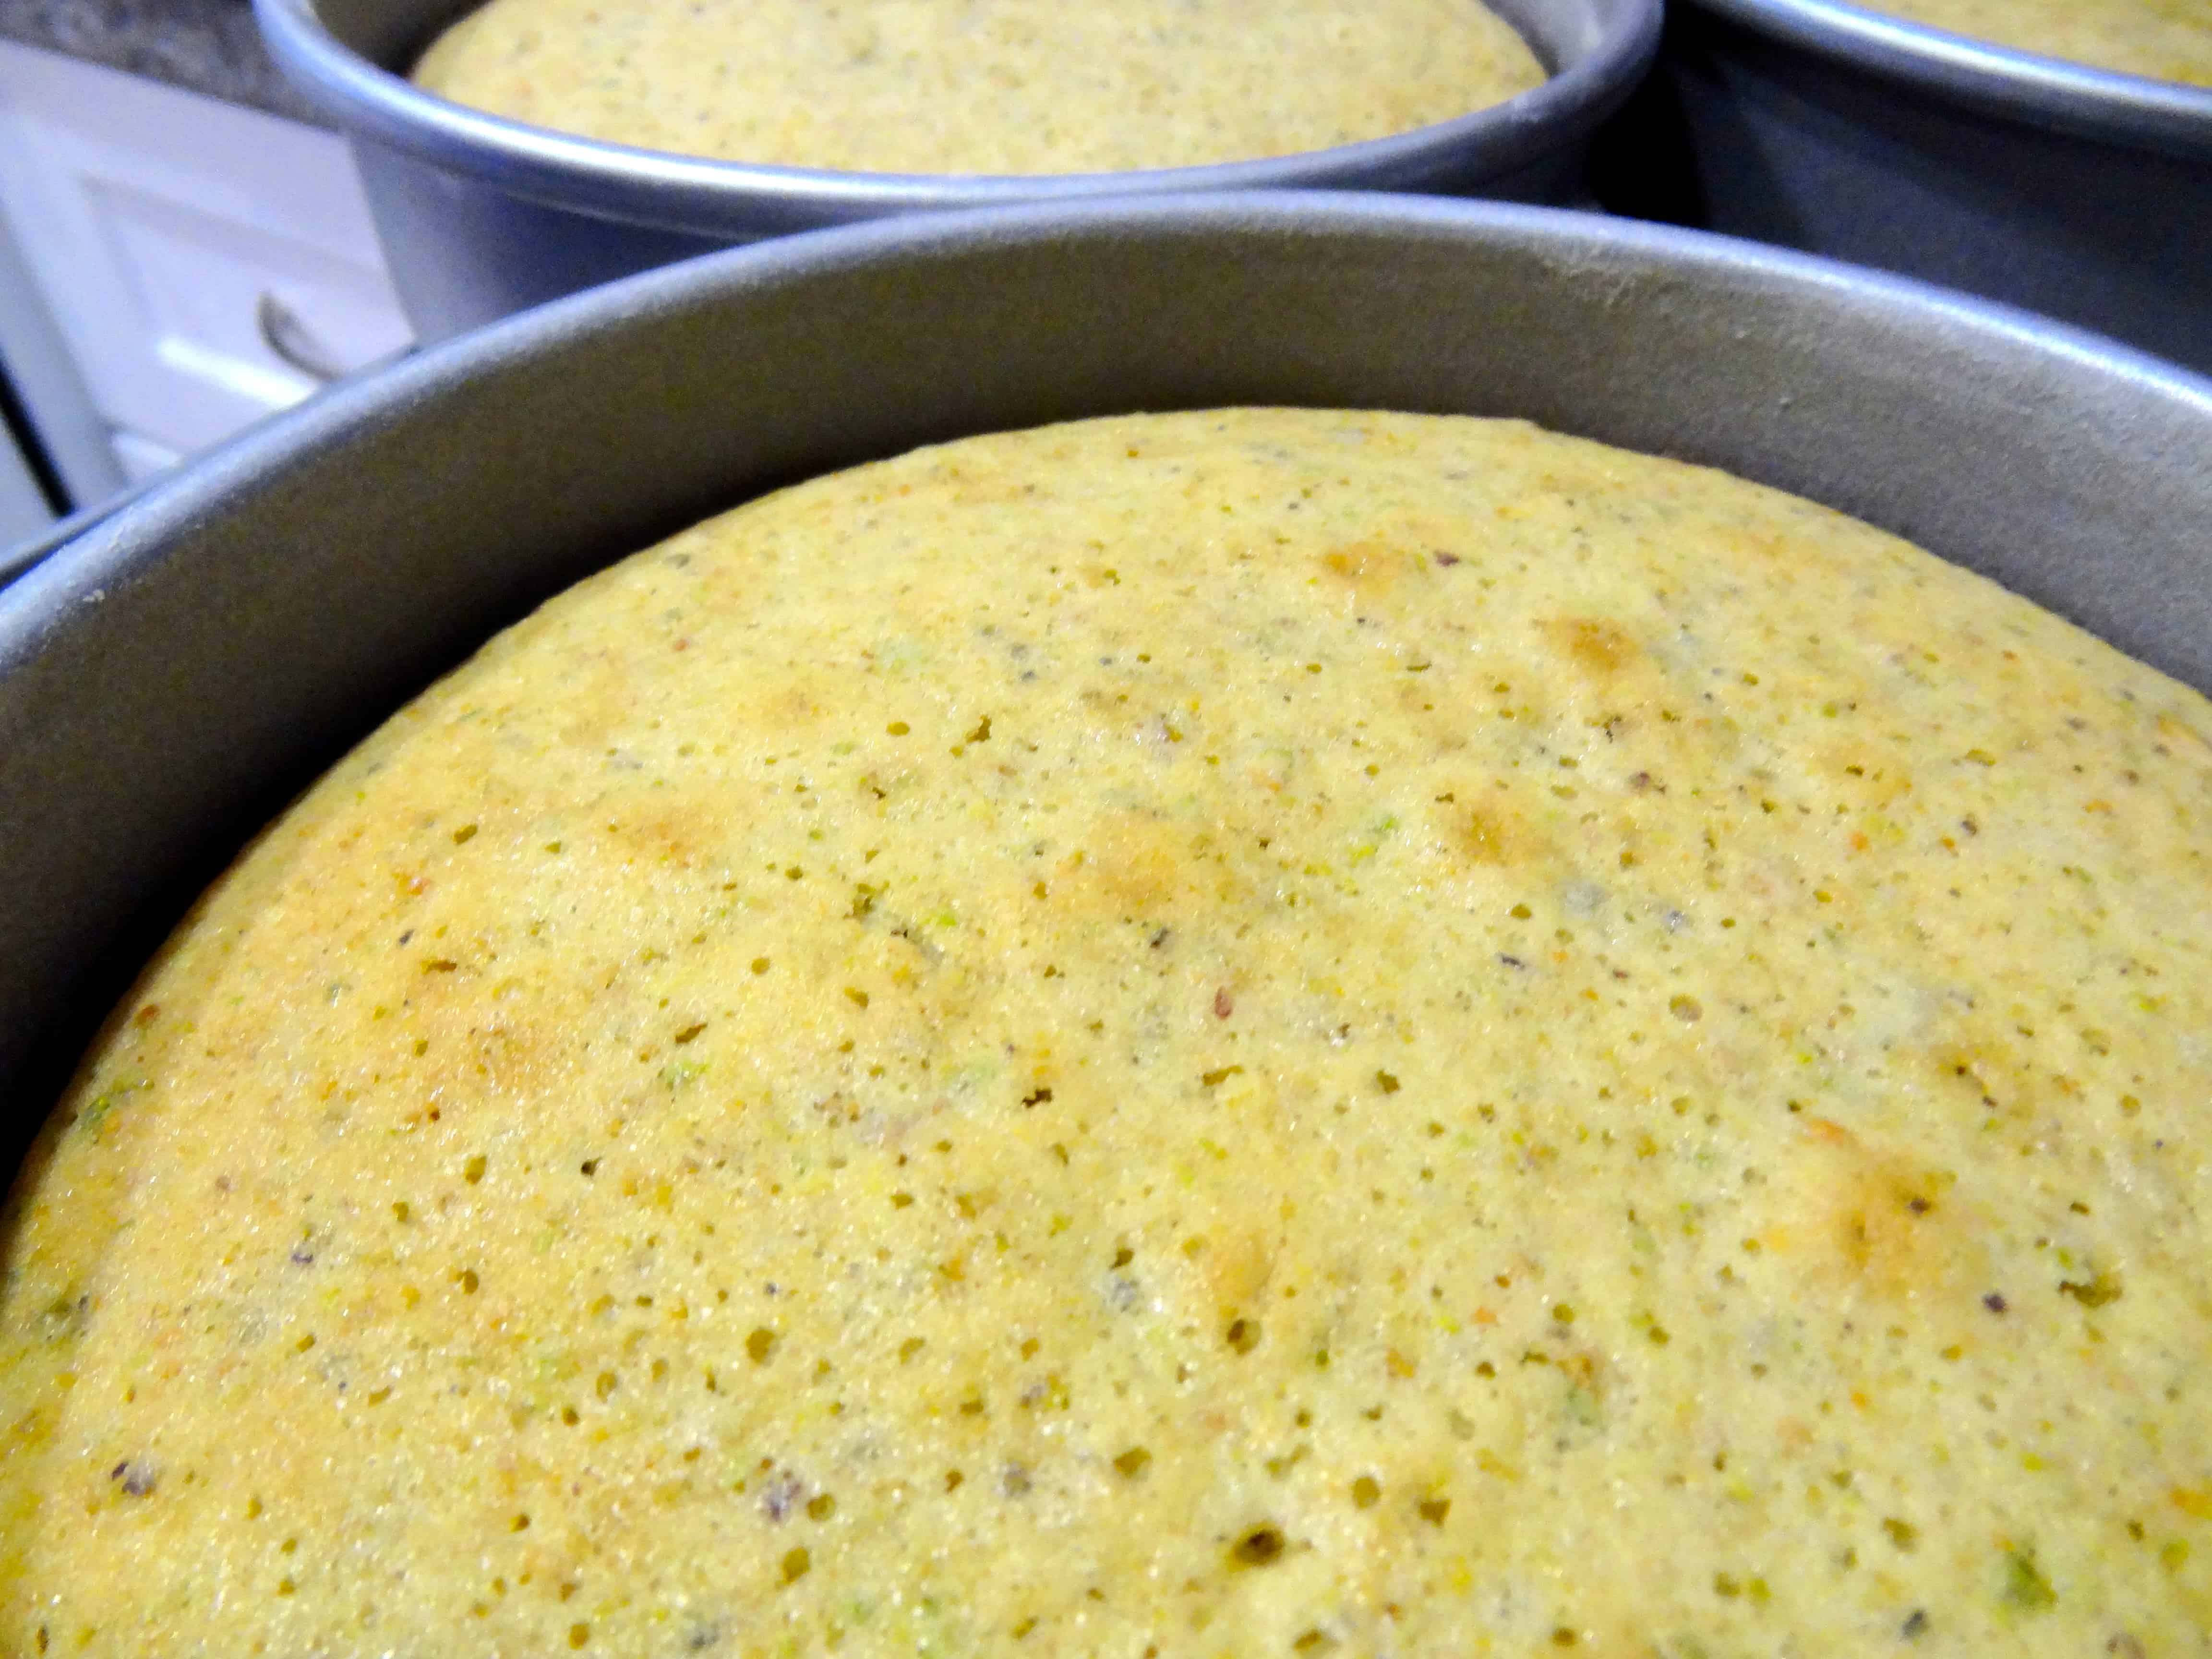
I did not own 8″ pans, but I went out and bought a set of 3 for this recipe; I had 6″ and 9″ pans already, but neither size was quite right for a BAKED cake, so I finally bit the bullet and invested in a set of 8-inchers for the multitude of BAKED cakes that I know I will make in the future. The 8″ size was in fact ideal, and the cakes baked up beautifully, though in much less time than prescribed in the recipe (33 minutes versus the recommended 40-45 minutes).
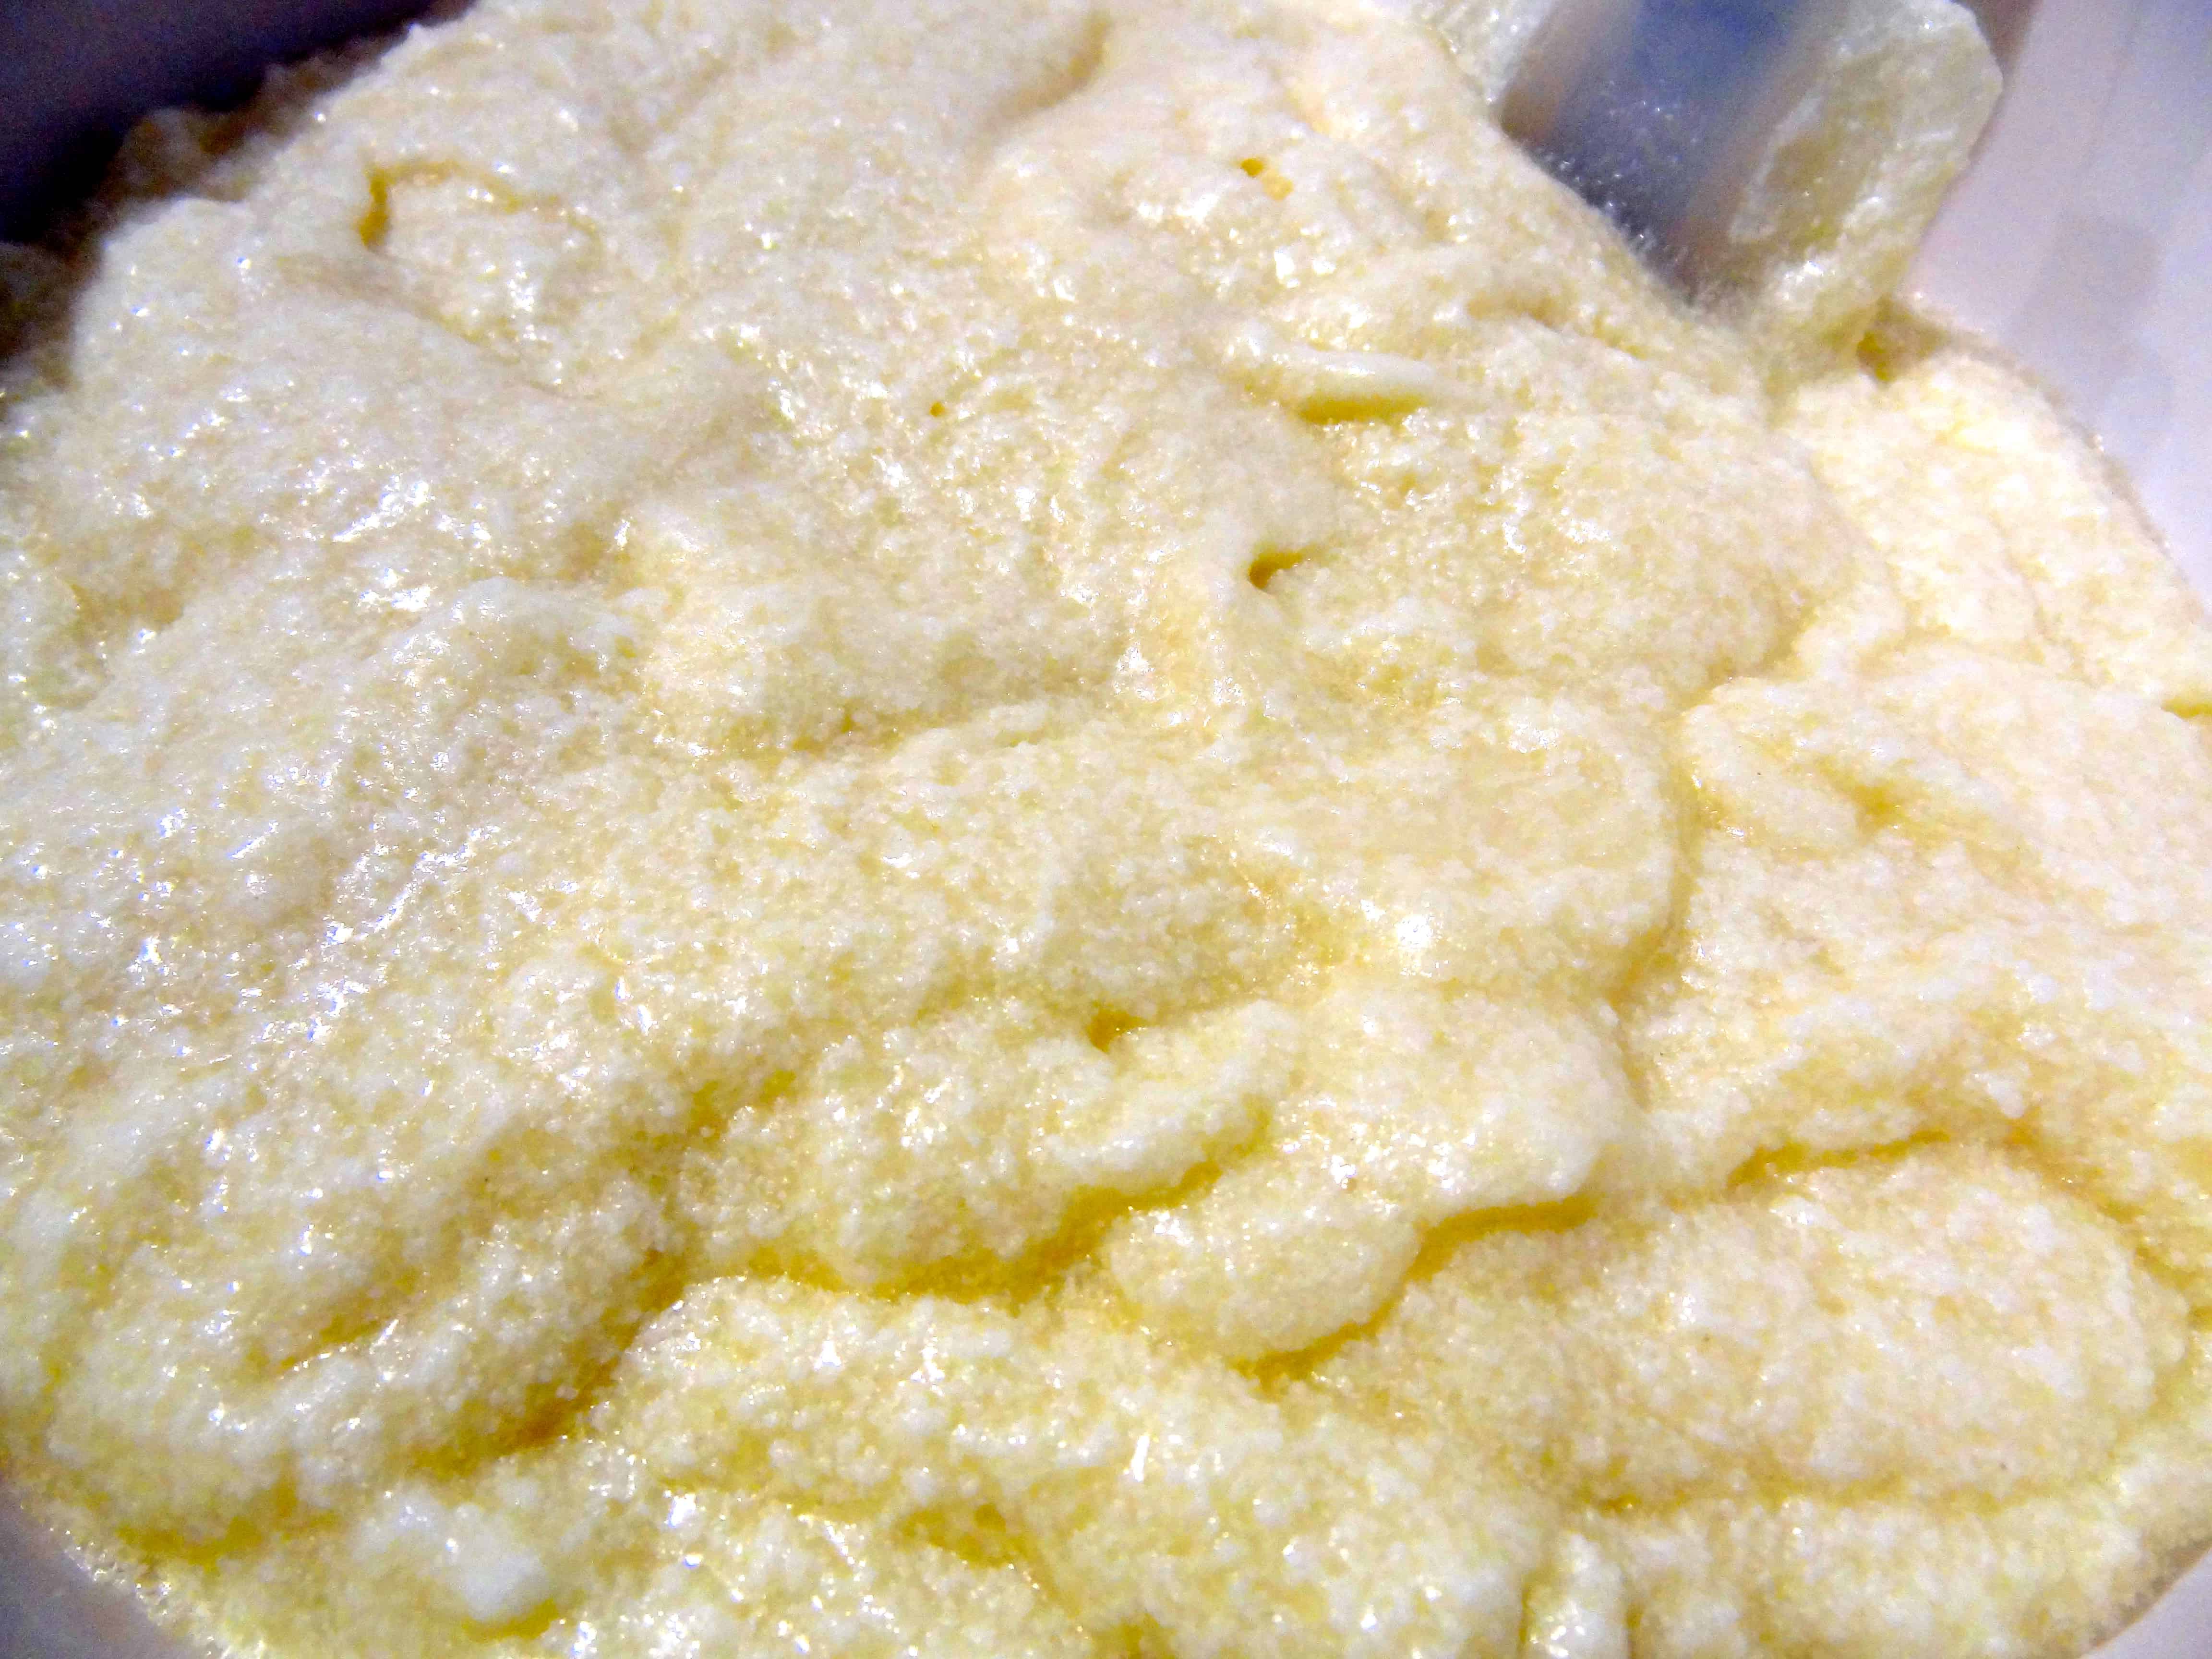
Now, the frosting is a different story altogether… BAKED’s buttercream is going to be the death of me. It haunts me in my dreams and mocks my attempts to “frost” a cake. When made correctly, it is fluffy and ethereal, perfectly enrobing the cake and effecting sweet, sweet harmony in my mouth! Unfortunately, it is a tricky beast that I have yet to conquer… Let’s review a little backstory, shall we? I tried it for the first time when making Oopsy Daisy Cupcakes (a peanut butter-vanilla version), and although delicious, the texture and consistency were totally off. I then made the eggnog version for Holiday Spice Cake (one of my favorite baked goods that I’ve ever made), and had the same result. The frosting was runny and curdled-looking– the polar opposite of fluffy and creamy; it was more of a sad pudding than anything I would call “frosting”. I was then able to correct it for Holiday Spice Cupcakes (Buttercream Attempt #3), and I finally got it right, with some useful tips from fellow Baked Sunday Mornings bakers. Fast-forward to now… I though I had figured it out last time, and I was SO excited to make this honey-vanilla version for the fabulous pistachio cake…
Alas, despite employing the same methods as last time (*gradually* adding the butter, straining the cooked mixture, and monitoring the temperatures), I ended up with a gloppy, separated mess. The past attempts could at least be spread on the cakes; this one was way too runny to even do that. I was utterly bewildered. I was bringing the cake to a dinner party at some friends’ house, so I wanted to bring something really pretty and well-made; this frosting would not do. The flavor was wonderful, but it was simply not possible to frost a cake with this stuff, even after a stint in the fridge. Since I didn’t want to bring naked cake layers to dinner, I decided to make another batch, being extra careful with the butter temperature, which seems to be key to a successful mixture. Despite my diligence, the second batch was much like the first. Major sad face!
Being that I was already late for dinner, I packed up all the components with the intention of frosting the cake at my friends’ house, should the frosting magically come together somehow. Unfortunately, such was not the case, and we ended up cutting one cake layer among the four of us and pouring the “sauce” over the top. It was incredibly delicious, but not exactly what I had in mind…
And so, the quest for buttercream dominance continues. I’m going to consider this blog post a work-in-progress, and I will update later this week after I’ve had time to try the buttercream yet again with more guidance from those who have mastered this temperamental frosting devil!
You can find the recipe for Aunt Sassy Cake at Baked Sunday Mornings, where you can also see what the cake *should* look like my fellow bakers’ photos!
UPDATE 2/17/2015: Soooo, it took me 2 years to finally update this– sorry about that. I’m happy to say that I made this frosting again twice, with eventual success. The first time, it was at least spreadable (I was able to use the other two cake layers that I had made for the original cake, which we didn’t eat at the dinner party), but it was still a weird, curdly texture. The second time (third overall), I basically HAD to get it right because I had promised to make an Aunt Sassy Cake for a wedding! With help from one of my fellow BSM bakers in person, I was finally able to make the Honey Vanilla Buttercream successfully. I honestly can’t tell you what I did differently, so that’s, uh, not super helpful. I think much of the “trick” is to learn what it should look like and watch the texture change in the mixer. Part of my problem was that I didn’t let it mix long enough– sometimes you just have to let it keep going until it comes together in fluffy goodness.
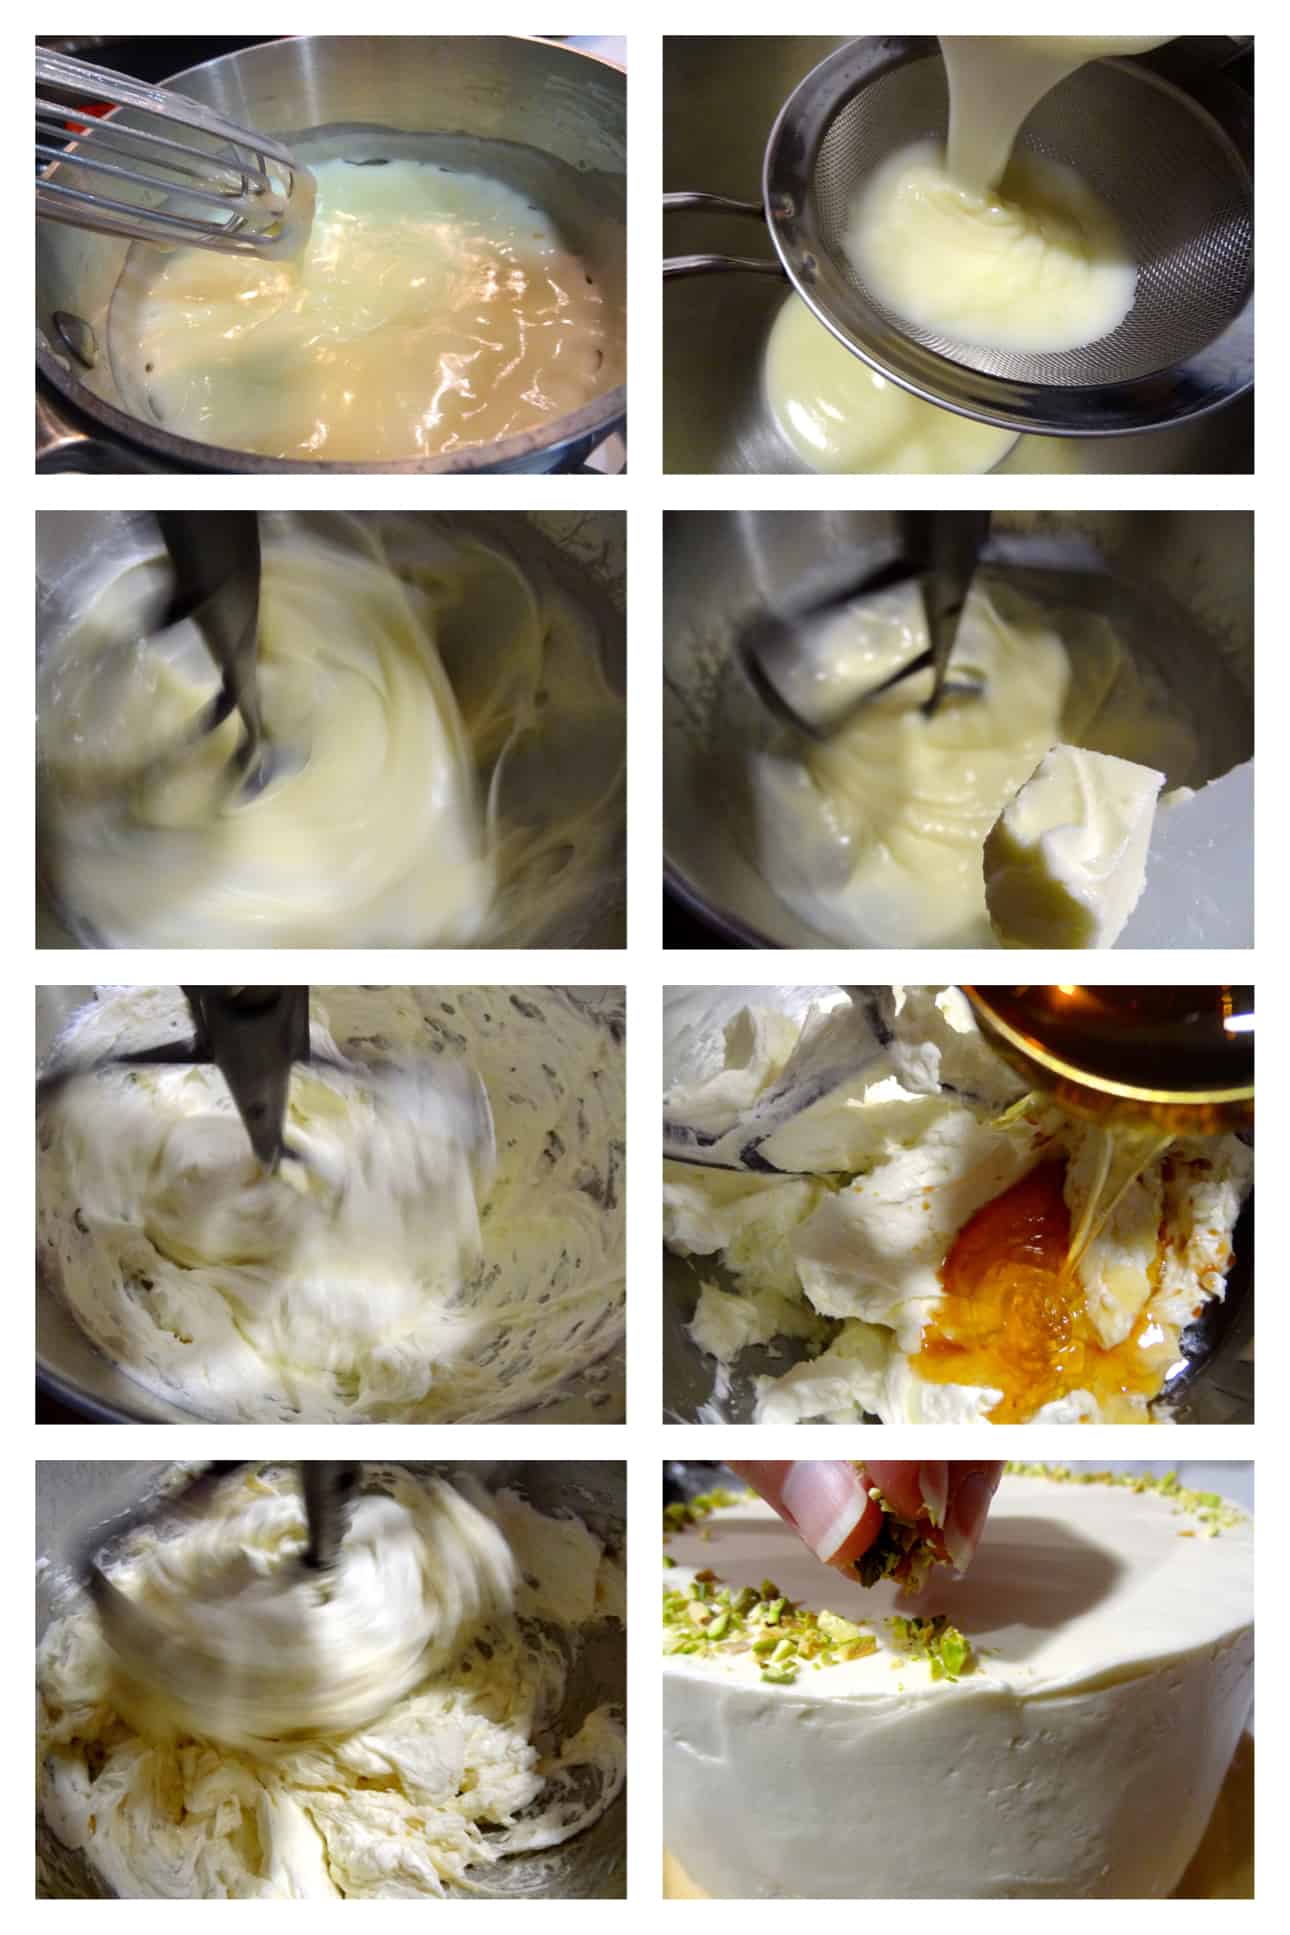
I did learn that if the frosting looks curdled, you can gently heat the bottom of the mixer bowl over a pot of simmering water until it “melts”– it will start to develop a melty-looking sheen on the edges, which is a sign that the butter is coalescing with the other ingredients. You will keep stirring until the whole mixture has come together in this way. If the frosting is then too soft to spread, stick it in the fridge for a bit to firm up, and finally re-whip in the mixer until it’s fluffy. This has worked for me a couple of times when making various BAKED frostings. Good luck! 🙂
© Dafna Adler & Stellina Sweets, 2013 & 2015.
23 Responses
oh wow. This looks absolutely amazing!!! pistachio cake sounds delicious! I’ll definitely be making this soon
Thank you! This cake rules– I would definitely recommend it! Let me know if you try it out. 🙂 I still haven’t had a chance to re-make the frosting, but I know it will be an awesome finished cake… one of these days… (My other two cake layers are in the freezer!)
Dafna, your cake looks perfect & I feel your pain over the frosting. You will get it right – it took me a few not-so-perfect looking cakes, too! Hang in there & let us know when you update your post so we can update the roundup!
Thanks for the words of encouragement, Susan! I haven’t had a chance to try the frosting again, but I’m hoping that all these BSM warm fuzzies will bring me good luck! 😀
I’m hoping to make it sometime in the next week or so, and I will definitely let you know for the roundup– thank you!
I think the Baked boys should bring us all to Red Hook for a hands-on, in-person buttercream tutorial! 😉
UM. YES. I like the way you think, April!! Personal BSM tutorials… 😀
It was a good tasting cake. And I feel your pain about the buttercream. I honestly think buttercream has a mind of its own……I’ve never had it turn out the same way twice.
I agree with April about a hands-on tutorial!!! That would be awesome! 🙂
Yes, this particular buttercream is pretty… *sassy*. I HAD to say it! 😉 I am totally in favor of a hands-on tutorial for sure– how cool would that be!!
I feel your pain with the buttercream! The taste is wonderful but I can’t get it to come together either! Your cake looks fantastic!
Thanks, Chelly– I’m glad we can all commiserate about our frosting woes! 🙂 I really feel like if we keep working on it, we will get there…
I felt lucky when this buttercream turned out for me since my eggnog one was a little weird… I actually think I would like more honey flavor in it next time! 🙂
Let’s petition Matt and Renato for a video tutorial for the Baked buttercream!
Yes, I am totally in for a tutorial!!
It does seem to be a little random, doesn’t it? It’s like Sandra said above– this frosting seems to have a mind of its own! I’m glad yours came out well, and hopefully that trend will continue for you. If you figure out any magical frosting tricks, please do pass them along! 🙂
I’m in for the buttercream tutorial! It is a fickle beast.
How cool would that be, right?! I’m determined to master this frosting– and SOON. I haven’t had a chance to re-make it yet, but my other two cake layers are waiting patiently in the freezer… 😉
Fancy frosting or not, your cake looks delicious! Bummed I missed this one, I was so looking forward to it. Might have to double up one of these weeks and get it done. Lovely job as always, lady! 🙂
I finally figured out the secret to this recipe (I think). I too have had that curdled look (not a good look). I noticed it was after I added the vanilla. I just beat the living daylights out of it and it came back together. So I think this might be the key. Don’t be afraid to let it beat a little longer than you think it should